# MCP Blocks
Source: https://docs.continue.dev/customization/mcp-tools
Model Context Protocol servers provide specialized functionality:
* **Enable integration** with external tools and systems
* **Create extensible interfaces** for custom capabilities
* **Support complex interactions** with your development environment
* **Allow partners** to contribute specialized functionality
* **Connect to databases** to understand schema and data models during development

## Learn More
Learn more in the [MCP deep dive](/customization/mcp-tools), and view [`mcpServers`](/reference#mcpservers) in the YAML Reference for more details.
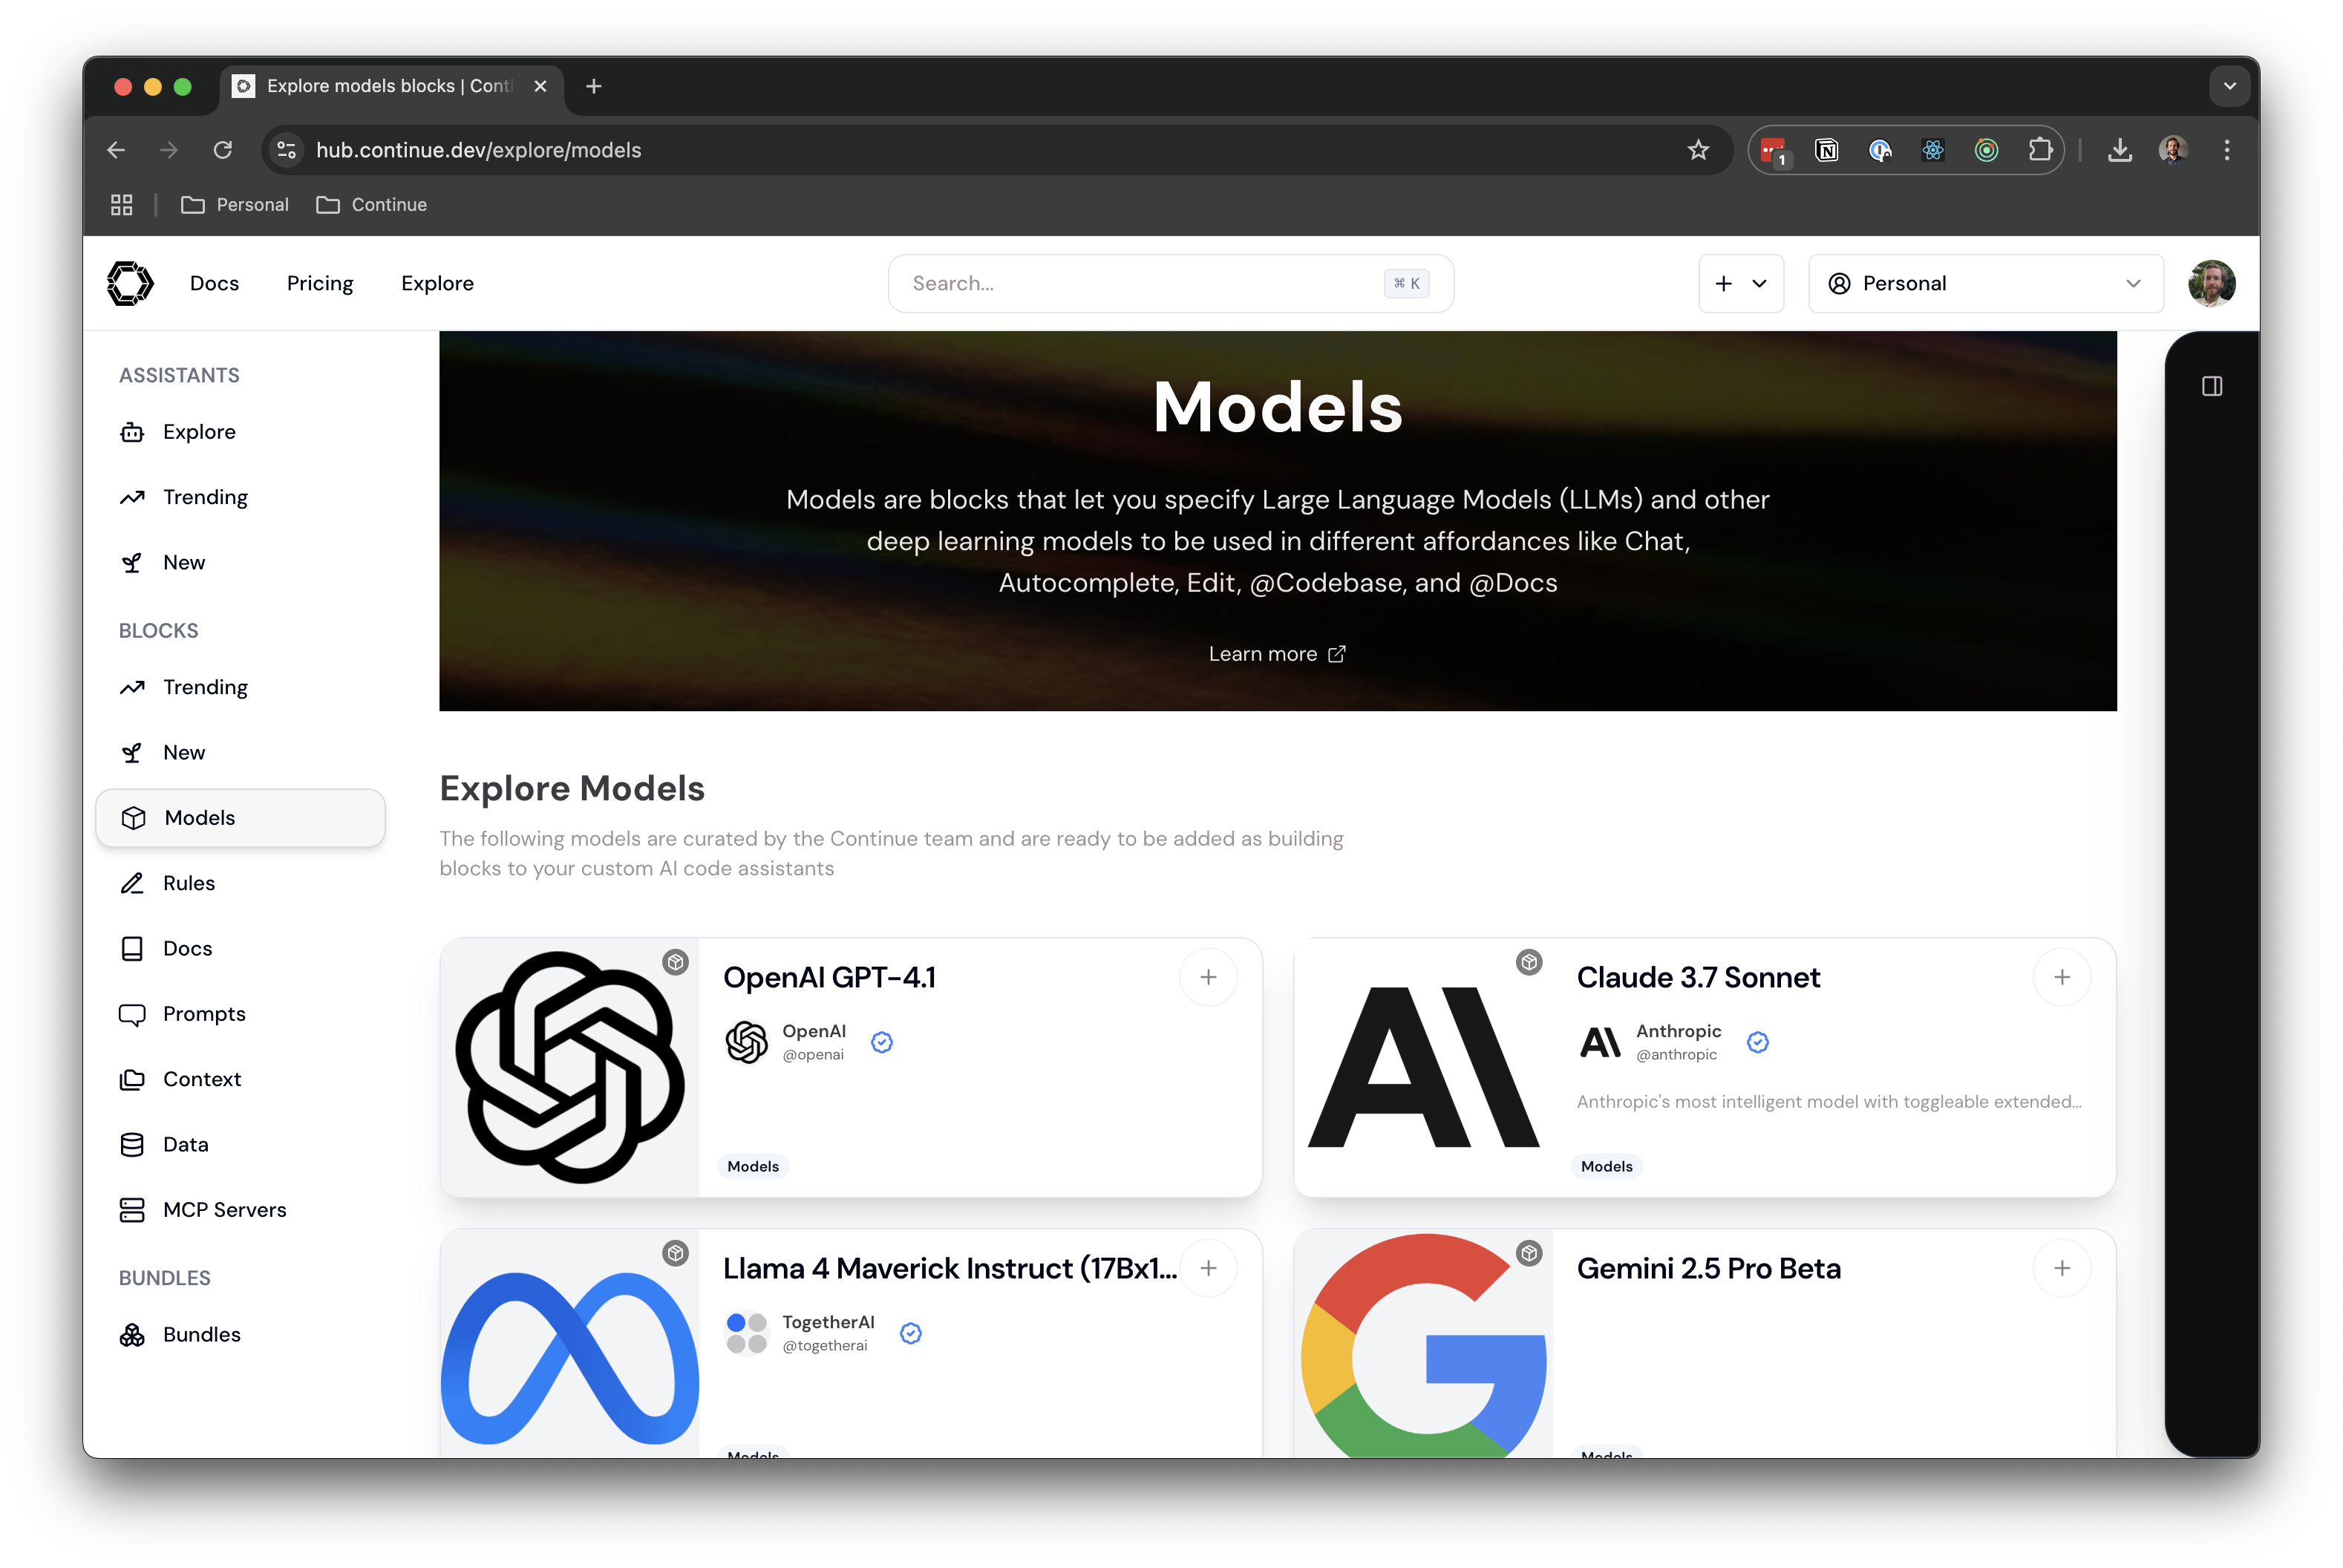
# Model Blocks
Source: https://docs.continue.dev/customization/models
These blocks form the foundation of the entire assistant experience, offering different specialized capabilities:
* **[Chat](/customize/model-roles/chat)**: Power conversational interactions about code and provide detailed guidance
* **[Edit](/customize/model-roles/edit)**: Handle complex code transformations and refactoring tasks
* **[Apply](/customize/model-roles/apply)**: Execute targeted code modifications with high accuracy
* **[Autocomplete](/customize/model-roles/autocomplete)**: Provide real-time suggestions as developers type
* **[Embedding](/customize/model-roles/embeddings)**: Transform code into vector representations for semantic search
* **[Reranker](/customize/model-roles/reranking)**: Improve search relevance by ordering results based on semantic meaning
## Learn More
Continue supports [many model providers](/customization/models#openai), including Anthropic, OpenAI, Gemini, Ollama, Amazon Bedrock, Azure, xAI, DeepSeek, and more. Models can have various roles like `chat`, `edit`, `apply`, `autocomplete`, `embed`, and `rerank`.
Read more about roles [here](/customize/model-roles) and view [`models`](/reference#models) in the YAML Reference.
# Overview
Source: https://docs.continue.dev/customization/overview
Continue can be deeply customized. For example you might:
* **Change your Model Provider**. Continue allows you to choose your favorite or even add multiple model providers. This allows you to use different models for different tasks, or to try another model if you're not happy with the results from your current model. Continue supports all of the popular model providers, including OpenAI, Anthropic, Microsoft/Azure, Mistral, and more. You can even self host your own model provider if you'd like. Learn more about [model providers](/customization/models#openai).
* **Select different models for specific tasks**. Different Continue features can use different models. We call these *model roles*. For example, you can use a different model for chat than you do for autocomplete. Learn more about [model roles](/customize/model-roles).
* **Add a Context Provider**. Context providers allow you to add information to your prompts, giving your LLM additional context to work with. Context providers allow you to reference snippets from your codebase, or lookup relevant documentation, or use a search engine to find information and much more. Learn more about [context providers](/customize/custom-providers).
* **Create a Slash Command**. Slash commands allow you to easily add custom functionality to Continue. You can use a slash command that allows you to generate a shell command from natural language, or perhaps generate a commit message, or create your own custom command to do whatever you want. Learn more about [slash commands](/customization/overview#slash-commands).
* **Call external tools and functions**. Unchain your LLM with the power of tools using [Agent](/features/agent/quick-start). Add custom tools using [MCP Servers](/customization/mcp-tools)
Whatever you choose, you'll probably start by editing your Assistant.
## Editing your assistant
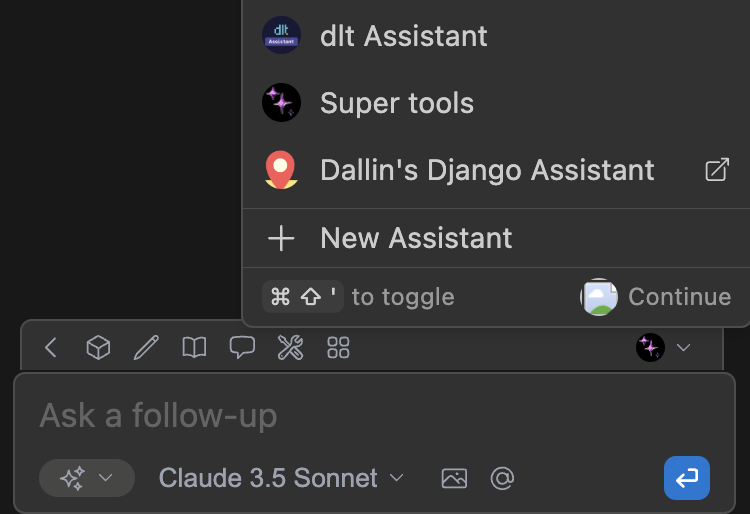
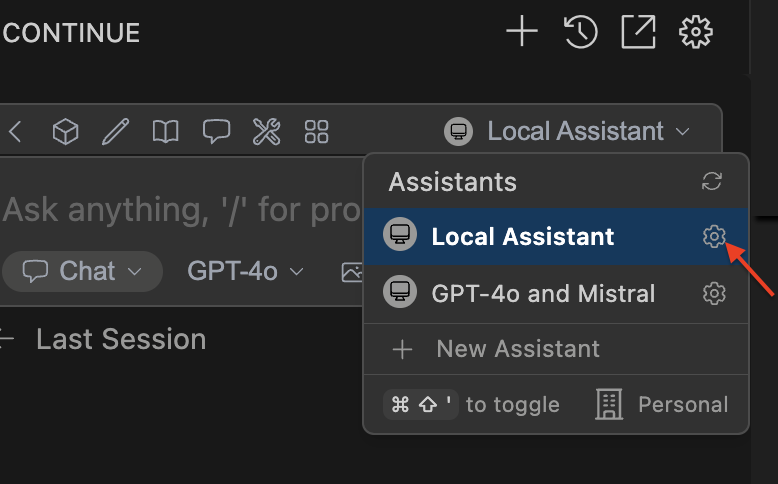
You can easily access your assistant configuration from the Continue Chat sidebar. Open the sidebar by pressing `cmd/ctrl` + `L` (VS Code) or `cmd/ctrl` + `J` (JetBrains) and click the Assistant selector above the main chat input. Then, you can hover over an assistant and click the `new window` (hub assistants) or `gear` (local assistants) icon.
* See [Editing Hub Assistants](/hub/assistants/edit-an-assistant) for more details on managing your hub assistant
* See the [Config Deep Dive](/customization/overview#configuration) for more details on configuring local assistants.
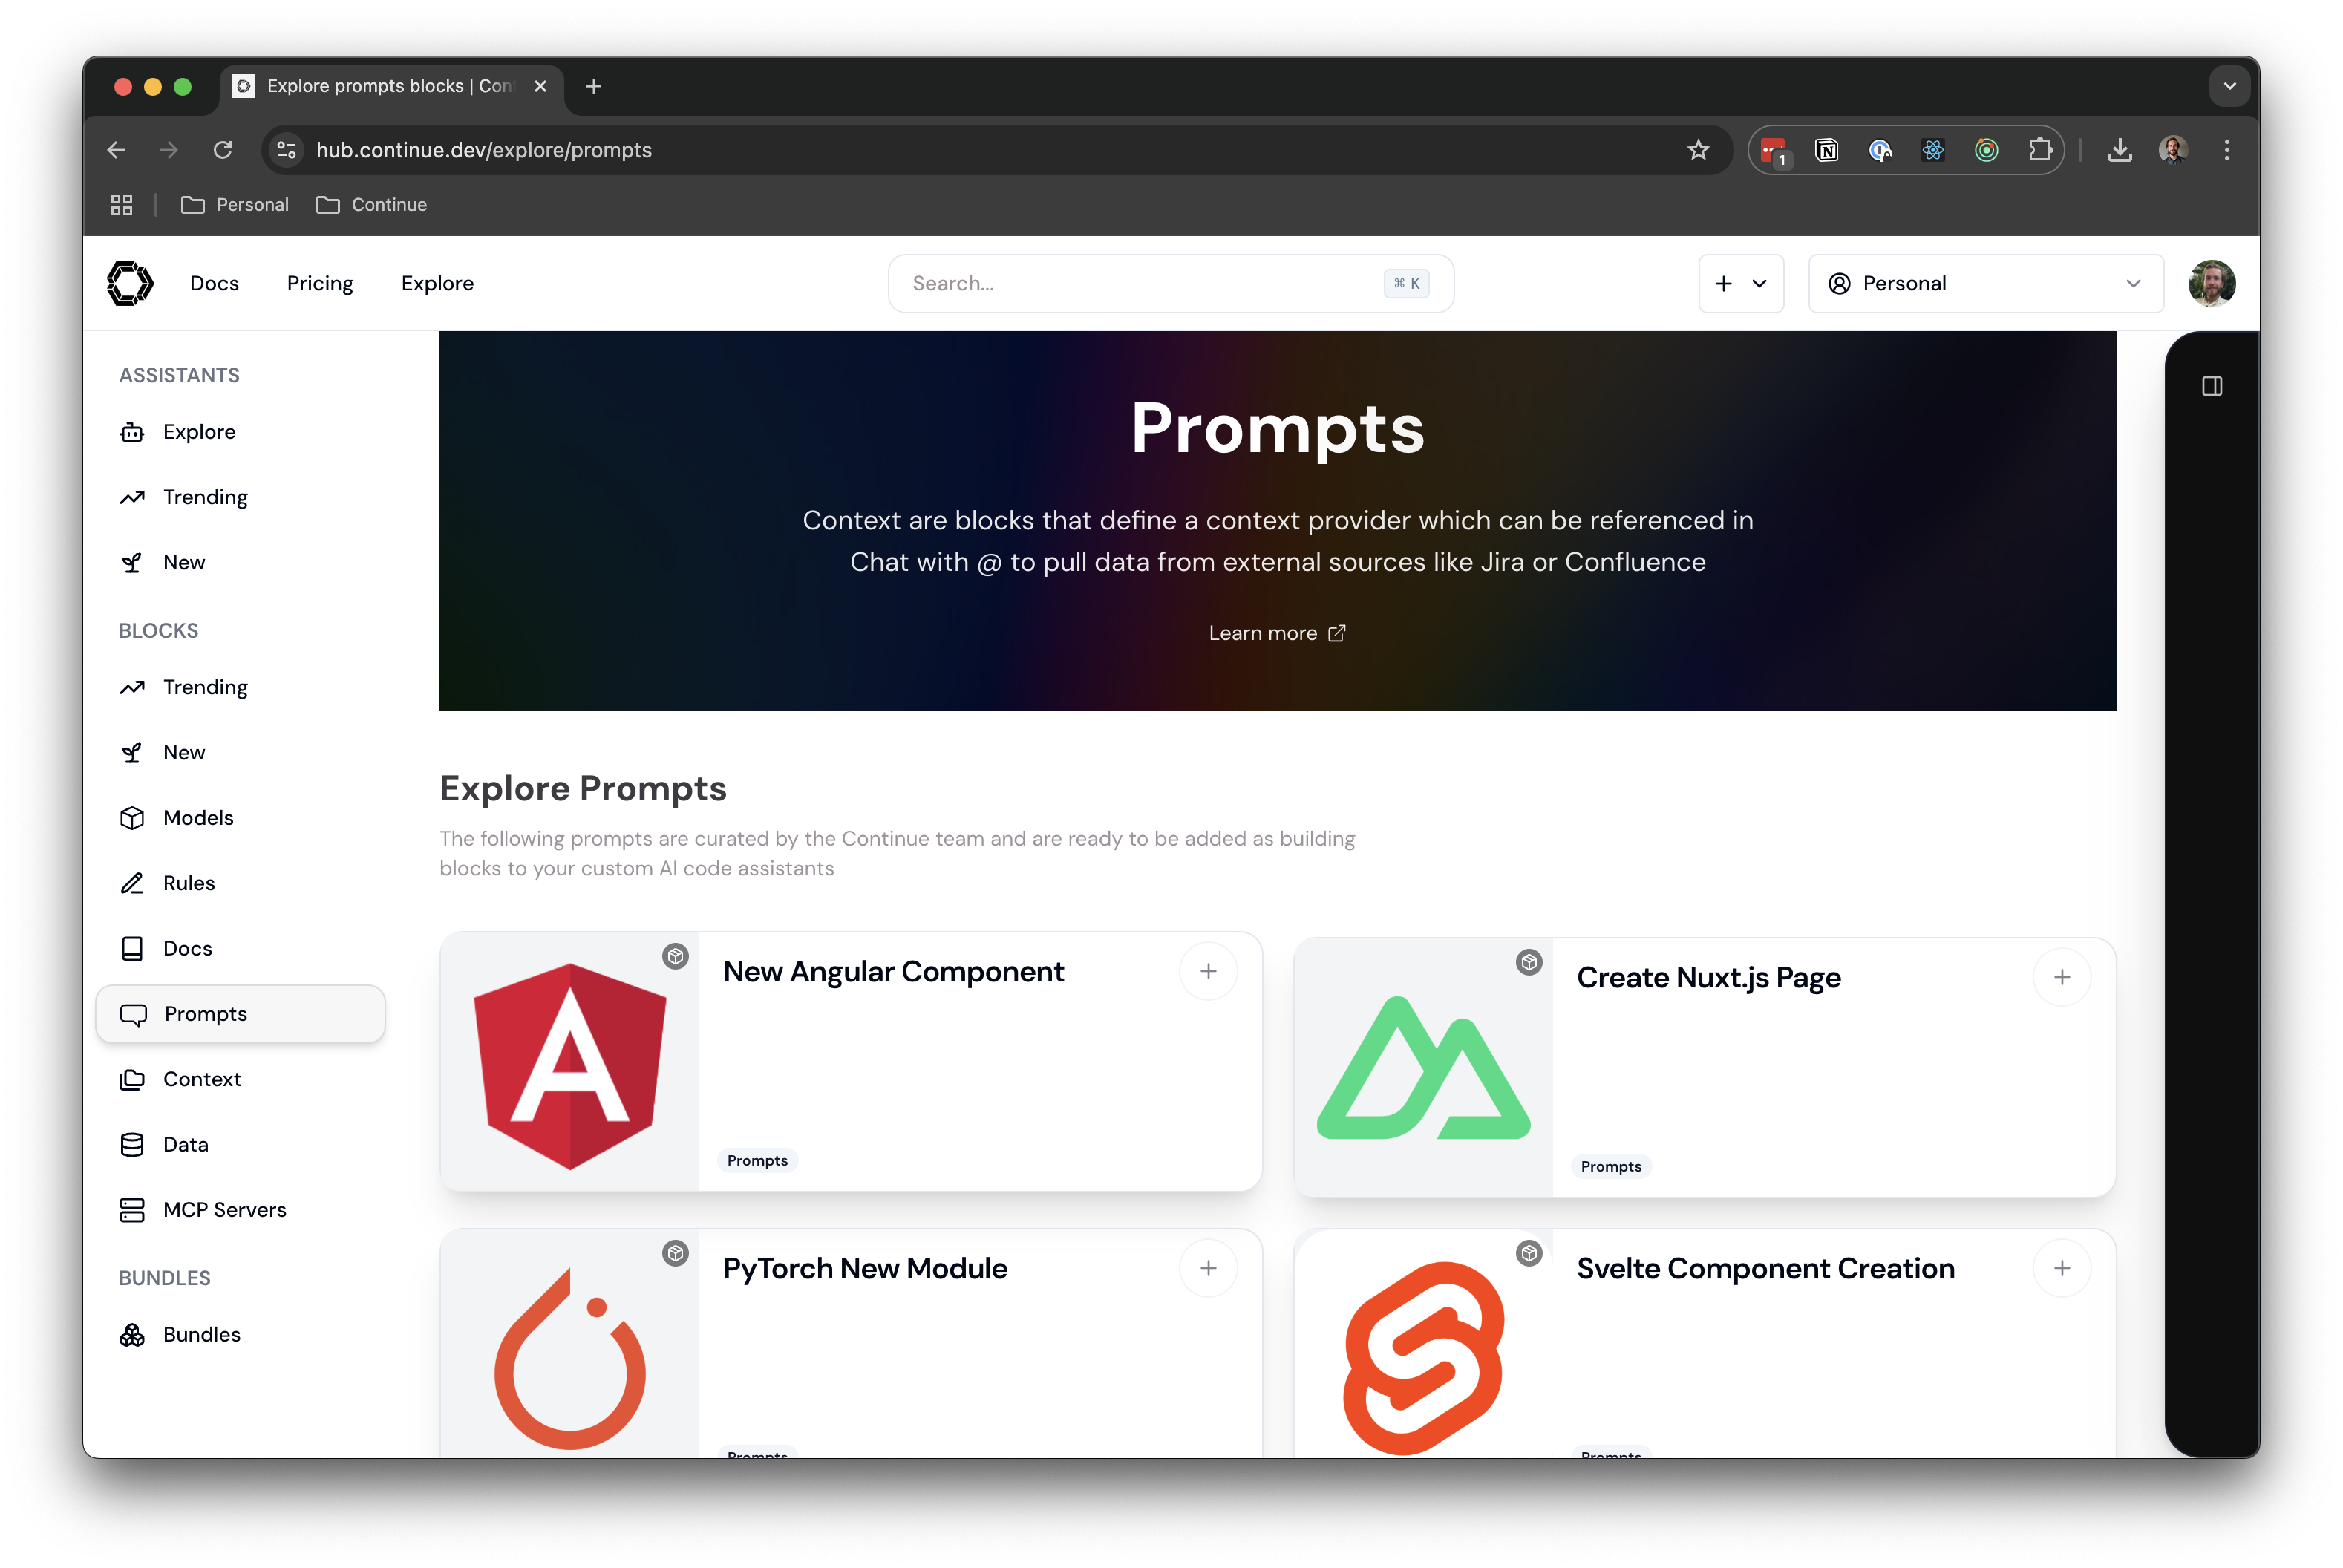
# Prompt Blocks
Source: https://docs.continue.dev/customization/prompts
These are the specialized instructions that shape how models respond:
* **Define interaction patterns** for specific tasks or frameworks
* **Encode domain expertise** for particular technologies
* **Ensure consistent guidance** aligned with organizational practices
* **Can be shared and reused** across multiple assistants
* **Act as automated code reviewers** that ensure consistency across teams
## Learn More
Prompt blocks have the same syntax as [prompt files](/customization/prompts). The `config.yaml` spec for `prompts` can be found [here](/reference#prompts).
# Rules Blocks
Source: https://docs.continue.dev/customization/rules
Rules allow you to provide specific instructions that guide how the AI assistant behaves when working with your code. Instead of the AI making assumptions about your coding standards, architecture patterns, or project-specific requirements, you can explicitly define guidelines that ensure consistent, contextually appropriate responses.
Think of these as the guardrails for your AI coding assistants:
* **Enforce company-specific coding standards** and security practices
* **Implement quality checks** that match your engineering culture
* **Create paved paths** for developers to follow organizational best practices
By implementing rules, you transform the AI from a generic coding assistant into a knowledgeable team member that understands your project's unique requirements and constraints.
### How Rules Work
Your assistant detects rule blocks and applies the specified rules while in [Agent](/features/agent/quick-start), [Chat](/features/chat/quick-start), and [Edit](/features/edit/quick-start) modes.
## Learn More
Learn more in the [rules deep dive](/customization/rules), and view [`rules`](/reference#rules) in the YAML Reference for more details.
# @Codebase
Source: https://docs.continue.dev/customize/context/codebase
Talk to your codebase
Continue indexes your codebase so that it can later automatically pull in the most relevant context from throughout your workspace. This is done via a combination of embeddings-based retrieval and keyword search. By default, all embeddings are calculated locally using `transformers.js` and stored locally in `~/.continue/index`.
**Note:** `transformers.js` cannot be used in JetBrains IDEs. However, you can
select a different embeddings model from [the list
here](../model-roles/embeddings.mdx).
Currently, the codebase retrieval feature is available as the "codebase" and "folder" context providers. You can use them by typing `@Codebase` or `@Folder` in the input box, and then asking a question. The contents of the input box will be compared with the embeddings from the rest of the codebase (or folder) to determine relevant files.
Here are some common use cases where it can be useful:
* Asking high-level questions about your codebase
* "How do I add a new endpoint to the server?"
* "Do we use VS Code's CodeLens feature anywhere?"
* "Is there any code written already to convert HTML to markdown?"
* Generate code using existing samples as reference
* "Generate a new React component with a date picker, using the same patterns as existing components"
* "Write a draft of a CLI application for this project using Python's argparse"
* "Implement the `foo` method in the `bar` class, following the patterns seen in other subclasses of `baz`.
* Use `@Folder` to ask questions about a specific folder, increasing the likelihood of relevant results
* "What is the main purpose of this folder?"
* "How do we use VS Code's CodeLens API?"
* Or any of the above examples, but with `@Folder` instead of `@Codebase`
Here are use cases where it is not useful:
* When you need the LLM to see *literally every* file in your codebase
* "Find everywhere where the `foo` function is called"
* "Review our codebase and find any spelling mistakes"
* Refactoring
* "Add a new parameter to the `bar` function and update usages"
## Configuration
There are a few options that let you configure the behavior of the `@codebase` context provider, which are the same for the `@folder` context provider:
```yaml title="config.yaml"
context:
- provider: codebase
params:
nRetrieve: 25
nFinal: 5
useReranking: true
```
```json title="config.json"
{
"contextProviders": [
{
"name": "codebase",
"params": {
"nRetrieve": 25,
"nFinal": 5,
"useReranking": true
}
}
]
}
```
### `nRetrieve`
Number of results to initially retrieve from vector database (default: 25)
### `nFinal`
Final number of results to use after re-ranking (default: 5)
### `useReranking`
Whether to use re-ranking, which will allow initial selection of `nRetrieve` results, then will use an LLM to select the top `nFinal` results (default: true)
## Ignore files during indexing
Continue respects `.gitignore` files in order to determine which files should not be indexed. If you'd like to exclude additional files, you can add them to a `.continueignore` file, which follows the exact same rules as `.gitignore`.
Continue also supports a **global** `.continueignore` file that will be respected for all workspaces, which can be created at `~/.continue/.continueignore`.
If you want to see exactly what files Continue has indexed, the metadata is stored in `~/.continue/index/index.sqlite`. You can use a tool like [DB Browser for SQLite](https://sqlitebrowser.org/) to view the `tag_catalog` table within this file.
If you need to force a refresh of the index, reload the VS Code window with cmd/ctrl + shift + p + "Reload Window".
## Repository map
Models in the Claude 3, Llama 3.1/3.2, Gemini 1.5, and GPT-4o families will automatically use a [repository map](../custom-providers.mdx#repository-map) during codebase retrieval, which allows the model to understand the structure of your codebase and use it to answer questions. Currently, the repository map only contains the filepaths in the codebase.
# @Docs
Source: https://docs.continue.dev/customize/context/documentation
Learn how to access and search your project's documentation directly within Continue
The [`@Docs` context provider](../custom-providers#docs) allows you to efficiently reference documentation directly within Continue.
## Enabling the `@Docs` context provider
To enable the `@Docs` context provider, add it to the list of context providers in your `config.json` file.
```yaml title="config.yaml"
context:
- provider: docs
```
```json title="config.json"
{
"contextProviders": [
{
"name": "docs"
}
]
}
```
## How It Works
The `@Docs` context provider works by
1. Crawling specified documentation sites
2. Generating embeddings for the chunked content
3. Storing the embeddings locally on your machine
4. Embedding chat input to include similar documentation chunks as context
## Indexing Your Own Documentation
### Hub `docs` Blocks
@Docs uses [`docs` blocks](../../hub/blocks/block-types.md#docs) in Assistants from the hub. Visit the hub to [explore `docs` blocks](https://hub.continue.dev/explore/docs) or [create your own](https://hub.continue.dev/new?type=block\&blockType=docs).
### Through the `@Docs` Context Provider
To add a single documentation site, we recommend using the **Add Documentation** Form within the GUI. This can be accessed
* from the `@Docs` context provider - type `@Docs` in the chat, hit `Enter`, and search for `Add Docs`
* from the `More` page (three dots icon) in the `@docs indexes` section
the `@Docs` context provider.
In the **Add Documentation** Form, enter a `Title` and `Start URL` for the site.
* `Title`: The name of the documentation site, used for identification in the UI.
* `Start URL`: The URL where the indexing process should begin.
Indexing will begin upon submission. Progress can be viewed in the form or later in the `@docs indexes` section of the `More` page.
Documentation sources may be suggested based on package files in your repo. This currently works for Python `requirements.txt` files and Node.js (Javascript/Typescript) `package.json` files.
* Packages with a valid documentation URL (with a `+` icon) can be clicked to immediately kick off indexing
* Packages with partial information (with a pen icon) can be clicked to fill the form with the available information
* Note that you can hover over the information icon to see where the package suggestion was found.

### In a configuration file
For bulk documentation site adds or edits, we recommend editing your global configuration file directly. Documentation sites are stored in an array within `docs` in your global configuration, as follows:
```yaml title="config.yaml"
docs:
- title: Nest.js
startUrl: https://docs.nestjs.com/
faviconUrl: https://docs.nestjs.com/favicon.ico
```
```json title="config.json"
{
"docs": [
{
"title": "Nest.js",
"startUrl": "https://docs.nestjs.com/",
"faviconUrl": "https://docs.nestjs.com/favicon.ico"
}
]
}
```
See [the config reference](/reference) for all documentation site configuration options.
Indexing will re-sync upon saving the configuration file.
## Configuration
### Using Your Embeddings Provider
If you have set up an [embeddings provider](../model-roles/embeddings.mdx), @docs will use your embeddings provider. Switching embeddings providers will trigger a re-index of all documentation sites in your configuration.
### Reranking
As with [@Codebase context provider configuration](./codebase#configuration), you can adjust the reranking behavior of the `@Docs` context provider with the `nRetrieve`, `nFinal`, and `useReranking`.
```yaml title="config.yaml"
context:
- provider: docs
params:
nRetrieve: 25 # The number of docs to retrieve from the embeddings query
nFinal: 5 # The number of docs chunks to return IF reranking
useReranking: true # use reranking if a reranker is configured (defaults to true)
```
```json title="config.json"
{
"contextProviders": [
{
"name": "docs",
"params": {
"nRetrieve": 25, // The number of docs to retrieve from the embeddings query
"nFinal": 5, // The number of docs chunks to return IF reranking
"useReranking": true // use reranking if a reranker is configured (defaults to true)
}
}
]
}
```
### GitHub
The GitHub API rate limits public requests to 60 per hour. If you want to reliably index GitHub repos, you can add a github token to your config file:
```yaml title="config.yaml"
context:
- provider: docs
params:
githubToken:
```
```json title="config.json"
{
"contextProviders": [
{
"name": "docs",
"params": {
"githubToken": "github_..."
}
}
]
}
```
### Local Crawling
By default, Continue crawls documentation sites using a specialized crawling service that provides the best experience for most users and documentation sites.
If your documentation is private, you can skip the default crawler and use a local crawler instead by setting `useLocalCrawling` to `true`.
```yaml title="config.yaml"
docs:
- title: My Private Docs
startUrl: http://10.2.1.2/docs
faviconUrl: http://10.2.1.2/docs/assets/favicon.ico,
useLocalCrawling: true
```
```json title="config.json"
{
"docs": [
{
"title": "My Private Docs",
"startUrl": "http://10.2.1.2/docs",
"faviconUrl": "http://10.2.1.2/docs/assets/favicon.ico",
"useLocalCrawling": true
}
]
}
```
Chromium crawling has been deprecated
{/* The default local crawler is a lightweight tool that cannot render sites that are dynamically generated using JavaScript. If your sites need to be rendered, you can enable the experimental `Use Chromium for Docs Crawling` feature from your [User Settings Page](../deep-dives/settings.md) This will download and install Chromium to `~/.continue/.utils`, and use it as the local crawler. */}
Further notes:
* If the site is only locally accessible, the default crawler will fail anyways and fall back to the local crawler. `useLocalCrawling` is especially useful if the URL itself is confidential.
* For GitHub Repos this has no effect because only the GitHub Crawler will be used, and if the repo is private it can only be accessed with a priveleged GitHub token anyways.
## Managing your docs indexes
You can view indexing statuses and manage your documentation sites from the `@docs indexes` section of the `More` page (three dots)
* Continue does not automatically re-index your docs. Use `Click to re-index` to trigger a reindex for a specific source
* While a site is indexing, click `Cancel indexing` to cancel the process
* Failed indexing attempts will show an error status bar and icon
* Delete a documentation site from your configuration using the trash icon

You can also view the overall status of currently indexing docs from a hideable progress bar at the bottom of the chat page

You can also use the following IDE command to force a re-index of all docs: `Continue: Docs Force Re-Index`.
## Examples
### VS Code minimal setup
The following configuration example works out of the box for VS Code. This uses the built-in embeddings provider with no reranking.
```yaml title="config.yaml"
context:
- provider: docs
docs:
- title: Nest.js
startUrl: https://docs.nestjs.com/
```
```json title="config.json"
{
"contextProviders": [
{
"name": "docs",
}
],
"docs": [
{
"title": "Nest.js",
"startUrl": "https://docs.nestjs.com/",
},
]
}
```
### Jetbrains minimal setup
Here is the equivalent minimal example for Jetbrains, which requires setting up an [embeddings provider](../model-roles/embeddings.mdx).
```yaml title="config.yaml"
models:
- name: LMStudio embedder
provider: lmstudio
model: nomic-ai/nomic-embed-text-v1.5-GGUF
roles:
- embed
context:
- provider: docs
docs:
- title: Nest.js
startUrl: https://docs.nestjs.com/
```
```json title="config.json"
{
"contextProviders": [
{
"name": "docs",
}
],
"docs": [
{
"title": "Nest.js",
"startUrl": "https://docs.nestjs.com/",
},
],
"embeddingsProvider": {
"provider": "lmstudio",
"model": "nomic-ai/nomic-embed-text-v1.5-GGUF"
}
}
```
### Full-power setup (VS Code or Jetbrains)
The following configuration example includes:
* Examples of both public and private documentation sources
* A custom embeddings provider
* A reranker model available, with reranking parameters customized
* A GitHub token to enable GitHub crawling
```yaml title="config.yaml"
models:
- name: LMStudio Nomic Text
provider: lmstudio
model: nomic-ai/nomic-embed-text-v1.5-GGUF
roles:
- embed
- name: Voyage Rerank-2
provider: voyage
apiKey:
model: rerank-2
roles:
- rerank
context:
- provider: docs
params:
githubToken:
nRetrieve: 25
nFinal: 5
useReranking: true
docs:
- title: Nest.js
startUrl: https://docs.nestjs.com/
- title: My Private Docs
startUrl: http://10.2.1.2/docs
faviconUrl: http://10.2.1.2/docs/assets/favicon.ico
maxDepth: 4
useLocalCrawling: true
```
```json title="config.json"
{
"contextProviders": [
{
"name": "docs",
"params": {
"githubToken": "github_...",
"nRetrieve": 25,
"nFinal": 5,
"useReranking": true
}
}
],
"docs": [
{
"title": "Nest.js",
"startUrl": "https://docs.nestjs.com/"
},
{
"title": "My Private Docs",
"startUrl": "http://10.2.1.2/docs",
"faviconUrl": "http://10.2.1.2/docs/assets/favicon.ico",
"maxDepth": 4,
"useLocalCrawling": true
}
],
"reranker": {
"name": "voyage",
"params": {
"model": "rerank-2",
"apiKey": ""
}
},
"embeddingsProvider": {
"provider": "lmstudio",
"model": "nomic-ai/nomic-embed-text-v1.5-GGUF"
}
}
```
{/* This could also involve enabling Chromium as a backup for local documentation the [User Settings Page](../deep-dives/settings.md). */}
# Context Providers
Source: https://docs.continue.dev/customize/custom-providers
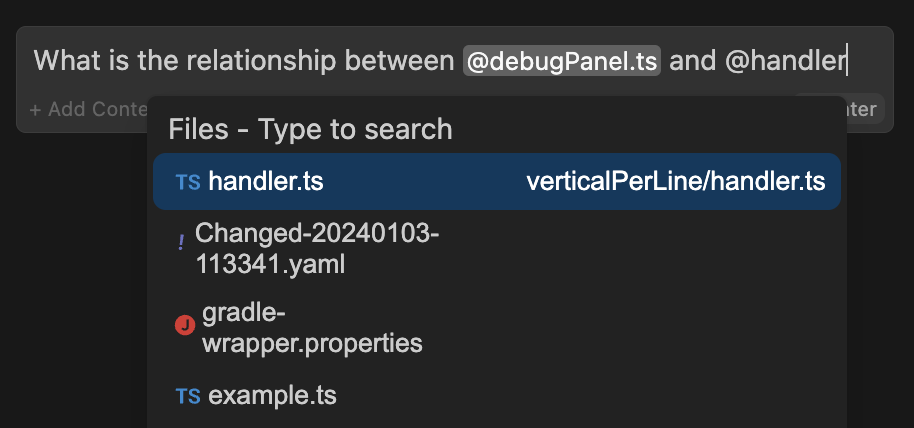
Context Providers allow you to type '@' and see a dropdown of content that can all be fed to the LLM as context. Every context provider is a plugin, which means if you want to reference some source of information that you don't see here, you can request (or build!) a new context provider.
As an example, say you are working on solving a new GitHub Issue. You type '@Issue' and select the one you are working on. Continue can now see the issue title and contents. You also know that the issue is related to the files 'readme.md' and 'helloNested.py', so you type '@readme' and '@hello' to find and select them. Now these 3 "Context Items" are displayed inline with the rest of your input.
## Context blocks
You can add context providers to assistants using [`context` blocks](/hub/blocks/block-types#context). Explore available context blocks in [the hub](https://hub.continue.dev/explore/context).
## Built-in Context Providers
You can add any built-in context-providers in your config file as shown below:
### `@File`
Reference any file in your current workspace.
* YAML
* JSON
config.yaml
```
context: - provider: file
```
config.json
```json
{ "contextProviders": [{ "name": "file" }] }
```
### `@Code`
Reference specific functions or classes from throughout your project.
* YAML
* JSON
config.yaml
```
context: - provider: code
```
config.json
```json
{ "contextProviders": [{ "name": "code" }] }
```
### `@Git Diff`
Reference all of the changes you've made to your current branch. This is useful if you want to summarize what you've done or ask for a general review of your work before committing.
* YAML
* JSON
config.yaml
```
context: - provider: diff
```
config.json
```json
{ "contextProviders": [{ "name": "diff" }] }
```
### `@Current File`
Reference the currently open file.
* YAML
* JSON
config.yaml
```
context: - provider: currentFile
```
config.json
```json
{ "contextProviders": [{ "name": "currentFile" }] }
```
### `@Terminal`
Reference the last command you ran in your IDE's terminal and its output.
* YAML
* JSON
config.yaml
```
context: - provider: terminal
```
config.json
```json
{ "contextProviders": [{ "name": "terminal" }] }
```
### `@Docs`
Reference the contents from any documentation site.
* YAML
* JSON
config.yaml
```
context: - provider: docs
```
config.json
```json
{ "contextProviders": [{ "name": "docs" }] }
```
Note that this will only enable the `@Docs` context provider.
To use it, you need to add a documentation site to your config file. See the [docs](/customization/overview#documentation-context) page for more information.
### `@Open`
Reference the contents of all of your open files. Set `onlyPinned` to `true` to only reference pinned files.
* YAML
* JSON
config.yaml
```
context: - provider: open params: onlyPinned: true
```
config.json
```json
{ "contextProviders": [{ "name": "open", "params": { "onlyPinned": true } }] }
```
### `@Web`
Reference relevant pages from across the web, automatically determined from your input.
Optionally, set `n` to limit the number of results returned (default 6).
* YAML
* JSON
config.yaml
```
context: - provider: web params: n: 5
```
config.json
```json
{ "contextProviders": [{ "name": "web", "params": { "n": 5 } }] }
```
### `@Codebase`
Reference the most relevant snippets from your codebase.
* YAML
* JSON
config.yaml
```
context: - provider: codebase
```
config.json
```json
{ "contextProviders": [{ "name": "codebase" }] }
```
Read more about indexing and retrieval [here](/customization/overview#codebase-context).
### `@Folder`
Uses the same retrieval mechanism as `@Codebase`, but only on a single folder.
* YAML
* JSON
config.yaml
```
context: - provider: folder
```
config.json
```json
{ "contextProviders": [{ "name": "folder" }] }
```
### `@Search`
Reference the results of codebase search, just like the results you would get from VS Code search.
* YAML
* JSON
config.yaml
```
context: - provider: search params: maxResults: 100 # optional, defaults to 200
```
config.json
```json
{ "contextProviders": [ { "name": "search", "params": { "maxResults": 100 // optional, defaults to 200 } } ]}
```
This context provider is powered by [ripgrep](https://github.com/BurntSushi/ripgrep).
### `@Url`
Reference the markdown converted contents of a given URL.
* YAML
* JSON
config.yaml
```
context: - provider: url
```
config.json
```json
{ "contextProviders": [{ "name": "url" }] }
```
### `@Clipboard`
Reference recent clipboard items
* YAML
* JSON
config.yaml
```
context: - provider: clipboard
```
config.json
```json
{ "contextProviders": [{ "name": "clipboard" }] }
```
### `@Tree`
Reference the structure of your current workspace.
* YAML
* JSON
config.yaml
```
context: - provider: tree
```
config.json
```json
{ "contextProviders": [{ "name": "tree" }] }
```
### `@Problems`
Get Problems from the current file.
* YAML
* JSON
config.yaml
```
context: - provider: problems
```
config.json
```json
{ "contextProviders": [{ "name": "problems" }] }
```
### `@Debugger`
Reference the contents of the local variables in the debugger. Currently only available in VS Code.
* YAML
* JSON
config.yaml
```
context: - provider: debugger params: stackDepth: 3
```
config.json
```json
{ "contextProviders": [{ "name": "debugger", "params": { "stackDepth": 3 } }] }
```
Uses the top *n* levels (defaulting to 3) of the call stack for that thread.
### `@Repository Map`
Reference the outline of your codebase. By default, signatures are included along with file in the repo map.
`includeSignatures` params can be set to false to exclude signatures. This could be necessary for large codebases and/or to reduce context size significantly. Signatures will not be included if indexing is disabled.
* YAML
* JSON
config.yaml
```
context: - provider: repo-map params: includeSignatures: false # default true
```
config.json
```json
{ "contextProviders": [ { "name": "repo-map", "params": { "includeSignatures": false // default true } } ]}
```
Provides a list of files and the call signatures of top-level classes, functions, and methods in those files. This helps the model better understand how a particular piece of code relates to the rest of the codebase.
In the submenu that appears, you can select either `Entire codebase`, or specify a subfolder to generate the repostiory map from.
This context provider is inpsired by [Aider's repository map](https://aider.chat/2023/10/22/repomap.html).
### `@Operating System`
Reference the architecture and platform of your current operating system.
* YAML
* JSON
config.yaml
```
context: - provider: os
```
config.json
```json
{ "contextProviders": [{ "name": "os" }] }
```
### Model Context Protocol
The [Model Context Protocol](https://modelcontextprotocol.io/introduction) is a standard proposed by Anthropic to unify prompts, context, and tool use. Continue supports any MCP server with the MCP context provider. Read their [quickstart](https://modelcontextprotocol.io/quickstart) to learn how to set up a local server and then set up your configuration like this:
* YAML
* JSON
config.yaml
```
mcpServers: - name: My MCP Server command: uvx args: - mcp-server-sqlite - --db-path - /Users/NAME/test.db
```
config.json
```json
{
"experimental": {
"modelContextProtocolServers": [
{
"transport": {
"type": "stdio",
"command": "uvx",
"args": ["mcp-server-sqlite", "--db-path", "/Users/NAME/test.db"]
}
}
]
}
}
```
You'll then be able to type "@" and see "MCP" in the context providers dropdown.
### `@Issue`
Reference the conversation in a GitHub issue.
* YAML
* JSON
config.yaml
```
context: - provider: issue params: repos: - owner: continuedev repo: continue githubToken: ghp_xxx
```
config.json
```json
{
"contextProviders": [
{
"name": "issue",
"params": {
"repos": [{ "owner": "continuedev", "repo": "continue" }],
"githubToken": "ghp_xxx"
}
}
]
}
```
Make sure to include your own [GitHub personal access token](https://docs.github.com/en/authentication/keeping-your-account-and-data-secure/managing-your-personal-access-tokens#creating-a-fine-grained-personal-access-token) to avoid being rate-limited.
### `@Database`
Reference table schemas from Sqlite, Postgres, MSSQL, and MySQL databases.
* YAML
* JSON
config.yaml
```
context: - provider: database params: connections: - name: examplePostgres connection_type: postgres connection: user: username host: localhost database: exampleDB password: yourPassword port: 5432 - name: exampleMssql connection_type: mssql connection: user: username server: localhost database: exampleDB password: yourPassword - name: exampleSqlite connection_type: sqlite connection: filename: /path/to/your/sqlite/database.db
```
config.json
```json
{
"contextProviders": [
{
"name": "database",
"params": {
"connections": [
{
"name": "examplePostgres",
"connection_type": "postgres",
"connection": {
"user": "username",
"host": "localhost",
"database": "exampleDB",
"password": "yourPassword",
"port": 5432
}
},
{
"name": "exampleMssql",
"connection_type": "mssql",
"connection": {
"user": "username",
"server": "localhost",
"database": "exampleDB",
"password": "yourPassword"
}
},
{
"name": "exampleSqlite",
"connection_type": "sqlite",
"connection": { "filename": "/path/to/your/sqlite/database.db" }
}
]
}
}
]
}
```
Each connection should include a unique name, the `connection_type`, and the necessary connection parameters specific to each database type.
Available connection types:
* `postgres`
* `mysql`
* `sqlite`
### `@Postgres`
Reference the schema of a table, and some sample rows
* YAML
* JSON
config.yaml
```
context: - provider: postgres params: host: localhost port: 5436 user: myuser password: catsarecool database: animals schema: public sampleRows: 3
```
config.json
```json
{
"contextProviders": [
{
"name": "postgres",
"params": {
"host": "localhost",
"port": 5436,
"user": "myuser",
"password": "catsarecool",
"database": "animals",
"schema": "public",
"sampleRows": 3
}
}
]
}
```
The only required settings are those for creating the database connection: `host`, `port`, `user`, `password`, and `database`.
By default, the `schema` filter is set to `public`, and the `sampleRows` is set to 3. You may unset the schema if you want to include tables from all schemas.
[Here is a short demo.](https://github.com/continuedev/continue/pull/859)
### `@Google`
Reference the results of a Google search.
* YAML
* JSON
config.yaml
```
context: - provider: google params: serperApiKey:
```
config.json
```json
{
"contextProviders": [
{
"name": "google",
"params": { "serperApiKey": "" }
}
]
}
```
For example, type "@Google python tutorial" if you want to search and discuss ways of learning Python.
Note: You can get an API key for free at [serper.dev](https://serper.dev).
### `@Gitlab Merge Request`
Reference an open MR for this branch on GitLab.
* YAML
* JSON
config.yaml
```
context: - provider: gitlab-mr params: token: "..."
```
config.json
```json
{ "contextProviders": [{ "name": "gitlab-mr", "params": { "token": "..." } }] }
```
You will need to create a [personal access token](https://docs.gitlab.com/ee/user/profile/personal_access_tokens.html) with the `read_api` scope.
#### Using Self-Hosted GitLab
You can specify the domain to communicate with by setting the `domain` parameter in your configurtion. By default this is set to `gitlab.com`.
* YAML
* JSON
config.yaml
```
context: - provider: gitlab-mr params: token: "..." domain: "gitlab.example.com"
```
config.json
```json
{
"contextProviders": [
{
"name": "gitlab-mr",
"params": { "token": "...", "domain": "gitlab.example.com" }
}
]
}
```
#### Filtering Comments
If you select some code to be edited, you can have the context provider filter out comments for other files. To enable this feature, set `filterComments` to `true`.
### `@Jira`
Reference the conversation in a Jira issue.
* YAML
* JSON
config.yaml
```
context: - provider: jira params: domain: company.atlassian.net token: ATATT...
```
config.json
```json
{
"contextProviders": [
{
"name": "jira",
"params": { "domain": "company.atlassian.net", "token": "ATATT..." }
}
]
}
```
Make sure to include your own [Atlassian API Token](https://id.atlassian.com/manage-profile/security/api-tokens), or use your `email` and `token`, with token set to your password for basic authentication. If you use your own Atlassian API Token, don't configure your email.
#### Jira Datacenter Support
This context provider supports both Jira API version 2 and 3. It will use version 3 by default since that's what the cloud version uses, but if you have the datacenter version of Jira, you'll need to set the API Version to 2 using the `apiVersion` property.
* YAML
* JSON
config.yaml
```
context: - provider: jira params: apiVersion: "2"
```
config.json
```json
{ "contextProviders": [{ "name": "jira", "params": { "apiVersion": "2" } }] }
```
#### Issue Query
By default, the following query will be used to find issues:
```
assignee = currentUser() AND resolution = Unresolved order by updated DESC
```
You can override this query by setting the `issueQuery` parameter.
#### Max results
You can set the `maxResults` parameter to limit the number of results returned. The default is `50`.
### `@Discord`
Reference the messages in a Discord channel.
* YAML
* JSON
config.yaml
```
context: - provider: discord params: discordKey: "bot token" guildId: "1234567890" channels: - id: "123456" name: "example-channel" - id: "678901" name: "example-channel-2"
```
config.json
```json
{
"contextProviders": [
{
"name": "discord",
"params": {
"discordKey": "bot token",
"guildId": "1234567890",
"channels": [
{ "id": "123456", "name": "example-channel" },
{ "id": "678901", "name": "example-channel-2" }
]
}
}
]
}
```
Make sure to include your own [Bot Token](https://discord.com/developers/applications), and join it to your related server . If you want more granular control over which channels are searched, you can specify a list of channel IDs to search in. If you don't want to specify any channels, just include the guild id(Server ID) and all channels will be included. The provider only reads text channels.
### `@HTTP`
The HttpContextProvider makes a POST request to the url passed in the configuration. The server must return 200 OK with a ContextItem object or an array of ContextItems.
* YAML
* JSON
config.yaml
```
context: - provider: http params: url: "https://api.example.com/v1/users"
```
config.json
```json
{
"contextProviders": [
{ "name": "http", "params": { "url": "https://api.example.com/v1/users" } }
]
}
```
The receiving URL should expect to receive the following parameters:
POST parameters
```json
{ query: string, fullInput: string}
```
The response 200 OK should be a JSON object with the following structure:
Response
```
[ { "name": "", "description": "", "content": "" }]// OR{ "name": "", "description": "", "content": ""}
```
### `@Commits`
Reference specific git commit metadata and diff or all of the recent commits.
* YAML
* JSON
config.yaml
```
context: - provider: commit params: Depth: 50 LastXCommitsDepth: 10
```
config.json
```json
{
"contextProviders": [
{ "name": "commit", "params": { "Depth": 50, "LastXCommitsDepth": 10 } }
]
}
```
The depth is how many commits will be loaded into the submenu, defaults to 50. The LastXCommitsDepth is how many recent commits will be included, defaults to 10.
### `@Greptile`
Query a [Greptile](https://www.greptile.com/) index of the current repo/branch.
* YAML
* JSON
config.yaml
```
context: - provider: greptile params: greptileToken: "..." githubToken: "..."
```
config.json
```json
{
"contextProviders": [
{
"name": "greptile",
"params": { "GreptileToken": "...", "GithubToken": "..." }
}
]
}
```
### Requesting Context Providers
Not seeing what you want? Create an issue [here](https://github.com/continuedev/continue/issues/new?assignees=TyDunn\&labels=enhancement\&projects=\&template=feature-request-%F0%9F%92%AA.md\&title=) to request a new Context Provider.
# Autocomplete
Source: https://docs.continue.dev/customize/deep-dives/autocomplete
Deep dive into Continue's autocomplete functionality and configuration
### Setting up with Codestral (recommended)
If you want to have the best autocomplete experience, we recommend using Codestral, which is available through the [Mistral API](https://console.mistral.ai/). To do this, obtain an API key and add it to your config:
[Mistral Codestral model block](https://hub.continue.dev/mistral/codestral)
```yaml title="config.yaml"
models:
- name: Codestral
provider: mistral
model: codestral-latest
apiKey:
roles:
- autocomplete
```
```json title="config.json"
{
"tabAutocompleteModel": {
"title": "Codestral",
"provider": "mistral",
"model": "codestral-latest",
"apiKey": ""
}
}
```
**Codestral API Key**: The API keys for Codestral and the general Mistral APIs
are different. If you are using Codestral, you probably want a Codestral API
key, but if you are sharing the key as a team or otherwise want to use
`api.mistral.ai`, then make sure to set `"apiBase":
"https://api.mistral.ai/v1"` in your `tabAutocompleteModel`.
### Setting up with Ollama (default)
If you'd like to run your autocomplete model locally, we recommend using Ollama. To do this, first download the latest version of Ollama from [here](https://ollama.ai). Then, run the following command to download our recommended model:
```bash
ollama run qwen2.5-coder:1.5b
```
Then, add the model to your configuration:
[Ollama Qwen 2.5 Coder 1.5B model block](https://hub.continue.dev/ollama/qwen2.5-coder-1.5b)
```yaml title="config.yaml"
models:
- name: Qwen 1.5b Autocomplete Model
provider: ollama
model: qwen2.5-coder:1.5b
roles:
- autocomplete
```
```json title="config.json"
{
"tabAutocompleteModel": {
"title": "Qwen 1.5b Autocomplete Model",
"provider": "ollama",
"model": "qwen2.5-coder:1.5b",
}
}
```
Once the model has been downloaded, you should begin to see completions in VS Code.
NOTE: Typically, thinking-type models are not recommended as they generate more slowly and are not suitable for scenarios that require speed.
However, if you use any thinking-switchable models, you can configure these models for autocomplete functions by turning off the thinking mode.
For example:
```yaml title="config.yaml"
models:
- name: Qwen3 without Thinking for Autocomplete
provider: ollama
model: qwen3:4b # qwen3 is a thinking-switchable model
roles:
- autocomplete
requestOptions:
extraBodyProperties:
think: false # turning off the thinking
```
Then, in the continue panel, select this model as the default model for autocomplete.
## Configuration Options
### Hub Autocomplete models
Explore autocomplete model configurations on [the hub](https://hub.continue.dev/explore/models?roles=autocomplete)
### Autocomplete User Settings
{/* - `Use autocomplete cache`: If on, caches completions */}
The following settings can be configured for autocompletion in the IDE extension [User Settings Page](../settings.md):
* `Multiline Autocompletions`: Controls multiline completions for autocomplete. Can be set to `always`, `never`, or `auto`. Defaults to `auto`
* `Disable autocomplete in files`: List of comma-separated glob pattern to disable autocomplete in matching files. E.g., "\_/.md, \*/.txt"
### `config.json` Configuration
The `config.json` configuration format (deprecated) offers further configuration options through `tabAutocompleteOptions`. See the [JSON Reference](/reference) for more details.
## FAQs
### I want better completions, should I use GPT-4?
Perhaps surprisingly, the answer is no. The models that we suggest for autocomplete are trained with a highly specific prompt format, which allows them to respond to requests for completing code (see examples of these prompts [here](https://github.com/continuedev/continue/blob/main/core/autocomplete/templating/AutocompleteTemplate.ts)). Some of the best commercial models like GPT-4 or Claude are not trained with this prompt format, which means that they won't generate useful completions. Luckily, a huge model is not required for great autocomplete. Most of the state-of-the-art autocomplete models are no more than 10b parameters, and increasing beyond this does not significantly improve performance.
### I'm not seeing any completions
Follow these steps to ensure that everything is set up correctly:
1. Make sure you have the "Enable Tab Autocomplete" setting checked (in VS Code, you can toggle by clicking the "Continue" button in the status bar, and in JetBrains by going to Settings -> Tools -> Continue).
2. Make sure you have downloaded Ollama.
3. Run `ollama run qwen2.5-coder:1.5b` to verify that the model is downloaded.
4. Make sure that any other completion providers are disabled (e.g. Copilot), as they may interfere.
5. Check the output of the logs to find any potential errors: cmd/ctrl + shift + P -> "Toggle Developer Tools" -> "Console" tab in VS Code, \~/.continue/logs/core.log in JetBrains.
6. Check VS Code settings to make sure that `"editor.inlineSuggest.enabled"` is set to `true` (use cmd/ctrl + , then search for this and check the box)
7. If you are still having issues, please let us know in our [Discord](https://discord.gg/vapESyrFmJ) and we'll help as soon as possible.
### Completions are only ever single-line
To ensure that you receive multi-line completions, you can set `"multilineCompletions": "always"` in `tabAutocompleteOptions`. By default, it is `"auto"`. If you still find that you are only seeing single-line completions, this may be because some models tend to produce shorter completions when starting in the middle of a file. You can try temporarily moving text below your cursor out of your active file, or switching to a larger model.
### Can I configure a "trigger key" for autocomplete?
Yes, in VS Code, if you don't want to be shown suggestions automatically you can:
1. Set `"editor.inlineSuggest.enabled": false` in VS Code settings to disable automatic suggestions
2. Open "Keyboard Shortcuts" (cmd/ctrl+k, cmd/ctrl+s) and search for `editor.action.inlineSuggest.trigger`
3. Click the "+" icon to add a new keybinding
4. Press the key combination you want to use to trigger suggestions (e.g. cmd/ctrl + space)
5. Now whenever you want to see a suggestion, you can press your key binding (e.g. cmd/ctrl + space) to trigger suggestions manually
### Is there a shortcut to accept one line at a time?
This is a built-in feature of VS Code, but it's just a bit hidden. Follow these settings to reassign the keyboard shortcuts in VS Code:
1. Press Ctrl+Shift+P, type the command: `Preferences: Open Keyboard Shortcuts`, and enter the keyboard shortcuts settings page.
2. Search for `editor.action.inlineSuggest.acceptNextLine`.
3. Set the key binding to Tab.
4. Set the trigger condition (when) to `inlineSuggestionVisible && !editorReadonly`.
This will make multi-line completion (including continue and from VS Code built-in or other plugin snippets) still work, and you will see multi-line completion. However, Tab will only fill in one line at a time. Any unnecessary code can be canceled with Esc.
If you need to apply all the code, just press Tab multiple times.
### How to turn off autocomplete
#### VS Code
Click the "Continue" button in the status panel at the bottom right of the screen. The checkmark will become a "cancel" symbol and you will no longer see completions. You can click again to turn it back on.
Alternatively, open VS Code settings, search for "Continue" and uncheck the box for "Enable Tab Autocomplete".
You can also use the default shortcut to disable autocomplete directly using a chord: press and hold ctrl/cmd + K (continue holding ctrl/cmd) and press ctrl/cmd + A. This will turn off autocomplete without navigating through settings.
#### JetBrains
Open Settings -> Tools -> Continue and uncheck the box for "Enable Tab Autocomplete".
#### Feedback
If you're turning off autocomplete, we'd love to hear how we can improve! Please let us know in our [Discord](https://discord.gg/vapESyrFmJ) or file an issue on GitHub.
# Configuration
Source: https://docs.continue.dev/customize/deep-dives/configuration
Configuration
You can easily access your assistant configuration from the Continue Chat sidebar. Open the sidebar by pressing cmd/ctrl + L (VS Code) or cmd/ctrl + J (JetBrains) and click the Assistant selector above the main chat input. Then, you can hover over an assistant and click the `new window` (hub assistants) or `gear` (local assistants) icon.

## Hub Assistants
Hub Assistants can be managed in [the Hub](https://hub.continue.dev). See [Editing an Assistant](../../hub/assistants/edit-an-assistant.md)
## YAML Config
Local user-level configuration is stored and can be edited in your home directory in `config.yaml`:
* `~/.continue/config.yaml` (MacOS / Linux)
* `%USERPROFILE%\.continue\config.yaml` (Windows)
To open this `config.yaml`, you need to open the assistants dropdown in the top-right portion of the chat input. On that dropdown beside the "Local Assistant" option, select the cog icon. It will open the local `config.yaml`.
When editing this file, you can see the available options suggested as you type, or check the reference below. When you save a config file from the IDE, Continue will automatically refresh to take into account your changes. A config file is automatically created the first time you use Continue, and always automatically generated with default values if it doesn't exist.
See the full reference for `config.yaml` [here](/reference).
## Deprecated configuration methods
View the `config.json` migration guide [here](../yaml-migration.mdx)
* [`config.json`](/reference) - The original configuration format which is stored in a file at the same location as `config.yaml`
* [`.continuerc.json`](#continuercjson) - Workspace-level configuration
* [`config.ts`](#configts) - Advanced configuration (probably unnecessary) - a TypeScript file in your home directory that can be used to programmatically modify (*merged*) the `config.json` schema:
* `~/.continue/config.ts` (MacOS / Linux)
* `%USERPROFILE%\.continue\config.ts` (Windows)
### `.continuerc.json`
The format of `.continuerc.json` is the same as `config.json`, plus one *additional* property `mergeBehavior`, which can be set to either "merge" or "overwrite". If set to "merge" (the default), `.continuerc.json` will be applied on top of `config.json` (arrays and objects are merged). If set to "overwrite", then every top-level property of `.continuerc.json` will overwrite that property from `config.json`.
Example
```json title=".continuerc.json"
{
"tabAutocompleteOptions": {
"disable": true
},
"mergeBehavior": "overwrite"
}
```
### `config.ts`
`config.yaml` or `config.json` can handle the vast majority of necessary configuration, so we recommend using it whenever possible. However, if you need to programmatically extend Continue configuration, you can use a `config.ts` file, placed at `~/.continue/config.ts` (MacOS / Linux) or `%USERPROFILE%\.continue\config.ts` (Windows).
`config.ts` must export a `modifyConfig` function, like:
```ts title="config.ts"
export function modifyConfig(config: Config): Config {
config.slashCommands?.push({
name: "commit",
description: "Write a commit message",
run: async function* (sdk) {
// The getDiff function takes a boolean parameter that indicates whether
// to include unstaged changes in the diff or not.
const diff = await sdk.ide.getDiff(false); // Pass false to exclude unstaged changes
for await (const message of sdk.llm.streamComplete(
`${diff}\n\nWrite a commit message for the above changes. Use no more than 20 tokens to give a brief description in the imperative mood (e.g. 'Add feature' not 'Added feature'):`,
new AbortController().signal,
{
maxTokens: 20,
},
)) {
yield message;
}
},
});
return config;
}
```
# Development Data
Source: https://docs.continue.dev/customize/deep-dives/development-data
Collecting data on how you build software
When you use Continue, you automatically collect data on how you build software. By default, this development data is saved to `.continue/dev_data` on your local machine.
You can read more about how development data is generated as a byproduct of LLM-aided development and why we believe that you should start collecting it now: [It’s time to collect data on how you build software](https://blog.continue.dev/its-time-to-collect-data-on-how-you-build-software)
## Custom Data Destinations
You can also configure custom destinations for your data, including remote HTTP endpoints and local file directories.
For hub assistants, data destinations are configured in `data` blocks. Visit the hub to [explore example data blocks](https://hub.continue.dev/explore/data) or [create your own](https://hub.continue.dev/new?type=block\&blockType=data).
See more details about adding `data` blocks to your configuration files in the [YAML specification](/reference#data)
When sending development data to your own HTTP endpoint, it will receive an event JSON blob at the given `schema` version. You can view event names, schema versions, and fields [here in the source code](https://github.com/continuedev/continue/tree/main/packages/config-yaml/src/schemas/data).
# MCP
Source: https://docs.continue.dev/customize/deep-dives/mcp
MCP use and customization
As AI systems get better, they're still held back by their training data and
can't access real-time information or specialized tools. The [Model Context
Protocol](https://modelcontextprotocol.io/introduction) (MCP) fixes this by
letting AI models connect with outside data sources, tools, and environments.
This allows smooth sharing of information and abilities between AI systems and
the wider digital world. This standard, created by Anthropic to bring together
prompts, context, and tool use, is key for building truly useful AI experiences
that can be set up with custom tools.
## How it works
Currently custom tools can be configured using the Model Context
Protocol standard to unify prompts, context, and tool use.
MCP Servers can be added to hub Assistants using `mcpServers` blocks. You can
explore available MCP server blocks
[here](https://hub.continue.dev/explore/mcp).
MCP can only be used in the **agent** mode.
## Quick Start
Below is a quick example of setting up a new MCP server for use in your assistant:
1. Create a folder called `.continue/mcpServers` at the top level of your workspace
2. Add a file called `playwright-mcp.yaml` to this folder.
3. Write the following contents to `playwright-mcp.yaml` and save.
```yaml title=".continue/mcpServers/playwright-mcp.yaml"
name: Playwright mcpServer
version: 0.0.1
schema: v1
mcpServers:
- name: Browser search
command: npx
args:
- "@playwright/mcp@latest"
```
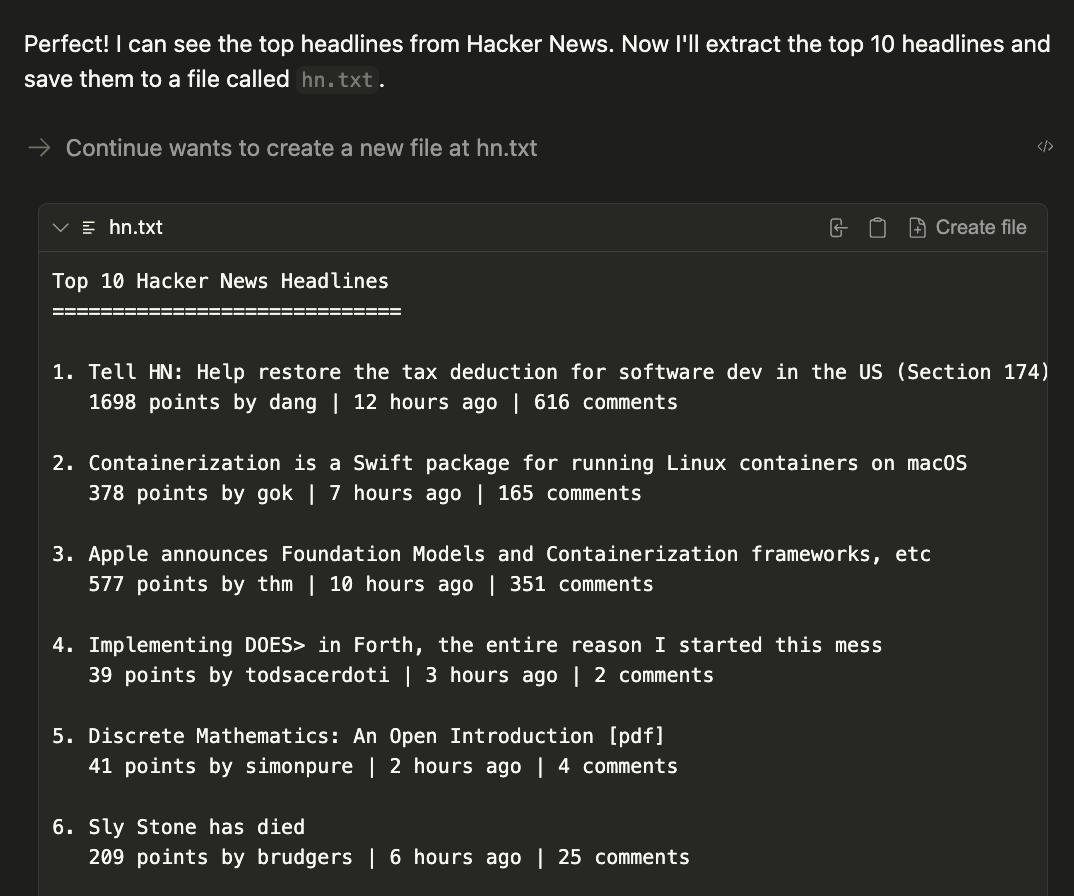
Now test your MCP server by prompting the following command:
```
Open the browser and navigate Hacker News. Save the top 10 headlines in a hn.txt file.
```
The result will be a generated file called `hn.txt` in the current working directory.
## Continue Documentation Search
You can set up an MCP server to search the Continue documentation directly from your agent. This is particularly useful for getting help with Continue configuration and features.
For complete setup instructions, troubleshooting, and usage examples, see the [Continue MCP Reference](/reference/continue-mcp).
## Using MCP Servers
To set up your own MCP server, read the [MCP
quickstart](https://modelcontextprotocol.io/quickstart) and then [create an
`mcpServers`
block](https://hub.continue.dev/new?type=block\&blockType=mcpServers) or add a local MCP
server block to your [config file](./configuration.md):
```yaml title="config.yaml"
mcpServers:
- name: SQLite MCP
command: npx
args:
- "-y"
- "mcp-sqlite"
- "/path/to/your/database.db"
```
```json title="config.json"
{
"experimental": {
"modelContextProtocolServers": [
{
"transport": {
"type": "stdio",
"command": "uvx",
"args": ["mcp-server-sqlite", "--db-path", "/path/to/your/database.db"]
}
}
]
}
}
```
### Syntax
MCP blocks follow the established syntax for blocks, with a few additional properties specific to MCP servers.
* `name` (**required**): A display name for the MCP server.
* `command` (**required**): The command to run to start the MCP server.
* `type` (optional): The type of the MCP server: `sse`, `stdio`, `streamable-http`
* `args` (optional): Arguments to pass to the command.
* `env` (optional): Secrets to be injected into the command as environment variables.
### Transport Types
MCP now supports remote server connections through HTTP-based transports, expanding beyond the traditional local stdio transport method. This enables integration with cloud-hosted MCP servers and distributed architectures.
#### Server-Sent Events (SSE) Transport
For real-time streaming communication, use the SSE transport:
```yaml
mcpServers:
- name: Name
type: sse
url: https://....
```
#### Standard Input/Output (stdio)
For local MCP servers that communicate via standard input and output:
```yaml
mcpServers:
- name: Name
type: stdio
command: npx
args:
- "@modelcontextprotocol/server-sqlite"
- "/path/to/your/database.db"
```
#### Streamable HTTP Transport
For standard HTTP-based communication with streaming capabilities:
```yaml
mcpServers:
- name: Name
type: streamable-http
url: https://....
```
These remote transport options allow you to connect to MCP servers hosted on remote infrastructure, enabling more flexible deployment architectures and shared server resources across multiple clients.
For detailed information about transport mechanisms and their use cases, refer to the official MCP documentation on [transports](https://modelcontextprotocol.io/docs/concepts/transports#server-sent-events-sse).
### Working with Secrets
With some MCP servers you will need to use API keys or other secrets. You can leverage locally stored environments secrets
as well as access hosted secrets in the Continue Hub. To leverage Hub secrets, you can use the `inputs` property in your MCP env block instead of `secrets`.
```yaml
mcpServers:
- name: Supabase MCP
command: npx
args:
- -y
- "@supabase/mcp-server-supabase@latest"
- --access-token
- ${{ secrets.SUPABASE_TOKEN }}
env:
SUPABASE_TOKEN: ${{ secrets.SUPABASE_TOKEN }}
- name: GitHub
command: npx
args:
- "-y"
- "@modelcontextprotocol/server-github"
env:
GITHUB_PERSONAL_ACCESS_TOKEN: ${{ secrets.GITHUB_PERSONAL_ACCESS_TOKEN }}
```
# Prompts
Source: https://docs.continue.dev/customize/deep-dives/prompts
Prompts are reusable instructions that can be referenced at any time during chat. They are especially useful as context for repetitive and/or complex tasks.
Prompts were previously defined in a `.prompt` file format, but for
consistency we now recommend using the same Markdown format as
[rules](./rules.mdx) and adding `alwaysApply: false` to the frontmatter so
that they are manually triggered.
### Quick Start
Below is a quick example of setting up a prompt file:
1. Create a folder called `.continue/rules` at the top level of your workspace
2. Add a file called `review-prompt.md` to this folder.
3. Write the following contents to `review-prompt.md` and save.
```md title="review-prompt.md"
---
name: Redux best practices review
alwaysApply: false
---
Review the currently open file for adherence to Redux best practices, as explained in their style guide at https://redux.js.org/style-guide/.
```
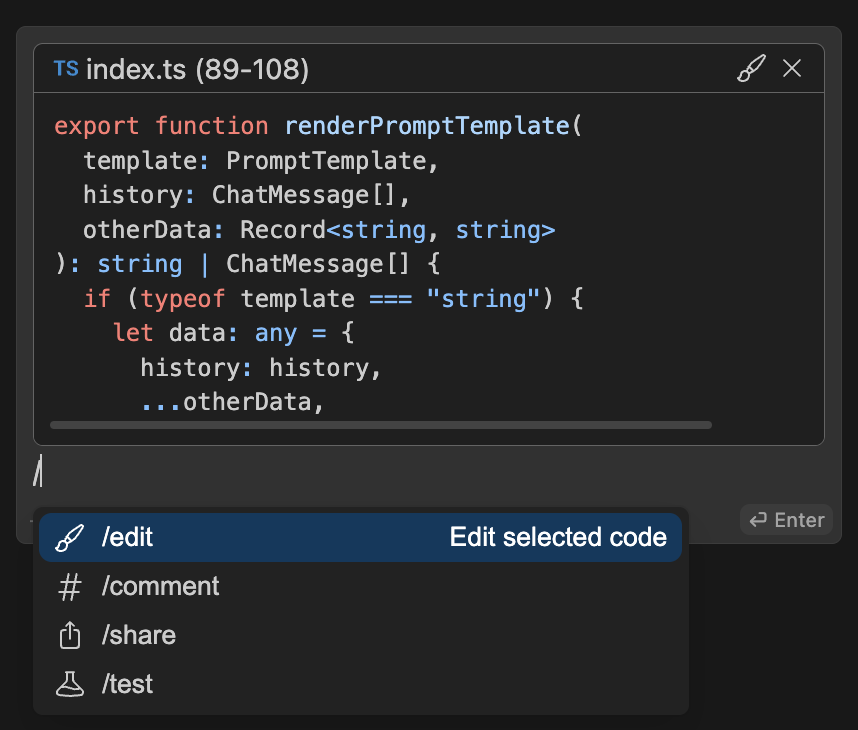
Now to use this prompt, you can open Chat, type /, select the prompt, and type out any additional instructions you'd like to add.
## Further Examples
Below are more examples to get you started. You can also visit the Hub to [explore prompts](https://hub.continue.dev/explore/prompts) or [create your own](https://hub.continue.dev/new?type=block\&blockType=prompts).
### Security review
```md title="security-review.md"
---
name: Security best practices review
alwaysApply: false
---
Review the changes in the current git diff for these security best practices:
- Does the architecture follow security-by-design principles?
- Are there potential security vulnerabilities in the system design?
- Is sensitive data handled appropriately throughout the lifecycle?
```
### Pull in commonly used files for tasks
```md title="typeorm-entity-generator.md"
---
name: Generate a new TypeORM entity
alwaysApply: false
---
Referencing `src/db/dataSource.ts` and `src/db/entity/SampleEntity.ts`, generate a new TypeORM entity based on the following requirements:
```
# Rules
Source: https://docs.continue.dev/customize/deep-dives/rules
Rules are used to provide instructions to the model for Chat, Edit, and Agent requests.
Rules provide instructions to the model for [Chat](../../features/chat/quick-start), [Edit](../../features/edit/quick-start), and [Agent](../../features/agent/quick-start) requests.
Rules are not included in [autocomplete](./autocomplete.mdx) or
[apply](../model-roles/apply.mdx).
## How it works
You can view the current rules by clicking the pen icon above the main toolbar:
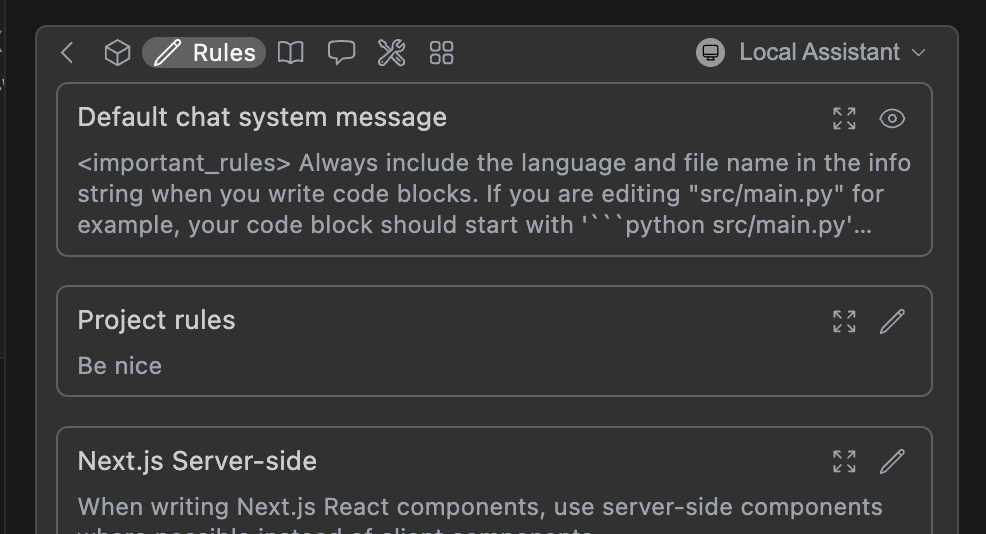
To form the system message, rules are joined with new lines, in the order they appear in the toolbar. This includes the base chat system message ([see below](#chat-system-message)).
## Quick Start
Below is a quick example of setting up a new rule file:
1. Create a folder called `.continue/rules` at the top level of your workspace
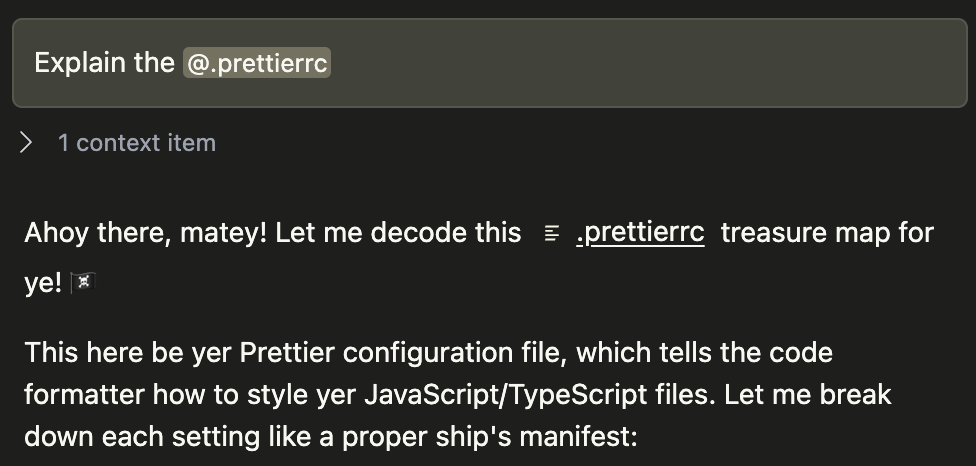
2. Add a file called `pirates-rule.md` to this folder.
3. Write the following contents to `pirates-rule.md` and save.
```md title=".continue/rules/pirates-rule.md"
---
name: Pirate rule
---
- Talk like a pirate.
```
Now test your rules by asking a question about a file in chat.
## Creating rules blocks
Rules can be added locally using the "Add Rules" button while viewing the Local Assistant's rules.
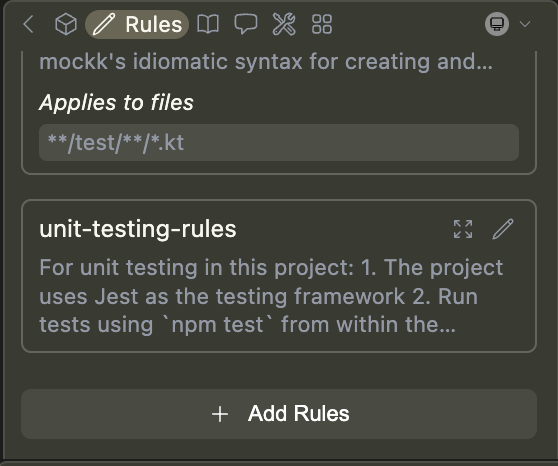
**Automatically create local rule blocks**: When in Agent mode, you can prompt the agent to create a rule for you using the `create_rule_block` tool if enabled.
For example, you can say "Create a rule for this", and a rule will be created for you in `.continue/rules` based on your conversation.
Rules can also be added to an Assistant on the Continue Hub.
Explore available rules [here](https://hub.continue.dev), or [create your own](https://hub.continue.dev/new?type=block\&blockType=rules) in the Hub.
### Syntax
Rules were originally defined in YAML format (demonstrated below), but we
introduced Markdown for easier editing. While both are still supported, we
recommend Markdown.
Rules blocks can be simple text, written in YAML configuration files, or as Markdown (`.md`) files. They can have the following properties:
* `name` (**required** for YAML): A display name/title for the rule
* `globs` (optional): When files are provided as context that match this glob pattern, the rule will be included. This can be either a single pattern (e.g., `"**/*.{ts,tsx}"`) or an array of patterns (e.g., `["src/**/*.ts", "tests/**/*.ts"]`).
* `regex` (optional): When files are provided as context and their content matches this regex pattern, the rule will be included. This can be either a single pattern (e.g., `"^import .* from '.*';$"`) or an array of patterns (e.g., `["^import .* from '.*';$", "^export .* from '.*';$"]`).
* `description` (optional): A description for the rule. Agents may read this description when `alwaysApply` is false to determine whether the rule should be pulled into context.
* `alwaysApply`: Determines whether the rule is always included. Behavior is described below:
* `true`: Always included, regardless of file context
* `false`: Included if globs exist AND match file context, or the agent decides to pull the rule into context based on its description
* `undefined` (default behavior): Included if no globs exist OR globs exist and match
```md title="doc-standards.md"
---
name: Documentation Standards
globs: docs/**/*.{md,mdx}
alwaysApply: false
description: Standards for writing and maintaining Continue Docs
---
# Continue Docs Standards
- Follow Docusaurus documentation standards
- Include YAML frontmatter with title, description, and keywords
- Use consistent heading hierarchy starting with h2 (##)
- Include relevant Admonition components for tips, warnings, and info
- Use descriptive alt text for images
- Include cross-references to related documentation
- Reference other docs with relative paths
- Keep paragraphs concise and scannable
- Use code blocks with appropriate language tags
```
```yaml title="doc-standards.yaml"
name: Documentation Standards
version: 1.0.0
schema: v1
rules:
- name: Documentation Standards
globs: docs/**/*.{md,mdx}
alwaysApply: false
rule: >
- Follow Docusaurus documentation standards
- Include YAML frontmatter with title, description, and keywords
- Use consistent heading hierarchy starting with h2 (##)
- Include relevant Admonition components for tips, warnings, and info
- Use descriptive alt text for images
- Include cross-references to related documentation
- Reference other docs with relative paths
- Keep paragraphs concise and scannable
- Use code blocks with appropriate language tags
```
### `.continue/rules` folder
You can create project-specific rules by adding a `.continue/rules` folder to the root of your project and adding new rule files.
Rules files are loaded in lexicographical order, so you can prefix them with numbers to control the order in which they are applied. For example: `01-general.md`, `02-frontend.md`, `03-backend.md`.
### Example: TypeScript Rules
```md title=".continue/rules/typescript.md"
---
name: TypeScript Best Practices
globs: ["**/*.ts", "**/*.tsx"]
---
# TypeScript Rules
- Always use TypeScript interfaces for object shapes
- Use type aliases sparingly, prefer interfaces
- Include proper JSDoc comments for public APIs
- Use strict null checks
- Prefer readonly arrays and properties where possible
- modularize components into smaller, reusable pieces
```
### Chat System Message
Continue includes a simple default system message for [Chat](../../features/chat/quick-start) and [Agent](../../features/agent/quick-start) requests, to help the model provide reliable codeblock formats in its output.
This can be viewed in the rules section of the toolbar (see above), or in the source code [here](https://github.com/continuedev/continue/blob/main/core/llm/constructMessages.ts#L4).
Advanced users can override this system message for a specific model if needed by using `chatOptions.baseSystemMessage`. See the [`config.yaml` reference](/reference#models).
### `.continuerules`
`.continuerules` will be deprecated in a future release. Please use the
`.continue/rules` folder instead.
You can create project-specific rules by adding a `.continuerules` file to the root of your project. This file is raw text and its full contents will be used as rules.
# Slash commands
Source: https://docs.continue.dev/customize/deep-dives/slash-commands
Shortcuts that can be activated by prefacing your input with '/'
Slash commands are shortcuts that can be activated by typing '/' in a chat session (press cmd/ctrl + L (VS Code) or cmd/ctrl + J (JetBrains)), and selecting from the dropdown.
Slash commands can be combined with additional instructions, including [context providers](../custom-providers.mdx) or highlighted code.
## Prompts
### Assistant prompt blocks
The easiest way to add a slash command is by adding [`prompt` blocks](../../hub/blocks/block-types.md#prompts) to your assistant, which show up as slash commands in [Chat](../../features/chat/how-it-works.mdx).
### Prompt files
It is also possible to write your own slash command by defining a “.prompt file.” Prompt files can be as simple as a text file, but also include templating so that you can refer to files, URLs, highlighted code, and more.
Learn more about prompt files [here](./prompts.md)
### MCP Server prompts
Any prompts provided by [Model Context Protocol](https://modelcontextprotocol.io/introduction) servers are also accessible in chat as Slash Commands. See the [MCP Server Deep Dive](./mcp.mdx) for more details.
# VS Code Actions
Source: https://docs.continue.dev/customize/deep-dives/vscode-actions
### Other triggers for Actions (VS Code)
Currently all of these are only available in VS Code
To make common use cases even more accessible, we provide a handful of other ways to invoke actions in VS Code.
## Quick actions
Quick Actions are displayed as buttons above top-level classes and functions in your source code, letting you invoke actions with one click. They will edit that class or function, but nothing outside of it. They can also be customized with [.prompt files](./prompts.md) to perform custom actions.
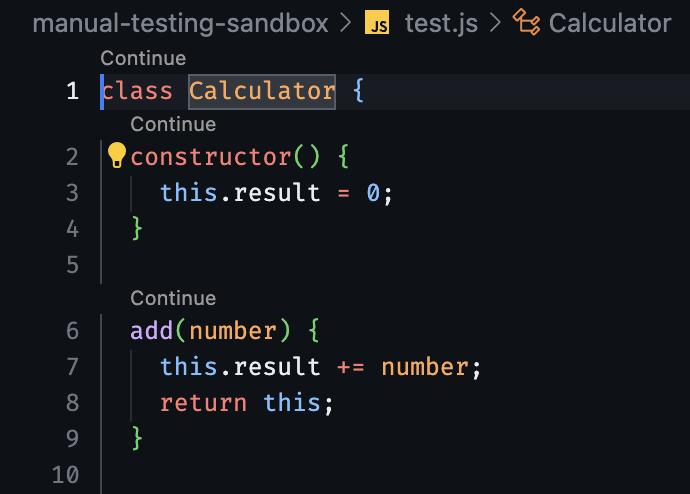
By default, quick actions are disabled, but can be enabled with the “Continue: Enable Quick Actions” in VS Code settings.
## Right click actions
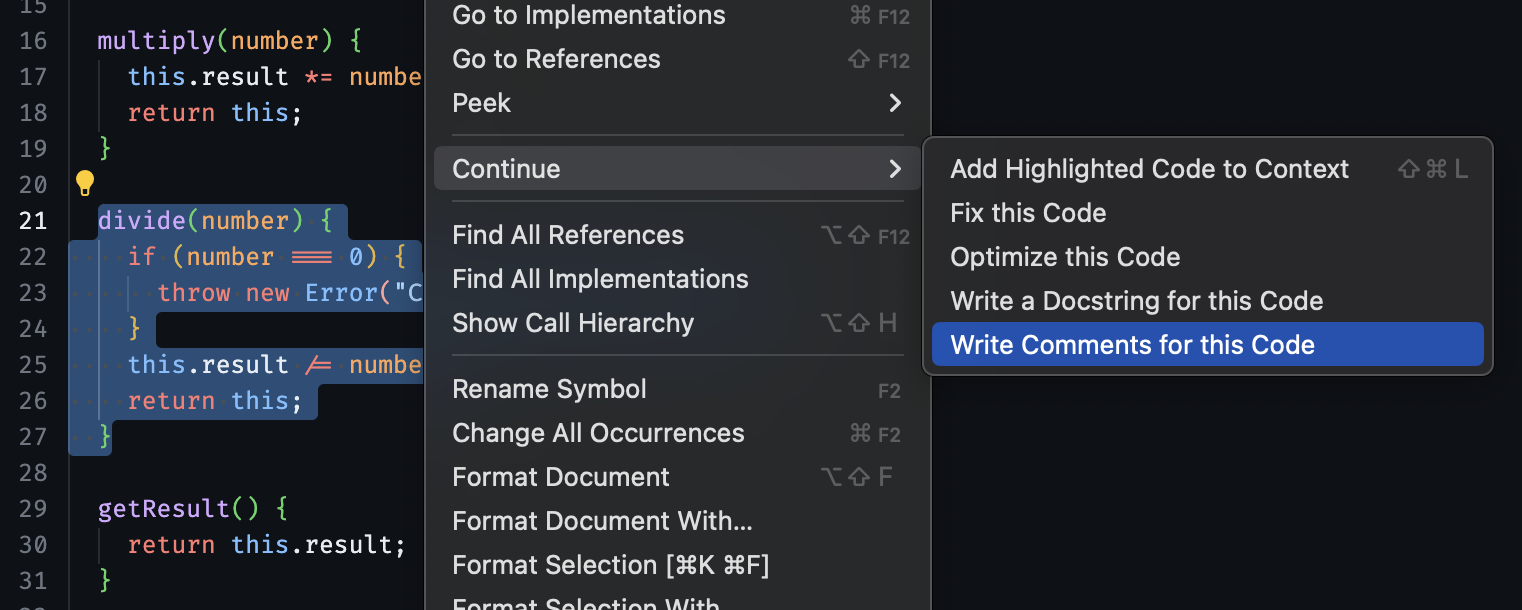
Right click actions let you highlight a desired region of code, right click, and then select an action from the dropdown menu.
The highlighted code you’ve selected will be included in your prompt alongside a pre-written set of instructions depending on the selected action. This is the only section of code that the model will attempt to edit.
Right click actions that generate inline diffs use the same prompt and response processing logic as [Edit](../../features/edit/how-it-works.mdx).
## Debug action
The debug action is a special built-in keyboard shortcut in the VS Code extension. Use cmd/ctrl + shift + R to instantly copy the contents of the most recent terminal output into the chat sidebar and get debugging advice. There is no additional, non-visible information sent to the language model.
```
I got the following error, can you please help explain how to fix it?
[ERROR_MESSAGE]
```
## Quick fixes
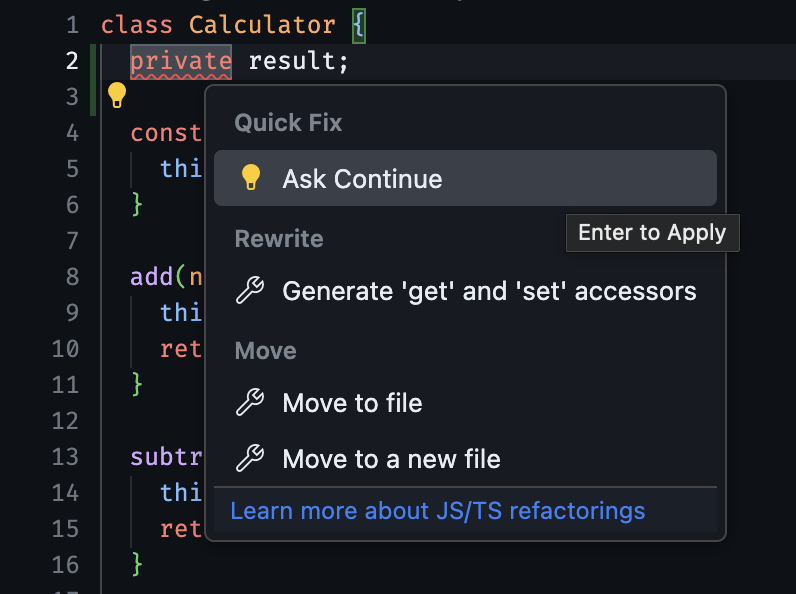
Whenever you see red/yellow underlines in your code indicating errors, you can place your cursor nearby and VS Code will display a lightbulb icon. Either clicking the lightbulb or using the keyboard shortcut cmd/ctrl + . will show a dropdown menu of quick fixes. One of these will be the “Ask Continue” action. Either click or use cmd/ctrl + . again and Continue will attempt to help solve the problem.
Similarly to the debug action, quick actions transparently inject a prompt into the chat window. When you select “Ask Continue”, the 3 lines above and below the error are sent to the chat followed by the question “How do I fix the following problem in the above code?: \[ERROR\_MESSAGE]”.
# Cloudflare
Source: https://docs.continue.dev/customize/model-providers/more/cloudflare
Cloudflare Workers AI can be used for both chat and tab autocompletion in Continue. Here is an example of Cloudflare Workers AI configuration:
```yaml title="config.yaml"
models:
- name: Llama 3 8B
provider: cloudflare
apiKey:
model: "@cf/meta/llama-3-8b-instruct"
contextLength: 2400
defaultCompletionOptions:
maxTokens: 500
roles:
- chat
env:
accountId: YOUR CLOUDFLARE ACCOUNT ID
- name: DeepSeek Coder 6.7b Instruct
provider: cloudflare
apiKey:
model: "@hf/thebloke/deepseek-coder-6.7b-instruct-awq"
contextLength: 2400
defaultCompletionOptions:
maxTokens: 500
roles:
- chat
env:
accountId: YOUR CLOUDFLARE ACCOUNT ID
- name: DeepSeek 7b
provider: cloudflare
apiKey:
model: "@hf/thebloke/deepseek-coder-6.7b-base-awq"
roles:
- autocomplete
env:
accountId: YOUR CLOUDFLARE ACCOUNT ID
```
```json title="config.json"
{
"models": [
{
"title": "Llama 3 8B",
"provider": "cloudflare",
"accountId": "YOUR CLOUDFLARE ACCOUNT ID",
"apiKey": "YOUR CLOUDFLARE API KEY",
"contextLength": 2400,
"completionOptions": {
"maxTokens": 500
},
"model": "@cf/meta/llama-3-8b-instruct"
},
{
"title": "DeepSeek Coder 6.7b Instruct",
"provider": "cloudflare",
"accountId": "YOUR CLOUDFLARE ACCOUNT ID",
"apiKey": "YOUR CLOUDFLARE API KEY",
"contextLength": 2400,
"completionOptions": {
"maxTokens": 500
},
"model": "@hf/thebloke/deepseek-coder-6.7b-instruct-awq"
}
],
"tabAutocompleteModel": {
"title": "DeepSeek 7b",
"provider": "cloudflare",
"accountId": "YOUR CLOUDFLARE ACCOUNT ID",
"apiKey": "YOUR CLOUDFLARE API KEY",
"model": "@hf/thebloke/deepseek-coder-6.7b-base-awq"
}
}
```
Visit the [Cloudflare dashboard](https://dash.cloudflare.com/) to [create an API key](https://developers.cloudflare.com/fundamentals/api/get-started/create-token/).
Review [available models](https://developers.cloudflare.com/workers-ai/models/) on Workers AI
[View the source](https://github.com/continuedev/continue/blob/main/core/llm/llms/Cloudflare.ts)
# Cohere
Source: https://docs.continue.dev/customize/model-providers/more/cohere
Before using Cohere, visit the [Cohere dashboard](https://dashboard.cohere.com/api-keys) to create an API key.
## Chat model
We recommend configuring **Command A** as your chat model.
```yaml title="config.yaml"
models:
- name: Command A 03-2025
provider: cohere
model: command-a-03-2025
apiKey:
```
```json title="config.json"
{
"models": [
{
"title": "Command A 03-2025",
"provider": "cohere",
"model": "command-a-03-2025",
"apiKey": ""
}
]
}
```
## Autocomplete model
Cohere currently does not offer any autocomplete models.
[Click here](../../model-roles/autocomplete.md) to see a list of autocomplete model providers.
## Embeddings model
We recommend configuring **embed-v4.0** as your embeddings model.
```yaml title="config.yaml"
models:
- name: Cohere Embed v4.0
provider: cohere
model: embed-v4.0
apiKey:
roles:
- embed
```
```json title="config.json"
{
"embeddingsProvider": {
"provider": "cohere",
"model": "embed-v4.0",
"apiKey": ""
}
}
```
## Reranking model
We recommend configuring **rerank-v3.5** as your reranking model.
```yaml title="config.yaml"
models:
- name: Cohere Rerank v3.5
provider: cohere
model: rerank-v3.5
apiKey:
roles:
- rerank
```
```json title="config.json"
{
"reranker": {
"name": "cohere",
"params": {
"model": "rerank-v3.5",
"apiKey": ""
}
}
}
```
# DeepInfra
Source: https://docs.continue.dev/customize/model-providers/more/deepinfra
[DeepInfra](https://deepinfra.com) provides inference for open-source models at very low cost. To get started with DeepInfra, obtain your API key [here](https://deepinfra.com/dash). Then, find the model you want to use [here](https://deepinfra.com/models?type=text-generation) and copy the name of the model. Continue can then be configured to use the `DeepInfra` LLM class, like the example here:
```yaml title="config.yaml"
models:
- name: DeepInfra
provider: deepinfra
model: mistralai/Mixtral-8x7B-Instruct-v0.1
apiKey:
```
```json title="config.json"
{
"models": [
{
"provider": "deepinfra",
"title": "DeepInfra",
"model": "mistralai/Mixtral-8x7B-Instruct-v0.1",
"apiKey": ""
}
]
}
```
[View the source](https://github.com/continuedev/continue/blob/main/core/llm/llms/DeepInfra.ts)
# Groq
Source: https://docs.continue.dev/customize/model-providers/more/groq
Check if your chosen model is still supported by referring to the [model
documentation](https://console.groq.com/docs/models). If a model has been
deprecated, you may encounter a 404 error when attempting to use it.
Groq provides the fastest available inference for open-source language models, including the entire Llama 3.1 family.
1. Obtain an API key [here](https://console.groq.com/keys)
2. Update your Continue config file like this:
```yaml title="config.yaml"
models:
- name: Llama 3.3 70b Versatile
provider: groq
model: llama-3.3-70b-versatile
apiKey:
roles:
- chat
```
```json title="config.json"
{
"models": [
{
"title": "Llama 3.3 70b Versatile",
"provider": "groq",
"model": "llama-3.3-70b-versatile",
"apiKey": ""
}
]
}
```
# HuggingFace Inference Endpoints
Source: https://docs.continue.dev/customize/model-providers/more/huggingfaceinferenceapi
Hugging Face Inference Endpoints are an easy way to setup instances of open-source language models on any cloud. Sign up for an account and add billing [here](https://huggingface.co/settings/billing), access the Inference Endpoints [here](https://ui.endpoints.huggingface.co), click on “New endpoint”, and fill out the form (e.g. select a model like [WizardCoder-Python-34B-V1.0](https://huggingface.co/WizardLM/WizardCoder-Python-34B-V1.0)), and then deploy your model by clicking “Create Endpoint”. Change `~/.continue/config.json` to look like this:
```yaml title="config.yaml"
models:
- name: Hugging Face Inference API
provider: huggingface-inference-api
model: MODEL_NAME
apiKey:
apiBase:
```
```json title="config.json"
{
"models": [
{
"title": "Hugging Face Inference API",
"provider": "huggingface-inference-api",
"model": "MODEL_NAME",
"apiKey": "",
"apiBase": ""
}
]
}
```
[View the source](https://github.com/continuedev/continue/blob/main/core/llm/llms/HuggingFaceInferenceAPI.ts)
# Llama.cpp
Source: https://docs.continue.dev/customize/model-providers/more/llamacpp
Run the llama.cpp server binary to start the API server. If running on a remote server, be sure to set host to 0.0.0.0:
```bash
.\server.exe -c 4096 --host 0.0.0.0 -t 16 --mlock -m models\meta\llama\codellama-7b-instruct.Q8_0.gguf
```
After it's up and running, change `~/.continue/config.json` to look like this:
```yaml title="config.yaml"
models:
- name: Llama CPP
provider: llama.cpp
model: MODEL_NAME
apiBase: http://localhost:8080
```
```json title="config.json"
{
"models": [
{
"title": "Llama CPP",
"provider": "llama.cpp",
"model": "MODEL_NAME",
"apiBase": "http://localhost:8080"
}
]
}
```
[View the source](https://github.com/continuedev/continue/blob/main/core/llm/llms/LlamaCpp.ts)
# LM Studio
Source: https://docs.continue.dev/customize/model-providers/more/lmstudio
[LM Studio](https://lmstudio.ai) is an application for Mac, Windows, and Linux that makes it easy to locally run open-source models and comes with a great UI. To get started with LM Studio, download from the website, use the UI to download a model, and then start the local inference server. Continue can then be configured to use the `LMStudio` LLM class:
```yaml title="config.yaml"
models:
- name: LM Studio
provider: lmstudio
model: llama2-7b
```
```json title="config.json"
{
"models": [
{
"title": "LM Studio",
"provider": "lmstudio",
"model": "llama2-7b"
}
]
}
```
### Embeddings model
LMStudio supports embeddings endpoints, and comes with the `nomic-ai/nomic-embed-text-v1.5-GGUF` model (as of Nov 2024, check your models)
```yaml title="config.yaml"
models:
- name: Nomic Embed Text
provider: lmstudio
model: nomic-ai/nomic-embed-text-v1.5-GGUF
roles:
- embed
```
```json title="config.json"
{
"embeddingsProvider": {
"provider": "lmstudio",
"model": "nomic-ai/nomic-embed-text-v1.5-GGUF"
}
}
```
## Setting up a remote instance
To configure a remote instance of LM Studio, add the `"apiBase"` property to your model in config.json:
```yaml title="config.yaml"
models:
- name: Nomic Embed Text
provider: lmstudio
model: nomic-ai/nomic-embed-text-v1.5-GGUF
roles:
- embed
```
```json title="config.json"
{
"embeddingsProvider": {
"provider": "lmstudio",
"model": "nomic-ai/nomic-embed-text-v1.5-GGUF"
}
}
```
This `apiBase` will now be used instead of the default `http://localhost:1234/v1`.
[View the source](https://github.com/continuedev/continue/blob/main/core/llm/llms/LMStudio.ts)
# NVIDIA
Source: https://docs.continue.dev/customize/model-providers/more/nvidia
***
## title: NVIDIA
[View the
docs](https://docs.nvidia.com/nim/large-language-models/latest/getting-started.html#option-1-from-api-catalog)
to learn how to get an API key.
## Chat model
We recommend configuring **Nemotron-4-340B-Instruct** as your chat model.
```yaml title="config.yaml"
models:
- name: Nemotron-4-340B-Instruct
provider: nvidia
model: nvidia-nemotron-4-340b-instruct
apiKey:
```
```json title="config.json"
{
"models": [
{
"title": "Nemotron-4-340B-Instruct",
"provider": "nvidia",
"model": "nvidia-nemotron-4-340b-instruct",
"apiKey": ""
}
]
}
```
## Autocomplete model
NVIDIA currently does not offer any autocomplete models.
[Click here](../../model-roles/autocomplete.md) to see a list of autocomplete model providers.
## Embeddings model
We recommend configuring **NVIDIA Retrieval QA Mistral 7B** as your embeddings model.
```yaml title="config.yaml"
models:
- name: Nvidia Embedder
provider: nvidia
model: nvidia/nv-embedqa-mistral-7b-v2
apiKey:
roles:
- embed
```
```json title="config.json"
{
"embeddingsProvider": {
"provider": "nvidia",
"model": "nvidia/nv-embedqa-mistral-7b-v2",
"apiKey": ""
}
}
```
## Reranking model
NVIDIA currently does not offer any reranking models.
[Click here](../../model-roles/reranking.mdx) to see a list of reranking model providers.
# OpenRouter
Source: https://docs.continue.dev/customize/model-providers/more/openrouter
OpenRouter is a unified interface for commercial and open-source models, giving you access to the best models at the best prices. You can sign up [here](https://openrouter.ai/signup), create your API key on the [keys page](https://openrouter.ai/keys), and then choose a model from the [list of supported models](https://openrouter.ai/models).
Change `~/.continue/config.json` to look like the following.
```yaml title="config.yaml"
models:
- name: OpenRouter LLaMA 70 8B
provider: openrouter
model: meta-llama/llama-3-70b-instruct
apiBase: https://openrouter.ai/api/v1
apiKey:
```
```json title="config.json"
{
"models": [
{
"title": "OpenRouter LLaMA 70 8B",
"provider": "openrouter",
"model": "meta-llama/llama-3-70b-instruct",
"apiBase": "https://openrouter.ai/api/v1",
"apiKey": ""
}
]
}
```
To utilize features such as provider preferences or model routing configuration, include these parameters inside the `models[].requestsOptions.extraBodyProperties` field of your plugin config.
For example, to prevent extra long prompts from being compressed, you can explicitly turn off the feature like so:
```yaml title="config.yaml"
models:
- name: Example Model
provider: exampleProvider
model: example-model
requestOptions:
extraBodyProperties:
transforms: []
```
```json title="config.json"
{
"models": [
{
"title": "Example Model",
"provider": "exampleProvider",
"model": "example-model",
"requestOptions": {
"extraBodyProperties": {
"transforms": []
}
}
}
]
}
```
Learn more about available settings [here](https://openrouter.ai/docs).
# Together AI
Source: https://docs.continue.dev/customize/model-providers/more/together
The Together API is a cloud platform for running large AI models. You can sign up [here](https://api.together.xyz/signup), copy your API key on the initial welcome screen, and then hit the play button on any model from the [Together Models list](https://docs.together.ai/docs/serverless-models). Change `~/.continue/config.json` to look like this:
```yaml title="config.yaml"
models:
- name: Together Qwen2.5 Coder
provider: together
model: Qwen/Qwen2.5-Coder-32B-Instruct
apiKey:
```
```json title="config.json"
{
"models": [
{
"title": "Together Qwen2.5 Coder",
"provider": "together",
"model": "Qwen/Qwen2.5-Coder-32B-Instruct",
"apiKey": ""
}
]
}
```
[View the source](https://github.com/continuedev/continue/blob/main/core/llm/llms/Together.ts)
# Anthropic
Source: https://docs.continue.dev/customize/model-providers/top-level/anthropic
You can get an API key from the [Anthropic
console](https://console.anthropic.com/account/keys).
## Chat model
We recommend configuring **Claude 4 Sonnet** as your chat model.
```yaml title="config.yaml"
models:
- name: Claude 4 Sonnet
provider: anthropic
model: claude-sonnet-4-20250514
apiKey:
```
```json title="config.json"
{
"models": [
{
"title": "Claude 4 Sonnet",
"provider": "anthropic",
"model": "claude-sonnet-4-latest",
"apiKey": ""
}
]
}
```
## Autocomplete model
Anthropic currently does not offer any autocomplete models.
[Click here](../../model-roles/autocomplete.md) to see a list of autocomplete model providers.
## Embeddings model
Anthropic currently does not offer any embeddings models.
[Click here](../../model-roles/embeddings.mdx) to see a list of embeddings model providers.
## Reranking model
Anthropic currently does not offer any reranking models.
[Click here](../../model-roles/reranking.mdx) to see a list of reranking model providers.
## Prompt caching
Anthropic supports [prompt caching with Claude](https://docs.anthropic.com/en/docs/build-with-claude/prompt-caching), which allows Claude models to cache system messages and conversation history between requests to improve performance and reduce costs.
Prompt caching is generally available for:
* Claude 4 Sonnet
* Claude 3.7 Sonnet
* Claude 3.5 Sonnet
* Claude 3.5 Haiku
To enable caching of the system message and the turn-by-turn conversation, update your model configuration as follows:
```yaml title="config.yaml"
models:
- name: Anthropic
provider: anthropic
model: claude-sonnet-4-20250514
apiKey:
roles:
- chat
defaultCompletionOptions:
promptCaching: true
```
```json title="config.json"
{
"models": [
{
"cacheBehavior": {
"cacheSystemMessage": true,
"cacheConversation": true
},
"title": "Anthropic",
"provider": "anthropic",
"model": "claude-sonnet-4-latest",
"defaultCompletionOptions": {
"promptCaching": true
},
"apiKey": ""
}
]
}
```
# Azure AI Foundry
Source: https://docs.continue.dev/customize/model-providers/top-level/azure
Azure AI Foundry is a cloud-based service that provides access to models from OpenAI, Mistral AI, and others, integrated with the security and enterprise features of the Microsoft Azure platform. To get started, create an Azure AI Foundry resource in the [Azure portal](https://portal.azure.com).
For details on OpenAI model setup, see [Azure OpenAI Service configuration](#azure-openai-service-configuration).
## Chat model
We recommend configuring **GPT-4o** as your chat model.
```yaml title="config.yaml"
models:
- name: GPT-4o
provider: azure
model: gpt-4o
apiBase:
apiKey: # If you use subscription key, try using Azure gateway to rename it apiKey
env:
deployment:
apiType: azure-foundry # Or "azure-openai" if using OpenAI models
```
```json title="config.json"
{
"models": [{
"title": "GPT-4o",
"provider": "azure",
"model": "gpt-4o",
"apiBase": "",
"deployment": "",
"apiKey": "", // If you use subscription key, try using Azure gateway to rename it apiKey
"apiType": "azure-foundry" // Or "azure-openai" if using OpenAI models
}]
}
```
## Autocomplete model
We recommend configuring **Codestral** as your autocomplete model. If you use Azure AI Foundry to deploy Codestral:
```yaml title="config.yaml"
models:
- name: Codestral
provider: mistral
model: codestral-latest
apiBase: https://..models.ai.azure.com/v1
apiKey:
roles:
- autocomplete
```
```json title="config.json"
{
"tabAutocompleteModel": {
"title": "Codestral",
"provider": "mistral",
"model": "codestral-latest",
"apiBase": "https://..models.ai.azure.com/v1",
"apiKey": ""
}
}
```
## Embeddings model
We recommend configuring **text-embedding-3-large** as your embeddings model.
```yaml title="config.yaml"
models:
- name: Text Embedding-3 Large
provider: azure
model: text-embedding-3-large
apiBase:
apiKey:
env:
deployment:
apiType: azure
```
```json title="config.json"
{
"embeddingsProvider": {
"provider": "azure",
"model": "text-embedding-3-large",
"apiBase": "",
"deployment": "",
"apiKey": "",
"apiType": "azure-foundry" // Or "azure-openai" if using OpenAI models
}
}
```
## Reranking model
Azure OpenAI currently does not offer any reranking models.
[Click here](../../model-roles/reranking.mdx) to see a list of reranking models.
## Privacy
If you'd like to use OpenAI models but are concerned about privacy, you can use the Azure OpenAI service, which is GDPR and HIPAA compliant.
**Getting access:** [Click
here](https://azure.microsoft.com/en-us/products/ai-services/openai-service)
to apply for access to the Azure OpenAI service. Response times are typically
within a few days.
## Azure OpenAI Service configuration
Azure OpenAI Service requires a handful of additional parameters to be configured, such as a deployment name and API base URL.
To find this information in *Azure AI Foundry*, first select the model that you would like to connect. Then visit *Endpoint* > *Target URI*.
For example, a Target URI of `https://just-an-example.openai.azure.com/openai/deployments/gpt-4o-july/chat/completions?api-version=2023-03-15-preview` would map to the following:
```yaml title="config.yaml"
models:
- name: GPT-4o Azure
model: gpt-4o
provider: azure
apiBase: https://just-an-example.openai.azure.com
apiKey:
env:
apiVersion: 2023-03-15-preview
deployment: gpt-4o-july
apiType: azure-openai
```
```json title="config.json"
{
"title": "GPT-4o Azure",
"model": "gpt-4o",
"provider": "azure",
"apiBase": "https://just-an-example.openai.azure.com",
"deployment": "gpt-4o-july",
"apiVersion": "2023-03-15-preview",
"apiKey": "",
"apiType": "azure-openai"
}
```
# Amazon Bedrock
Source: https://docs.continue.dev/customize/model-providers/top-level/bedrock
Amazon Bedrock is a fully managed service on AWS that provides access to foundation models from various AI companies through a single API.
## Chat model
We recommend configuring **Claude 3.7 Sonnet** as your chat model.
```yaml title="config.yaml"
models:
- name: Claude 3.7 Sonnet
provider: bedrock
model: us.anthropic.claude-3-7-sonnet-20250219-v1:0
env:
region: us-east-1
profile: bedrock
roles:
- chat
```
```json title="config.json"
{
"models": [
{
"title": "Claude 3.7 Sonnet",
"provider": "bedrock",
"model": "us.anthropic.claude-3-7-sonnet-20250219-v1:0",
"region": "us-east-1",
"profile": "bedrock"
}
]
}
```
> If you run into the following error when connecting to the new Claude 3.5 Sonnet 2 models from AWS - `400 Invocation of model ID anthropic.claude-3-5-sonnet-20241022-v2:0 with on-demand throughput isn't supported. Retry your request with the ID or ARN of an inference profile that contains this model.`
> You can fix this using the following config:
```yaml title="config.yaml"
models:
- name: Claude 3.5 Sonnet
provider: bedrock
model: us.anthropic.claude-3-5-sonnet-20241022-v2:0
env:
region: us-east-1
profile: bedrock
roles:
- chat
```
```json title="config.json"
{
"models": [
{
"title": "Claude 3.5 Sonnet",
"provider": "bedrock",
"model": "us.anthropic.claude-3-5-sonnet-20241022-v2:0",
"region": "us-east-1",
"profile": "bedrock"
}
]
}
```
## Autocomplete model
Bedrock currently does not offer any autocomplete models. However, [Codestral from Mistral](https://mistral.ai/news/codestral-2501/) and [Point from Poolside](https://aws.amazon.com/bedrock/poolside/) will be supported in the near future.
In the meantime, you can view a list of autocomplete model providers [here](../../model-roles/autocomplete.md).
## Embeddings model
We recommend configuring [`amazon.titan-embed-text-v2:0`](https://docs.aws.amazon.com/bedrock/latest/devguide/models.html#amazon.titan-embed-text-v2-0) as your embeddings model.
```yaml title="config.yaml"
models:
- name: Embeddings Model
provider: bedrock
model: amazon.titan-embed-text-v2:0
env:
region: us-west-2
roles:
- embed
```
```json title="config.json"
{
"embeddingsProvider": {
"title": "Embeddings Model",
"provider": "bedrock",
"model": "amazon.titan-embed-text-v2:0",
"region": "us-west-2"
}
}
```
## Reranking model
We recommend configuring `cohere.rerank-v3-5:0` as your reranking model, you may also use `amazon.rerank-v1:0`.
```yaml title="config.yaml"
models:
- name: Bedrock Reranker
provider: bedrock
model: cohere.rerank-v3-5:0
env:
region: us-west-2
roles:
- rerank
```
```json title="config.json"
{
"reranker": {
"name": "bedrock",
"params": {
"model": "cohere.rerank-v3-5:0",
"region": "us-west-2"
}
}
}
```
## Prompt caching
Bedrock allows Claude models to cache tool payloads, system messages, and chat
messages between requests. Enable this behavior by adding
`promptCaching: true` under `defaultCompletionOptions` in your model
configuration.
Prompt caching is generally available for:
* Claude 3.7 Sonnet
* Claude 3.5 Haiku
* Amazon Nova Micro
* Amazon Nova Lite
* Amazon Nova Pro
Customers who were granted access to Claude 3.5 Sonnet v2 during the prompt
caching preview will retain that access, but it cannot be enabled for new users
on that model.
```yaml title="config.yaml"
models:
- name: Claude 3.7 Sonnet
provider: bedrock
model: us.anthropic.claude-3-7-sonnet-20250219-v1:0
defaultCompletionOptions:
promptCaching: true
```
Prompt caching is not supported in JSON configuration files, so use the YAML syntax above to enable it.
## Authentication
Authentication will be through temporary or long-term credentials in
`~/.aws/credentials` under a configured profile (e.g. "bedrock").
```title="~/.aws/credentials
[bedrock]
aws_access_key_id = abcdefg
aws_secret_access_key = hijklmno
aws_session_token = pqrstuvwxyz # Optional: means short term creds.
```
## Custom Imported Models
To setup Bedrock using custom imported models, add the following to your config file:
```yaml title="config.yaml"
models:
- name: AWS Bedrock deepseek-coder-6.7b-instruct
provider: bedrockimport
model: deepseek-coder-6.7b-instruct
env:
region: us-west-2
profile: bedrock
modelArn: arn:aws:bedrock:us-west-2:XXXXX:imported-model/XXXXXX
```
```json title="config.json"
{
"models": [
{
"title": "AWS Bedrock deepseek-coder-6.7b-instruct",
"provider": "bedrockimport",
"model": "deepseek-coder-6.7b-instruct",
"modelArn": "arn:aws:bedrock:us-west-2:XXXXX:imported-model/XXXXXX",
"region": "us-west-2",
"profile": "bedrock"
}
]
}
```
Authentication will be through temporary or long-term credentials in
\~/.aws/credentials under a configured profile (e.g. "bedrock").
```title="~/.aws/credentials
[bedrock]
aws_access_key_id = abcdefg
aws_secret_access_key = hijklmno
aws_session_token = pqrstuvwxyz # Optional: means short term creds.
```
# DeepSeek
Source: https://docs.continue.dev/customize/model-providers/top-level/deepseek
You can get an API key from the [DeepSeek console](https://www.deepseek.com/).
## Chat model
We recommend configuring **DeepSeek Chat** as your chat model.
```yaml title="config.yaml"
models:
- name: DeepSeek Chat
provider: deepseek
model: deepseek-chat
apiKey:
```
```json title="config.json"
{
"models": [
{
"title": "DeepSeek Chat",
"provider": "deepseek",
"model": "deepseek-chat",
"apiKey": ""
}
]
}
```
## Autocomplete model
We recommend configuring **DeepSeek Coder** as your autocomplete model.
```yaml title="config.yaml"
models:
- name: DeepSeek Coder
provider: deepseek
model: deepseek-coder
apiKey:
roles:
- autocomplete
```
```json title="config.json"
{
"tabAutocompleteModel": {
"title": "DeepSeek Coder",
"provider": "deepseek",
"model": "deepseek-coder",
"apiKey": ""
}
}
```
## Embeddings model
DeepSeek currently does not offer any embeddings models.
[Click here](../../model-roles/embeddings.mdx) to see a list of embeddings model providers.
## Reranking model
DeepSeek currently does not offer any reranking models.
[Click here](../../model-roles/reranking.mdx) to see a list of reranking model providers.
# Gemini
Source: https://docs.continue.dev/customize/model-providers/top-level/gemini
You can get an API key from the [Google AI
Studio](https://aistudio.google.com/).
## Chat model
We recommend configuring **Gemini 2.0 Flash** as your chat model.
```yaml title="config.yaml"
models:
- name: Gemini 2.0 Flash
provider: gemini
model: gemini-2.0-flash
apiKey:
```
```json title="config.json"
{
"models": [
{
"title": "Gemini 2.0 Flash",
"provider": "gemini",
"model": "gemini-2.0-flash",
"apiKey": ""
}
]
}
```
## Autocomplete model
Gemini currently does not offer any autocomplete models.
[Click here](../../model-roles/autocomplete.md) to see a list of autocomplete model providers.
## Embeddings model
We recommend configuring **text-embedding-004** as your embeddings model.
```yaml title="config.yaml"
models:
- name: Gemini Embeddings
provider: gemini
model: models/text-embedding-004
apiKey:
roles:
- embed
```
```json title="config.json"
{
"embeddingsProvider": {
"provider": "gemini",
"model": "models/text-embedding-004",
"apiKey": ""
}
}
```
## Reranking model
Gemini currently does not offer any reranking models.
[Click here](../../model-roles/reranking.mdx) to see a list of reranking model providers.
# Inception
Source: https://docs.continue.dev/customize/model-providers/top-level/inception
You can get an API key from the [Inception
Dashboard](https://platform.inceptionlabs.ai/dashboard/api-keys).
## Chat model
We recommend configuring **Mercury Coder Small** as your chat model.
```yaml title="config.yaml"
models:
- uses: inceptionlabs/mercury-coder-small
with:
INCEPTION_API_KEY: ${{ secrets.INCEPTION_API_KEY }}
```
```json title="config.json"
{
"models": [
{
"title": "Mercury Coder Small",
"provider": "inception",
"model": "mercury-coder-small",
"apiKey": ""
}
]
}
```
## Autocomplete model
We also recommend configuring **Mercury Coder Small** as your autocomplete model.
```yaml title="config.yaml"
models:
- uses: inceptionlabs/mercury-coder-small
with:
INCEPTION_API_KEY: ${{ secrets.INCEPTION_API_KEY }}
```
```json title="config.json"
{
"tabAutocompleteModel": [
{
"title": "Mercury Coder Small",
"provider": "inception",
"model": "mercury-coder-small",
"apiKey": ""
}
]
}
```
## Embeddings model
Inception currently does not offer any embeddings models.
[Click here](../../model-roles/embeddings.mdx) to see a list of embeddings model providers.
## Reranking model
Inception currently does not offer any reranking models.
[Click here](../../model-roles/reranking.mdx) to see a list of reranking model providers.
# Mistral
Source: https://docs.continue.dev/customize/model-providers/top-level/mistral
You can get an API key from the [Mistral
Dashboard](https://console.mistral.ai). Note that the API key for Codestral
(codestral.mistral.ai) is different from for all other models
(api.mistral.ai). If you are using a Codestral API key, you should set the
`apiBase` to `https://codestral.mistral.ai/v1`. Otherwise, we will default to
using `https://api.mistral.ai/v1`.
## Chat model
We recommend configuring **Mistral Large** as your chat model.
```yaml title="config.yaml"
models:
- name: Mistral Large
provider: mistral
model: mistral-large-latest
apiKey:
roles:
- chat
```
```json title="config.json"
{
"models": [
{
"title": "Mistral Large",
"provider": "mistral",
"model": "mistral-large-latest",
"apiKey": ""
}
]
}
```
## Autocomplete model
We recommend configuring **Codestral** as your autocomplete model.
```yaml title="config.yaml"
models:
- name: Codestral
provider: mistral
model: codestral-latest
# apiBase: https://codestral.mistral.ai/v1 # Do this if you are using a Codestral API key
roles:
- autocomplete
```
```json title="config.json"
{
"tabAutocompleteModel": {
"title": "Codestral",
"provider": "mistral",
"model": "codestral-latest"
// "apiBase": "https://codestral.mistral.ai/v1" // Do this if you are using a Codestral API key
}
}
```
## Embeddings model
We recommend configuring **Mistral Embed** as your embeddings model.
```yaml title="config.yaml"
models:
- name: Mistral Embed
provider: mistral
model: mistral-embed
apiKey:
apiBase: https://api.mistral.ai/v1
roles:
- embed
```
```json title="config.json"
{
"embeddingsProvider": {
"provider": "mistral",
"model": "mistral-embed",
"apiKey": "",
"apiBase": "https://api.mistral.ai/v1"
}
}
```
## Reranking model
Mistral currently does not offer any reranking models.
[Click here](../../model-roles/reranking.mdx) to see a list of reranking model providers.
# Ollama
Source: https://docs.continue.dev/customize/model-providers/top-level/ollama
Ollama is an open-source tool that allows to run large language models (LLMs) locally on their own computers. To use Ollama, you can install it [here](https://ollama.ai/download) and download the model you want to run with the `ollama run` command.
## Chat model
We recommend configuring **Llama3.1 8B** as your chat model.
```yaml title="config.yaml"
models:
- name: Llama3.1 8B
provider: ollama
model: llama3.1:8b
```
```json title="config.json"
{
"models": [
{
"title": "Llama3.1 8B",
"provider": "ollama",
"model": "llama3.1:8b"
}
]
}
```
## Autocomplete model
We recommend configuring **Qwen2.5-Coder 1.5B** as your autocomplete model.
```yaml title="config.yaml"
models:
- name: Qwen2.5-Coder 1.5B
provider: ollama
model: qwen2.5-coder:1.5b-base
roles:
- autocomplete
```
```json title="config.json"
{
"tabAutocompleteModel": {
"title": "Qwen2.5-Coder 1.5B",
"provider": "ollama",
"model": "qwen2.5-coder:1.5b-base"
}
}
```
## Embeddings model
We recommend configuring **Nomic Embed Text** as your embeddings model.
```yaml title="config.yaml"
models:
- name: Nomic Embed Text
provider: ollama
model: nomic-embed-text
roles:
- embed
```
```json title="config.json"
{
"embeddingsProvider": {
"provider": "ollama",
"model": "nomic-embed-text"
}
}
```
## Reranking model
Ollama currently does not offer any reranking models.
[Click here](../../model-roles/reranking.mdx) to see a list of reranking model providers.
## Using a remote instance
To configure a remote instance of Ollama, add the `"apiBase"` property to your model in config.json:
```yaml title="config.yaml"
models:
- name: Llama3.1 8B
provider: ollama
model: llama3.1:8b
apiBase: http://:11434
```
```json title="config.json"
{
"models": [
{
"title": "Llama3.1 8B",
"provider": "ollama",
"model": "llama3.1:8b",
"apiBase": "http://:11434"
}
]
}
```
# OpenAI
Source: https://docs.continue.dev/customize/model-providers/top-level/openai
You can get an API key from the [OpenAI
console](https://platform.openai.com/account/api-keys)
## Chat model
We recommend configuring **GPT-4o** as your chat model.
```yaml title="config.yaml"
models:
- name: GPT-4o
provider: openai
model: gpt-4o
apiKey:
```
```json title="config.json"
{
"models": [
{
"title": "GPT-4o",
"provider": "openai",
"model": "gpt-4o",
"apiKey": ""
}
]
}
```
## Autocomplete model
OpenAI currently does not offer any autocomplete models.
[Click here](../../model-roles/autocomplete.md) to see a list of autocomplete model providers.
## Embeddings model
We recommend configuring **text-embedding-3-large** as your embeddings model.
```yaml title="config.yaml"
models:
- name: OpenAI Embeddings
provider: openai
model: text-embedding-3-large
apiKey:
roles:
- embed
```
```json title="config.json"
{
"embeddingsProvider": {
"provider": "openai",
"model": "text-embedding-3-large",
"apiKey": ""
}
}
```
## Reranking model
OpenAI currently does not offer any reranking models.
[Click here](../../model-roles/reranking.mdx) to see a list of reranking model providers.
## OpenAI compatible servers / APIs
OpenAI compatible servers
* [KoboldCpp](https://github.com/lostruins/koboldcpp)
* [text-gen-webui](https://github.com/oobabooga/text-generation-webui/tree/main/extensions/openai#setup--installation)
* [FastChat](https://github.com/lm-sys/FastChat/blob/main/docs/openai_api.md)
* [LocalAI](https://localai.io/basics/getting_started/)
* [llama-cpp-python](https://github.com/abetlen/llama-cpp-python#web-server)
* [TensorRT-LLM](https://github.com/NVIDIA/trt-llm-as-openai-windows?tab=readme-ov-file#examples)
* [vLLM](https://docs.vllm.ai/en/latest/serving/openai_compatible_server.html)
* [BerriAI/litellm](https://github.com/BerriAI/litellm)
OpenAI compatible APIs
* [Anyscale Endpoints](https://github.com/continuedev/deploy-os-code-llm#others)
* [Anyscale Private Endpoints](https://github.com/continuedev/deploy-os-code-llm#anyscale-private-endpoints)
If you are using an OpenAI compatible server / API, you can change the `apiBase` like this:
```yaml title="config.yaml"
models:
- name: OpenAI-compatible server / API
provider: openai
model: MODEL_NAME
apiBase: http://localhost:8000/v1
apiKey:
```
```json title="config.json"
{
"models": [
{
"title": "OpenAI-compatible server / API",
"provider": "openai",
"model": "MODEL_NAME",
"apiKey": "",
"apiBase": "http://localhost:8000/v1"
}
]
}
```
To force usage of `chat/completions` instead of `completions` endpoint you can set:
```yaml title="config.yaml"
models:
- name: OpenAI-compatible server / API
provider: openai
model: MODEL_NAME
apiBase: http://localhost:8000/v1
useLegacyCompletionsEndpoint: true
```
```json title="config.json"
{
"models": [
{
"title": "OpenAI-compatible server / API",
"provider": "openai",
"model": "MODEL_NAME",
"apiBase": "http://localhost:8000/v1",
"useLegacyCompletionsEndpoint": true
}
]
}
```
# Vertex AI
Source: https://docs.continue.dev/customize/model-providers/top-level/vertexai
You need to enable the [Vertex AI
API](https://console.cloud.google.com/marketplace/product/google/aiplatform.googleapis.com)
and set up the [Google Application Default
Credentials](https://cloud.google.com/docs/authentication/provide-credentials-adc).
## Chat model
We recommend configuring **Claude 3.5 Sonnet** as your chat model.
```yaml title="config.yaml"
models:
- name: Claude 3.5 Sonnet
provider: vertexai
model: claude-3-5-sonnet-20240620
env:
projectId:
region: us-east5
```
```json title="config.json"
{
"models": [
{
"title": "Claude 3.5 Sonnet",
"provider": "vertexai",
"model": "claude-3-5-sonnet-20240620",
"projectId": "[PROJECT_ID]",
"region": "us-east5"
}
]
}
```
## Autocomplete model
We recommend configuring **Codestral** or **code-gecko** as your autocomplete model.
```yaml title="config.yaml"
models:
- name: Codestral (Vertex AI)
provider: vertexai
model: codestral
roles:
- autocomplete
env:
projectId:
region: us-central1
```
```json title="config.json"
{
"tabAutocompleteModel": {
"title": "Codestral (Vertex AI)",
"provider": "vertexai",
"model": "codestral",
"projectId": "[PROJECT_ID]",
"region": "us-central1"
}
}
```
## Embeddings model
We recommend configuring **text-embedding-004** as your embeddings model.
```yaml title="config.yaml"
models:
- name: Text Embedding-004
provider: vertexai
model: text-embedding-004
env:
projectId:
region: us-central1
roles:
- embed
```
```json title="config.json"
{
"embeddingsProvider": {
"provider": "vertexai",
"model": "text-embedding-004",
"projectId": "[PROJECT_ID]",
"region": "us-central1"
}
}
```
## Reranking model
Vertex AI currently does not offer any reranking models.
[Click here](../../model-roles/reranking.mdx) to see a list of reranking model providers.
## Express mode
You can use VertexAI in [express mode](https://cloud.google.com/vertex-ai/generative-ai/docs/start/express-mode/overview) by only providing an API Key. Only some Gemini models are supported in express mode for now.
```yaml title="config.yaml"
models:
- name: Gemini 2.5 Flash - VertexAI
provider: vertexai
model: gemini-2.5-flash
apiKey: ${{ secrets.GOOGLE_CLOUD_API_KEY }}
```
```json title="config.json"
{
"models": [
{
"title": "Gemini 2.5 Flash - VertexAI",
"provider": "vertexai",
"model": "gemini-2.5-flash",
"apiKey": "[YOUR_GOOGLE_CLOUD_API_KEY]",
}
]
}
```
# xAI
Source: https://docs.continue.dev/customize/model-providers/top-level/xAI
You can get an API key from the [xAI console](https://console.x.ai/)
## Chat model
We recommend configuring **grok-4** as your chat model. For information on other available models, visit [xAI Documentation](https://docs.x.ai/docs/models).
Add the [xAI Grok 4 model block](https://hub.continue.dev/xai/grok-4) on the hub.
```yaml title="config.yaml"
models:
- name: Grok 4
provider: xAI
model: grok-4
apiKey:
```
```json title="config.json"
{
"models": [
{
"title": "Grok 4",
"provider": "xAI",
"model": "grok-4",
"apiKey": ""
}
]
}
```
## Autocomplete model
xAI currently does not offer any autocomplete models.
[Click here](../../model-roles/autocomplete.md) to see a list of autocomplete model providers.
## Embeddings model
xAI currently does not offer any embeddings models.
[Click here](../../model-roles/embeddings.mdx) to see a list of embeddings model providers.
## Reranking model
xAI currently does not offer any reranking models.
[Click here](../../model-roles/reranking.mdx) to see a list of reranking model providers.
# Intro to Roles
Source: https://docs.continue.dev/customize/model-roles/00-intro
Apply model role
Models in Continue can be configured to be used for various roles in the extension.
* [`chat`](./chat.mdx): Used for chat conversations in the extension sidebar
* [`autocomplete`](./autocomplete.md): Used for autocomplete code suggestions in the editor
* [`edit`](./edit.mdx): Used to generate code based on edit prompts
* [`apply`](./apply.mdx): Used to decide how to apply edits to a file
* [`embed`](./embeddings.mdx): Used to generate embeddings used for vector search (@Codebase and @Docs context providers)
* [`rerank`](./reranking.mdx): Used to rerank results from vector search
These roles can be specified for a `config.yaml` model block using `roles`. See the [YAML Specification](/reference#models) for more details.
## Selecting model roles
You can control which of the models in your assistant for a given role will be currently used for that role. Above the main input, click the 3 dots and then the cube icon to expand the `Models` section. Then you can use the dropdowns to select an active model for each role.

`roles` are not explicitly defined within `config.json` (deprecated) - they
are infered by the top level keys like `embeddingsProvider`
# Apply Role
Source: https://docs.continue.dev/customize/model-roles/apply
Apply model role
When editing code, Chat and Edit model output often doesn't clearly align with existing code. A model with the `apply` role is used to generate a more precise diff to apply changes to a file.
## Recommended Apply models
We recommend [Morph Fast Apply](https://morphllm.com) or [Relace's Instant Apply model](https://hub.continue.dev/relace/instant-apply) for the fastest Apply experience. You can sign up for Morph's free tier [here](https://morphllm.com/dashboard) or get a Relace API key [here](https://app.relace.ai/settings/api-keys).
However, most Chat models can also be used for applying code changes. We recommend smaller/cheaper models for the task, such as Claude 3.5 Haiku.
Explore all apply models in [the
Hub](https://hub.continue.dev/explore/models?roles=apply)
## Prompt templating
You can customize the prompt template used for applying code changes by setting the `promptTemplates.apply` property in your model configuration. Continue uses [Handlebars syntax](https://handlebarsjs.com/guide/) for templating.
Available variables for the apply template:
* `{{{original_code}}}` - The original code before changes
* `{{{new_code}}}` - The new code after changes
Example:
```yaml
models:
- name: My Custom Apply Template
provider: anthropic
model: claude-3-5-sonnet-latest
promptTemplates:
apply: |
Original: {{{original_code}}}
New: {{{new_code}}}
Please generate the final code without any markers or explanations.
```
# Autocomplete Role
Source: https://docs.continue.dev/customize/model-roles/autocomplete
Autocomplete model role
An "autocomplete model" is an LLM that is trained on a special format called fill-in-the-middle (FIM). This format is designed to be given the prefix and suffix of a code file and predict what goes between. This task is very specific, which on one hand means that the models can be smaller (even a 3B parameter model can perform well). On the other hand, this means that Chat models, though larger, will often perform poorly even with extensive prompting.
In Continue, autocomplete models are used to display inline [Autocomplete](../../features/autocomplete/quick-start) suggestions as you type. Autocomplete models are designated by adding the `autocomplete` to the model's `roles` in `config.yaml`.
## Recommended Autocomplete models
Visit the [Autocomplete Deep Dive](../deep-dives/autocomplete.mdx) for recommended models and more details.
## Prompt templating
You can customize the prompt template used when autocomplete happens by setting the `promptTemplates.autocomplete` property in your model configuration. Continue uses [Handlebars syntax](https://handlebarsjs.com/guide/) for templating.
Available variables for the apply template:
* `{{{prefix}}}` - the code before your cursor
* `{{{suffix}}}` - the code after your cursor
* `{{{filename}}}` - the name of the file your cursor currently is
* `{{{reponame}}}` - the name of the folder where the codebase is
* `{{{language}}}` - the name of the programming language in full (ex. Typescript)
Example:
```yaml
models:
- name: My Custom Autocomplete Template
provider: ollama
model: qwen2.5-coder:1.5b
promptTemplates:
autocomplete: |
`
globalThis.importantFunc = importantFunc
<|fim_prefix|>{{{prefix}}}<|fim_suffix|>{{{suffix}}}<|fim_middle|>
`
```
# Chat Role
Source: https://docs.continue.dev/customize/model-roles/chat
Chat model role
A "chat model" is an LLM that is trained to respond in a conversational format. Because they should be able to answer general questions and generate complex code, the best chat models are typically large, often 405B+ parameters.
In Continue, these models are used for normal [Chat](../../features/chat/quick-start) and [VS Code actions](../deep-dives/vscode-actions.md). The selected chat model will also be used for [Edit](../../features/edit/quick-start) and [Apply](./apply.mdx) if no `edit` or `apply` models are specified, respectively.
## Recommended Chat models
## Best overall experience
For the best overall Chat experience, you will want to use a 400B+ parameter model or one of the frontier models.
### Claude Sonnet 3.7 from Anthropic
Our current top recommendation is Claude 3.7 Sonnet from [Anthropic](../model-providers/top-level/anthropic.mdx).
View the [Claude 3.7 Sonnet model block](https://hub.continue.dev/anthropic/claude-3-7-sonnet) on the hub.
```yaml title="config.yaml"
models:
- name: Claude 3.7 Sonnet
provider: anthropic
model: claude-3-7-sonnet-latest
apiKey:
```
```json title="config.json"
{
"models": [
{
"title": "Claude 3.5 Sonnet",
"provider": "anthropic",
"model": "claude-3-5-sonnet-latest",
"apiKey": ""
}
]
}
```
### Gemma from Google DeepMind
If you prefer to use an open-weight model, then the Gemma family of Models from Google DeepMind is a good choice. You will need to decide if you use it through a SaaS model provider, e.g. [Together](../model-providers/more/together.mdx), or self-host it, e.g. [Ollama](../model-providers/top-level/ollama.mdx).
Add the [Ollama Gemma 3 27B block](https://hub.continue.dev/ollama/gemma3-27b) from the hub
Add the [Together Gemma 2 27B Instruct block](https://hub.continue.dev/togetherai/gemma-2-instruct-27b) from the hub
```yaml title="config.yaml"
models:
- name: "Gemma 3 27B"
provider: "ollama"
model: "gemma3:27b"
```
```yaml title="config.yaml"
models:
- name: "Gemma 3 27B"
provider: "together"
model: "google/gemma-2-27b-it"
apiKey:
```
```json title="config.json"
{
"models": [
{
"title": "Gemma 3 27B",
"provider": "ollama",
"model": "gemma3:27b"
}
]
}
```
```json title="config.json"
{
"models": [
{
"title": "Gemma 3 27B",
"provider": "together",
"model": "google/gemma-2-27b-it",
"apiKey": ""
}
]
}
```
### GPT-4o from OpenAI
If you prefer to use a model from [OpenAI](../model-providers/top-level/openai.mdx), then we recommend GPT-4o.
Add the [OpenAI GPT-4o block](https://hub.continue.dev/openai/gpt-4o) from the hub
```yaml title="config.yaml"
models:
- name: GPT-4o
provider: openai
model: ''
apiKey:
```
```json title="config.json"
{
"models": [
{
"title": "GPT-4o",
"provider": "openai",
"model": "",
"apiKey": ""
}
]
}
```
### Grok-2 from xAI
If you prefer to use a model from [xAI](../model-providers/top-level/xAI.mdx), then we recommend Grok-2.
Add the [xAI Grok-2 block](https://hub.continue.dev/xai/grok-2) from the hub
```yaml title="config.yaml"
models:
- name: Grok-2
provider: xAI
model: grok-2-latest
apiKey:
```
```json title="config.json"
{
"models": [
{
"title": "Grok-2",
"provider": "xAI",
"model": "grok-2-latest",
"apiKey": ""
}
]
}
```
### Gemini 2.0 Flash from Google
If you prefer to use a model from [Google](../model-providers/top-level/gemini.mdx), then we recommend Gemini 2.0 Flash.
Add the [Gemini 2.0 Flash block](https://hub.continue.dev/google/gemini-2.0-flash) from the hub
```yaml title="config.yaml"
models:
- name: Gemini 2.0 Flash
provider: gemini
model: gemini-2.0-flash
apiKey:
```
```json title="config.json"
{
"models": [
{
"title": "Gemini 2.0 Flash",
"provider": "gemini",
"model": "gemini-2.0-flash",
"apiKey": ""
}
]
}
```
## Local, offline experience
For the best local, offline Chat experience, you will want to use a model that is large but fast enough on your machine.
### Llama 3.1 8B
If your local machine can run an 8B parameter model, then we recommend running Llama 3.1 8B on your machine (e.g. using [Ollama](../model-providers/top-level/ollama.mdx) or [LM Studio](../model-providers/more/lmstudio.mdx)).
Add the [Ollama Llama 3.1 8b block](https://hub.continue.dev/ollama/llama3.1-8b) from the hub
{/* HUB_TODO nonexistent block */}
{/*
Add the [LM Studio Llama 3.1 8b block](https://hub.continue.dev/explore/models) from the hub
*/}
```yaml title="config.yaml"
models:
- name: Llama 3.1 8B
provider: ollama
model: llama3.1:8b
```
```yaml title="config.yaml"
models:
- name: Llama 3.1 8B
provider: lmstudio
model: llama3.1:8b
```
```yaml title="config.yaml"
models:
- name: Llama 3.1 8B
provider: msty
model: llama3.1:8b
```
```json title="config.json"
{
"models": [
{
"title": "Llama 3.1 8B",
"provider": "ollama",
"model": "llama3.1:8b"
}
]
}
```
```json title="config.json"
{
"models": [
{
"title": "Llama 3.1 8B",
"provider": "lmstudio",
"model": "llama3.1-8b"
}
]
}
```
```json title="config.json"
{
"models": [
{
"title": "Llama 3.1 8B",
"provider": "msty",
"model": "llama3.1-8b"
}
]
}
```
### DeepSeek Coder 2 16B
If your local machine can run a 16B parameter model, then we recommend running DeepSeek Coder 2 16B (e.g. using [Ollama](../model-providers/top-level/ollama.mdx) or [LM Studio](../model-providers/more/lmstudio.mdx)).
{/* HUB_TODO nonexistent blocks */}
{/*
Add the [Ollama Deepseek Coder 2 16B block](https://hub.continue.dev/explore/models) from the hub
Add the [LM Studio Deepseek Coder 2 16B block](https://hub.continue.dev/explore/models) from the hub
*/}
```yaml title="config.yaml"
models:
- name: DeepSeek Coder 2 16B
provider: ollama
model: deepseek-coder-v2:16b
```
```yaml title="config.yaml"
models:
- name: DeepSeek Coder 2 16B
provider: lmstudio
model: deepseek-coder-v2:16b
```
```yaml title="config.yaml"
models:
- name: DeepSeek Coder 2 16B
provider: msty
model: deepseek-coder-v2:16b
```
```json title="config.json"
{
"models": [
{
"title": "DeepSeek Coder 2 16B",
"provider": "ollama",
"model": "deepseek-coder-v2:16b",
"apiBase": "http://localhost:11434"
}
]
}
```
```json title="config.json"
{
"models": [
{
"title": "DeepSeek Coder 2 16B",
"provider": "lmstudio",
"model": "deepseek-coder-v2:16b"
}
]
}
```
```json title="config.json"
{
"models": [
{
"title": "DeepSeek Coder 2 16B",
"provider": "msty",
"model": "deepseek-coder-v2:16b"
}
]
}
```
## Other experiences
There are many more models and providers you can use with Chat beyond those mentioned above. Read more [here](../model-roles/chat.mdx)
# Edit Role
Source: https://docs.continue.dev/customize/model-roles/edit
Edit model role
It's often useful to select a different model to respond to Edit prompts than for chat prompts, as Edits are often more code-specific and may require less conversational readability.
In Continue, you can add `edit` to a model's roles to specify that it can be used for Edit requests. If no edit models are specified, the selected `chat` model is used.
Use model roles.
```yaml title="config.yaml"
models:
- name: Claude 3.5 Sonnet
provider: anthropic
model: claude-3-5-sonnet-latest
apiKey:
roles:
- edit
```
Set the `experimental.modelRoles.inlineEdit` property in `config.json`.
```json title="config.json"
{
"models": {
"name": "Claude 3.5 Sonnet",
"provider": "anthropic",
"model": "claude-3-5-sonnet-latest",
"apiKey": ""
},
"experimental": {
"modelRoles": {
"inlineEdit": "Claude 3.5 Sonnet",
}
}
}
```
Explore edit models in [the hub](https://hub.continue.dev/explore/models?roles=edit). Generally, our recommendations for Edit overlap with recommendations for Chat.
## Prompt templating
You can customize the prompt template used for editing code by setting the `promptTemplates.edit` property in your model configuration. Continue uses [Handlebars syntax](https://handlebarsjs.com/guide/) for templating.
Available variables for the edit template:
* `{{{userInput}}}` - The user's edit request/instruction
* `{{{language}}}` - The programming language of the code
* `{{{codeToEdit}}}` - The code that's being edited
* `{{{prefix}}}` - Content before the edit area
* `{{{suffix}}}` - Content after the edit area
* `{{{supportsCompletions}}}` - Whether the model supports completions API
* `{{{supportsPrefill}}}` - Whether the model supports prefill capability
Example:
```yaml
models:
- name: My Custom Edit Template
provider: openai
model: gpt-4o
promptTemplates:
edit: |
`Here is the code before editing:
\`\`\`{{{language}}}
{{{codeToEdit}}}
\`\`\`
Here is the edit requested:
"{{{userInput}}}"
Here is the code after editing:`
```
# Embed Role
Source: https://docs.continue.dev/customize/model-roles/embeddings
Embed model role
An "embeddings model" is trained to convert a piece of text into a vector, which can later be rapidly compared to other vectors to determine similarity between the pieces of text. Embeddings models are typically much smaller than LLMs, and will be extremely fast and cheap in comparison.
In Continue, embeddings are generated during indexing and then used by [@Codebase](../context/codebase.mdx) to perform similarity search over your codebase.
You can add `embed` to a model's `roles` to specify that it can be used to embed.
\[Built-in model (VS Code only)] `transformers.js` is used as a built-in
embeddings model in VS Code. In JetBrains, there currently is no built-in
embedder.
## Recommended embedding models
If you have the ability to use any model, we recommend `voyage-code-3`, which is listed below along with the rest of the options for embeddings models.
If you want to generate embeddings locally, we recommend using `nomic-embed-text` with [Ollama](../model-providers/top-level/ollama.mdx#embeddings-model).
### Voyage AI
After obtaining an API key from [here](https://www.voyageai.com/), you can configure like this:
[Voyage Code 3 Embedder Block](https://hub.continue.dev/voyageai/voyage-code-3)
```yaml title="config.yaml"
models:
- name: Voyage Code 3
provider: voyage
model: voyage-code-3
apiKey:
roles:
- embed
```
```json title="config.json"
{
"embeddingsProvider": {
"provider": "voyage",
"model": "voyage-code-3",
"apiKey": ""
}
}
```
### Ollama
See [here](../model-providers/top-level/ollama.mdx#embeddings-model) for instructions on how to use Ollama for embeddings.
### Transformers.js (currently VS Code only)
[Transformers.js](https://huggingface.co/docs/transformers.js/index) is a JavaScript port of the popular [Transformers](https://huggingface.co/transformers/) library. It allows embeddings to be calculated entirely locally. The model used is `all-MiniLM-L6-v2`, which is shipped alongside the Continue extension.
```yaml title="config.yaml"
models:
- name: default-transformers
provider: transformers.js
roles:
- embed
```
```json title="config.json"
{
"embeddingsProvider": {
"provider": "transformers.js"
}
}
```
### Text Embeddings Inference
[Hugging Face Text Embeddings Inference](https://huggingface.co/docs/text-embeddings-inference/en/index) enables you to host your own embeddings endpoint. You can configure embeddings to use your endpoint as follows:
{/* HUB_TODO nonexistent block */}
{/*
[HuggingFace Text Embedder Block](https://hub.continue.dev/)
*/}
```yaml title="config.yaml"
models:
- name: Huggingface TEI Embedder
provider: huggingface-tei
apiBase: http://localhost:8080
apiKey:
roles: [embed]
```
```json title="config.json"
{
"embeddingsProvider": {
"provider": "huggingface-tei",
"apiBase": "http://localhost:8080",
"apiKey": ""
}
}
```
### OpenAI
See [here](../model-providers/top-level/openai.mdx#embeddings-model) for instructions on how to use OpenAI for embeddings.
### Cohere
See [here](../model-providers/more/cohere.mdx#embeddings-model) for instructions on how to use Cohere for embeddings.
### Gemini
See [here](../model-providers/top-level/gemini.mdx#embeddings-model) for instructions on how to use Gemini for embeddings.
### Vertex
See [here](../model-providers/top-level/vertexai.mdx#embeddings-model) for instructions on how to use Vertex for embeddings.
### Mistral
See [here](../model-providers/top-level/mistral.mdx#embeddings-model) for instructions on how to use Mistral for embeddings.
### NVIDIA
See [here](../model-providers/more/nvidia.mdx#embeddings-model) for instructions on how to use NVIDIA for embeddings.
### Bedrock
See [here](../model-providers/top-level/bedrock.mdx#embeddings-model) for instructions on how to use Bedrock for embeddings.
### WatsonX
See [here](../model-providers/more/watsonx.mdx#embeddings-model) for instructions on how to use WatsonX for embeddings.
### LMStudio
See [here](../model-providers/more/lmstudio.mdx#embeddings-model) for instructions on how to use LMStudio for embeddings.
# Rerank Role
Source: https://docs.continue.dev/customize/model-roles/reranking
Rerank model role
A "reranking model" is trained to take two pieces of text (often a user question and a document) and return a relevancy score between 0 and 1, estimating how useful the document will be in answering the question. Rerankers are typically much smaller than LLMs, and will be extremely fast and cheap in comparison.
In Continue, rerankers are designated using the `rerank` role and used by [@Codebase](../context/codebase.mdx) in order to select the most relevant code snippets after vector search.
## Recommended reranking models
If you have the ability to use any model, we recommend `rerank-2` by Voyage AI, which is listed below along with the rest of the options for rerankers.
### Voyage AI
Voyage AI offers the best reranking model for code with their `rerank-2` model. After obtaining an API key from [here](https://www.voyageai.com/), you can configure a reranker as follows:
[Voyage Rerank 2 Block](https://hub.continue.dev/voyageai/rerank-2)
```yaml title="config.yaml"
models:
- name: My Voyage Reranker
provider: voyage
apiKey:
model: rerank-2
roles:
- rerank
```
```json title="config.json"
{
"reranker": {
"name": "voyage",
"params": {
"model": "rerank-2",
"apiKey": ""
}
}
}
```
### Cohere
See Cohere's documentation for rerankers [here](https://docs.cohere.com/docs/rerank-2).
{/* HUB_TODO block doesn't exist */}
{/*
[Cohere Reranker English v3](https://hub.continue.dev/)
*/}
```yaml title="config.yaml"
models:
- name: Cohere Reranker
provider: cohere
model: rerank-english-v3.0
apiKey:
roles:
- rerank
```
```json title="config.json"
{
"reranker": {
"name": "cohere",
"params": {
"model": "rerank-english-v3.0",
"apiKey": ""
}
}
}
```
### LLM
If you only have access to a single LLM, then you can use it as a reranker. This is discouraged unless truly necessary, because it will be much more expensive and still less accurate than any of the above models trained specifically for the task. Note that this will not work if you are using a local model, for example with Ollama, because too many parallel requests need to be made.
{/* HUB_TODO block doesn't exist */}
{/*
[GPT-4o LLM Reranker Block](https://hub.continue.dev/)
*/}
```yaml title="config.yaml"
models:
- name: LLM Reranker
provider: openai
model: gpt-4o
roles:
- rerank
```
```json title="config.json"
{
"reranker": {
"name": "llm",
"params": {
"modelTitle": "My Model Title"
}
}
}
```
The `"modelTitle"` field must match one of the models in your "models" array in config.json.
### Text Embeddings Inference
[Hugging Face Text Embeddings Inference](https://huggingface.co/docs/text-embeddings-inference/en/index) enables you to host your own [reranker endpoint](https://huggingface.github.io/text-embeddings-inference/#/Text%20Embeddings%20Inference/rerank). You can configure your reranker as follows:
{/* HUB_TODO */}
{/*
[HuggingFace TEI Reranker block](https://hub.continue.dev/)
*/}
```yaml title="config.yaml"
models:
- name: Huggingface-tei Reranker
provider: huggingface-tei
apiBase: http://localhost:8080
apiKey:
roles:
- rerank
```
```json title="config.json"
{
"reranker": {
"name": "huggingface-tei",
"params": {
"apiBase": "http://localhost:8080",
"apiKey": ""
}
}
}
```
# Overview
Source: https://docs.continue.dev/customize/overview
Explore Continue's advanced capabilities for power users and complex development scenarios.
## Context Providers
Master how Continue understands your codebase with powerful context providers for code, documentation, and more.
[Explore Context Providers →](/customize/custom-providers)
## Context Integration
Specialized context features for codebase understanding and documentation integration.
[Browse Context Features →](/customization/overview#codebase-context)
## Deep Dives
Detailed technical explanations of Continue's internal workings and advanced configuration options.
[Read Deep Dives →](/customization/overview#configuration)
## Model Providers
Configure and optimize different AI model providers for your specific needs and infrastructure.
[Configure Providers →](/customization/models#openai)
## Model Roles
Understand how different models can be assigned specific roles in your development workflow.
[Learn Model Roles →](/customize/model-roles)
## Reference
Complete configuration reference and API documentation.
[View Reference →](/reference)
## Troubleshooting
Solutions to common issues and debugging techniques.
[Get Help →](/troubleshooting)
***
These advanced topics help you get the most out of Continue in complex development environments.
# User Settings Page
Source: https://docs.continue.dev/customize/settings
Reference for Adjusting User-Specific Settings
The **User Settings page** can be accessed by clicking the gear icon in the header of the Continue sidebar and then selecting the "Settings" tab.

Which takes you to this page (select the "Settings" tab):
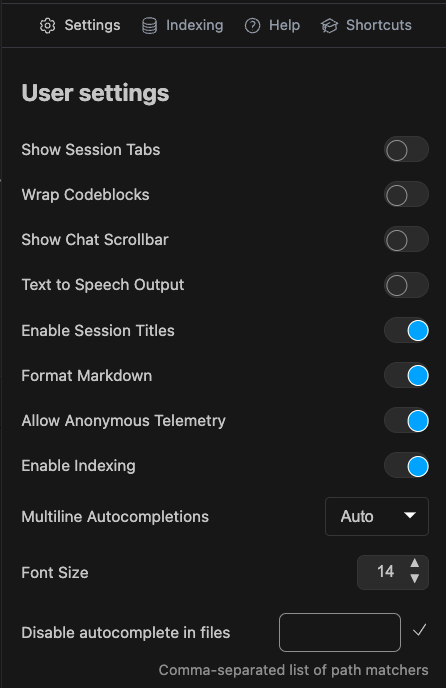
Below that, the following settings which are not part of a configuration file are available:
* **Show Session Tabs**: If on, displays tabs above the chat as an alternative way to organize and access your sessions. Off by default
* **Wrap Codeblocks**: If on, enables text wrapping in code blocks. Off by default
* **Show Chat Scrollbar**: If on, enables a scrollbar in the chat window. Off by default
* **Text-to-Speech Output**: If on, reads LLM responses aloud with TTS. Off by default
* **Enable Session Titles**: If on, generates summary titles for each chat session after the first message, using the current Chat model. On by default
* **Format Markdown**: If off, shows responses as raw text. On by default
* **Allow Anonymous Telemetry**: If on, allows Continue to send anonymous telemetry. **On** by default
* **Enable Indexing**: Enables indexing of the codebase for the @codebase and @code context providers. **On** by default
* **Font Size**: Specifies base font size for UI elements
* **Multiline Autocompletions**: Controls multiline completions for autocomplete. Can be set to `always`, `never`, or `auto`. Defaults to `auto`
* **Autocomplete timeout**: Maximum time in milliseconds for autocomplete request/retrieval. Defaults to 150
* **Autocomplete debounce**: Minimum time in milliseconds to trigger an autocomplete request after a change. Defaults to 250
* **Disable autocomplete in files**: List of comma-separated glob pattern to disable autocomplete in matching files. E.g., `**/*.{txt,md}`
## Experimental settings
At the bottom of the User Settings page there is an "Experimental Settings" section which contains new or otherwise experimental settings, including:
**Auto-Accept Agent Edits**: Be very careful with this setting. When turned
on, Agent mode's edit tool can make changes to files with no manual review or
guaranteed stopping point. If on, diffs generated by the edit tool are
automatically accepted and Agent proceeds with the next conversational turn.
Off by default.
# Telemetry
Source: https://docs.continue.dev/customize/telemetry
## Overview
The open-source Continue Extensions collect and report **anonymous** usage information to help us improve our product. This data enables us to understand user interactions and optimize the user experience effectively. You can opt out of telemetry collection at any time if you prefer not to share your usage information.
We utilize [Posthog](https://posthog.com/), an open-source platform for product analytics, to gather and store this data. For transparency, you can review the implementation code [here](https://github.com/continuedev/continue/blob/main/gui/src/hooks/CustomPostHogProvider.tsx) or read our [official privacy policy](https://continue.dev/privacy).
## Tracking Policy
All data collected by the open-source Continue extensions is anonymized and stripped of personally identifiable information (PII) before being sent to PostHog. We are committed to maintaining the privacy and security of your data.
## What We Track
The following usage information is collected and reported:
* **Suggestion Interactions:** Whether you accept or reject suggestions (excluding the actual code or prompts involved).
* **Model and Command Information:** The name of the model and command used.
* **Token Metrics:** The number of tokens generated.
* **System Information:** The name of your operating system (OS) and integrated development environment (IDE).
* **Pageviews:** General pageview statistics.
## How to Opt Out
You can disable anonymous telemetry by visiting the [User Settings Page](/customize/settings) and toggling "Allow Anonymous Telemetry" off.
Alternatively in VS Code, you can disable telemetry through your VS Code settings by unchecking the "Continue: Telemetry Enabled" box (this will override the Settings Page settings). VS Code settings can be accessed with `File` > `Preferences` > `Settings` (or use the keyboard shortcut `ctrl` + `,` on Windows/Linux or `cmd` + `,` on macOS).
# null
Source: https://docs.continue.dev/features/agent/context-selection
You can use the same methods to manually add context as [Chat](/features/chat/context-selection).
Tool call responses are automatically included as context items. This enables Agent mode to see the result of the previous action and decide what to do next.
# How Agent Works
Source: https://docs.continue.dev/features/agent/how-it-works
Agent offers the same functionality as Chat, while also including tools in the request to the model and an interface for handling tool calls and responses.
## The tool handshake
Tools provide a flexible, powerful way for models to interface with the external world. They are provided to the model as a JSON object with a name and an arguments schema. For example, a `read_file` tool with a `filepath` argument will give the model the ability to request the contents of a specific file.
The following handshake describes how Agent uses tools:
1. In Agent mode, available tools are sent along with `user` chat requests
2. The model can choose to include a tool call in its response
3. The user gives permission. This step is skipped if the policy for that tool is set to `Automatic`
4. Continue calls the tool using built-in functionality or the MCP server that offers that particular tool
5. Continue sends the result back to the model
6. The model responds, potentially with another tool call and step 2 begins again
In [Chat mode](/features/chat/quick-start), tools are **not** included in the
request to the model.
## Built-in tools
Continue includes several built-in tools which provide the model access to IDE functionality:
* **Read file** (`read_file`): read the contents of a file within the project
* **Read currently open file** (`read_currently_open_file`): read the contents of the currently open file
* **Create new file** (`create_new_file`): Create a new file within the project, with path and contents specified by the model
* **Exact search** (`exact_search`): perform a `ripgrep` search within the project
* **Glob search** (`file_glob_search`): perform a glob search on files in the project. Currently limits to 100 output and warns the Agent if limit reached.
* **Run terminal command** (`run_terminal_command`): run a terminal command from the workspace root
* **Search web** (`search_web`): Perform a web search to get top results
* **View diff** (`view_diff`): View the current working git diff
* **View repo map** (`view_repo_map`): request a copy of the repository map—same as the [Repo Map Context Provider](/customize/custom-providers#repository-map)
* **View subdirectory** (`view_subdirectory`): request a copy of a repo map for a specific directory within the project
* **Create Rule Block** (`create_rule_block`): creates a new rule block in `.continue/rules` based on the contents of the conversation
# null
Source: https://docs.continue.dev/features/agent/how-to-customize
## Add Rules Blocks
Adding Rules can be done in your assistant locally or in the Hub. You can explore Rules on the Continue Hub and refer to the [Rules deep dive](/customize/deep-dives/rules) for more details.
## Add MCP Tools
You can add MCP servers to your assistant to give Agent access to more tools. Explore [MCP Servers on the Hub](https://hub.continue.dev) and consult the [MCP guide](/customize/deep-dives/mcp) for more details.
## Tool Policies
You can adjust the Agent's tool usage behavior to three options:
* **Ask First (default)**: Request user permission with "Cancel" and "Continue" buttons
* **Automatic**: Automatically call the tool without requesting permission
* **Excluded**: Do not send the tool to the model
:::warning
Be careful setting tools to "automatic" if their behavior is not read-only.
:::
To manage tool policies:
1. Click the tools icon in the input toolbar
2. View and change policies by clicking on the policy text
3. You can also toggle groups of tools on/off
Tool policies are stored locally per user.
# null
Source: https://docs.continue.dev/features/agent/model-setup
The models you set up for Chat mode will be used with Agent mode if the model supports tool calling.
The recommended models and how to set them up can be found [here](/features/chat/model-setup).
# Quick Start
Source: https://docs.continue.dev/features/agent/quick-start
## How to use it
Agent equips the Chat model with the tools needed to handle a wide range of coding tasks, allowing the model to make decisions and save you the work of manually finding context and performing actions.
### Use Agent
You can switch to `Agent` in the mode selector below the chat input box.
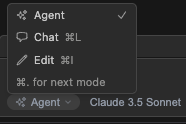
If Agent is disabled with a `Not Supported` message, the selected model or
provider doesn't support tools, or Continue doesn't yet support tools with it.
See [Model Blocks](/customization/models) for more information.
### Chat with Agent
Agent lives within the same interface as [Chat](/features/chat/how-it-works), so the same [input](/features/chat/quick-start#1-start-a-conversation) is used to send messages and you can still use the same manual methods of providing context, such as [`@` context providers](/features/chat/quick-start#3-use--for-additional-context) or adding [highlighted code from the editor](/features/chat/quick-start#2-include-code-context).
#### Use natural language
With Agent, you can provide natural language instruction and let the model do the work. As an example, you might say
> Set the @typescript-eslint/naming-convention rule to "off" for all eslint configurations in this project
Agent will then decide which tools to use to get the job done.
## Give Agent permission
By default, Agent will ask permission when it wants to use a tool. Click `Continue` to allow Agent mode to proceed with the tool call or `Cancel` to reject it.
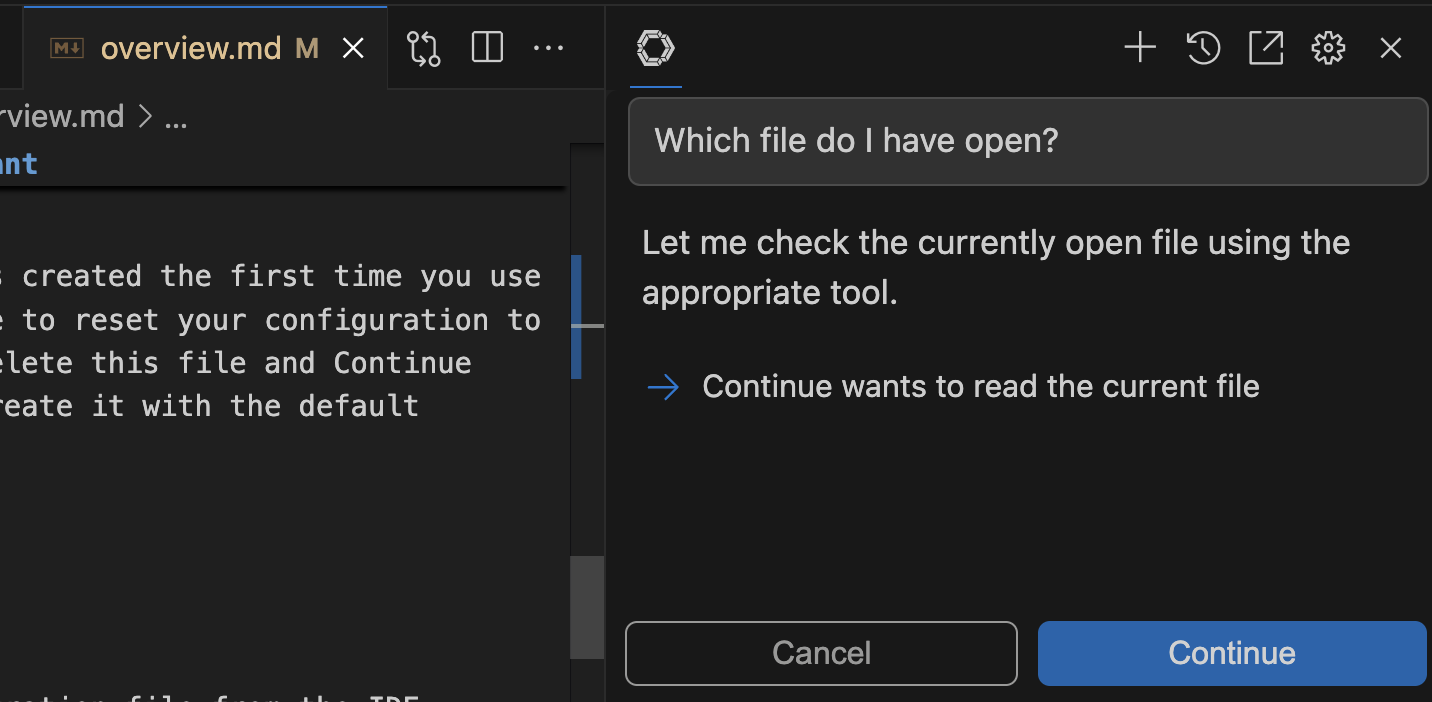
You can use tool policies to exclude or make usage automatic for specific tools. See [MCP Tools](/customization/mcp-tools) for more background.
## View Tool Responses
Any data returned from a tool call is automatically fed back into the model as a context item. Most errors are also caught and returned, so that Agent mode can decide how to proceed.
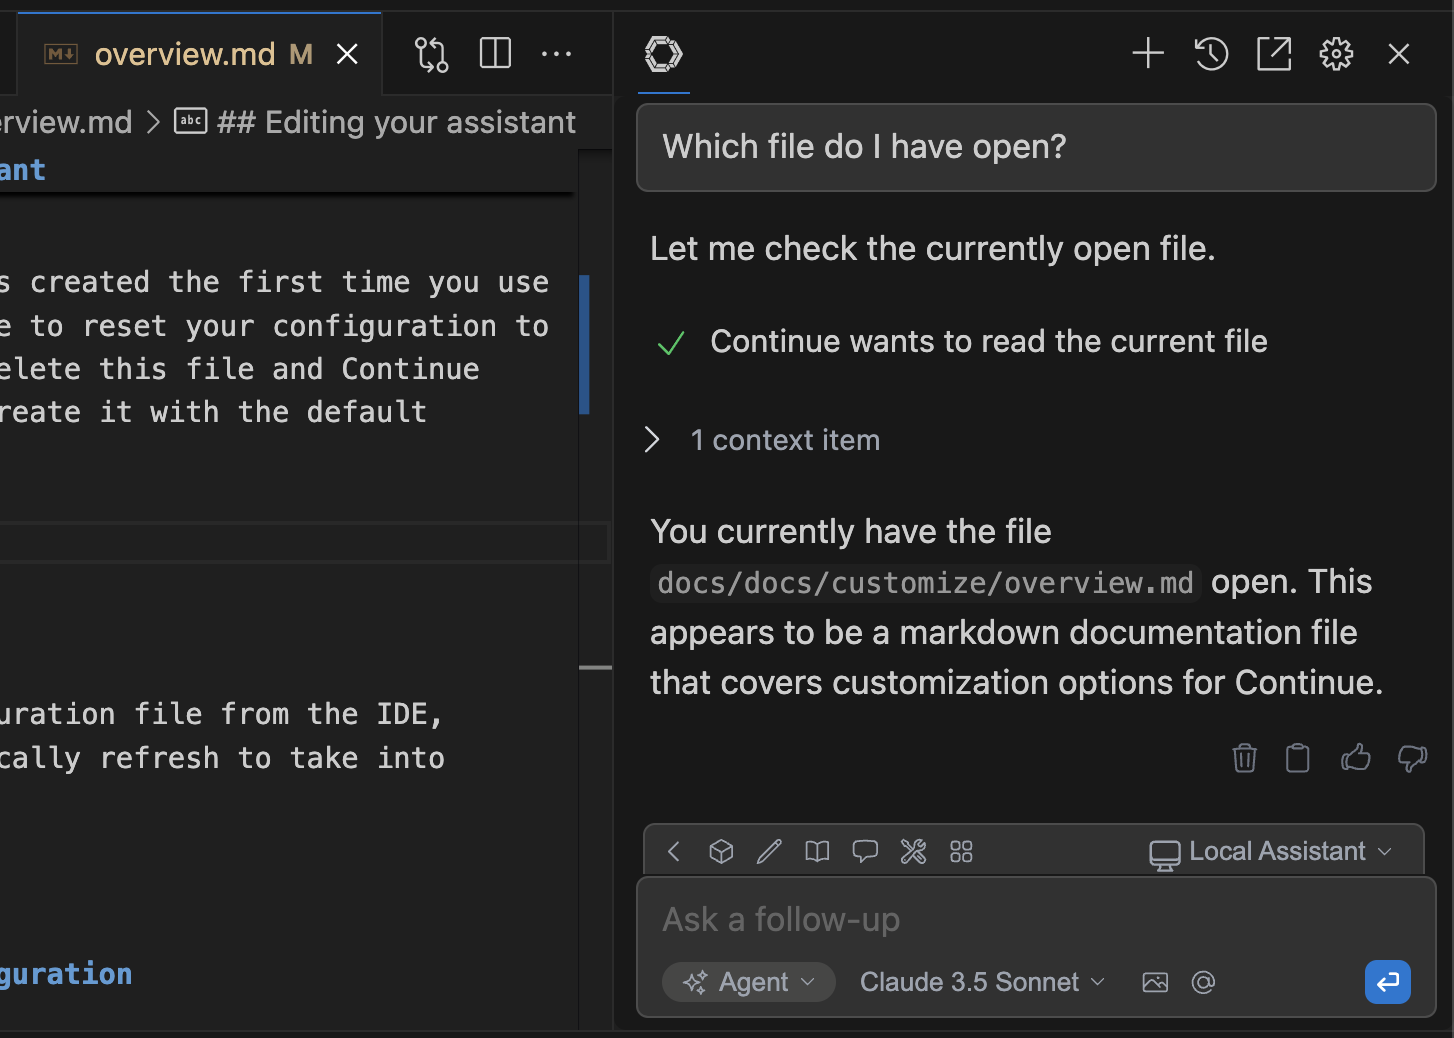
# null
Source: https://docs.continue.dev/features/autocomplete/context-selection
Autocomplete will automatically determine context based on the current cursor position. We use the following techniques to determine what to include in the prompt:
## File prefix/suffix
We will always include the code from your file prior to and after the cursor position.
## Definitions from the Language Server Protocol
Similar to how you can use cmd/ctrl + click in your editor, we use the same tool (the LSP) to power "go to definition". For example, if you are typing out a function call, we will include the function definition. Or, if you are writing code inside of a method, we will include the type definitions for any parameters or the return type.
## Imported files
Because there are often many imports, we can't include all of them. Instead, we look for symbols around your cursor that have matching imports and use that as context.
## Recent files
We automatically consider recently opened or edited files and include snippets that are relevant to the current completion.
# How Autocomplete Works
Source: https://docs.continue.dev/features/autocomplete/how-it-works
Autocomplete is a that uses a combination of retrieval methods and response processing techniques. The system can be understood in roughly three parts.
## Timing
In order to display suggestions quickly, without sending too many requests, we do the following:
* Debouncing: If you are typing quickly, we won't make a request on each keystroke. Instead, we wait until you have finished.
* Caching: If your cursor is in a position that we've already generated a completion for, this completion is reused. For example, if you backspace, we'll be able to immediately show the suggestion you saw before.
## Context
Continue uses a number of retrieval methods to find relevant snippets from your codebase to include in the prompt.
## Filtering
Language models aren't perfect, but can be made much closer by adjusting their output. We do extensive post-processing on responses before displaying a suggestion, including:
* filtering out special tokens
* stopping early when re-generating code
* fixing indentation
We will also occasionally entirely filter out responses if they are bad. This is often due to extreme repetition.
You can learn more about how it works in the [Autocomplete deep dive](/customization/models#autocomplete).
# null
Source: https://docs.continue.dev/features/autocomplete/how-to-customize
Continue offers a handful of settings to customize autocomplete behavior. Visit the [User Settings Page](/customize/deep-dives/settings/) to manage these settings.
For a comprehensive guide on all configuration options and their impacts, see the [Autocomplete deep dive](/customize/deep-dives/autocomplete).
# null
Source: https://docs.continue.dev/features/autocomplete/model-setup
Setting up the right model for autocomplete is crucial for a smooth coding experience. Here are our top recommendations:
## Recommended Models
### Hosted (Best Performance)
For the highest quality autocomplete suggestions, we recommend **[Codestral](https://hub.continue.dev/mistral/codestral)** from Mistral.
This model is specifically designed for code completion and offers excellent performance across multiple programming languages.
**Codestral Quick Setup:**
1. Get your API key from [Mistral AI](https://console.mistral.ai)
2. Add [Codestral](https://hub.continue.dev/mistral/codestral) to your assistant on Continue Hub
3. Add `MISTRAL_API_KEY` as a [User Secret](https://docs.continue.dev/hub/secrets/secret-types#user-secrets) on Continue Hub [here](https://hub.continue.dev/settings/secrets)
4. Click `Reload config` in the assistant selector in the Continue IDE extension
### Hosted (Best Speed/Quality Tradeoff)
For fast, quality autocomplete suggestions, we recommend **[Mercury Coder Small](https://hub.continue.dev/inceptionlabs/mercury-coder-small)** from Inception Labs.
This model is specifically designed for code completion and is particularly fast because it is a diffusion model.
**Mercury Coder Small Quick Setup:**
1. Get your API key from [Inception Labs](https://platform.inceptionlabs.ai/)
2. Add [Mercury Coder Small](https://hub.continue.dev/inceptionlabs/mercury-coder-small) to your assistant on Continue Hub
3. Add `INCEPTION_API_KEY` as a [User Secret](https://docs.continue.dev/hub/secrets/secret-types#user-secrets) on Continue Hub [here](https://hub.continue.dev/settings/secrets)
4. Click `Reload config` in the assistant selector in the Continue IDE extension
### Local (Offline / Privacy First)
For a fully local autocomplete experience, we recommend **[Qwen 2.5 Coder 1.5B](https://hub.continue.dev/ollama/qwen2.5-coder-1.5b)**.
This model provides good suggestions while keeping your code completely private.
**Quick Setup:**
1. Install [Ollama](https://ollama.ai/)
2. Add [Qwen 2.5 Coder 1.5B](https://hub.continue.dev/ollama/qwen2.5-coder-1.5b) to your assistant on Continue Hub
3. Click `Reload config` in the assistant selector in the Continue IDE extension
## Need Help?
If you're not seeing any completions or need more detailed configuration options, check out our comprehensive [autocomplete deep dive guide](/customize/deep-dives/autocomplete).
# Quick Start
Source: https://docs.continue.dev/features/autocomplete/quick-start
## How to use it
Autocomplete provides inline code suggestions as you type. To enable it, simply click the "Continue" button in the status bar at the bottom right of your IDE or ensure the "Enable Tab Autocomplete" option is checked in your IDE settings.
### Accepting a full suggestion
Accept a full suggestion by pressing `Tab`
### Rejecting a full suggestion
Reject a full suggestion with `Esc`
### Partially accepting a suggestion
For more granular control, use `cmd/ctrl` + `→` to accept parts of the suggestion word-by-word.
### Forcing a suggestion (VS Code)
If you want to trigger a suggestion immediately without waiting, or if you've dismissed a suggestion and want a new one, you can force it by using the keyboard shortcut **`cmd/ctrl` + `alt` + `space`**.
# null
Source: https://docs.continue.dev/features/chat/context-selection
## Input
Typing a question or instructions into the input box is the only required context.
## Highlighted Code
The highlighted code you've selected by pressing cmd/ctrl + L (VS Code) or cmd/ctrl + J (JetBrains) will be included in your prompt.
## Active File
You can include the currently open file as context by pressing opt/alt + enter when you send your request.
## Specific File
You can include a specific file in your current workspace by typing '@Files' and selecting the file.
## Specific Folder
You can include a folder in your current workspace by typing '@Folder' and selecting the directory.
## Codebase Search
You can automatically include relevant files from your codebase by typing '@Codebase'.
## Documentation Site
You can include a documentation site as context by typing '@Docs' and selecting the site.
## Terminal Contents
You can include the contents of the terminal in your IDE by typing '@Terminal'.
## Git Diff
You can include all of the changes you've made to your current branch by typing '@Git Diff'.
## Other Context
You can see a full list of built-in context providers [here](/customize/custom-providers) and learn about how to create your own context provider [here](/guides/build-your-own-context-provider).
# How Chat Works
Source: https://docs.continue.dev/features/chat/how-it-works
Continue's Chat feature provides a conversational interface with AI models directly in your IDE sidebar.
## Core Functionality
When you start a chat conversation, Continue:
1. **Gathers Context**: Uses any selected code sections and @-mentioned context
2. **Constructs Prompt**: Combines your input with relevant context
3. **Sends to Model**: Prompts the configured AI model for a response
4. **Streams Response**: Returns the AI response in real-time to the sidebar
## Context Management
### Automatic Context
* Selected code in your editor
* Current file context when relevant
* Previous conversation history in the session
### Manual Context
* `@Codebase` - Search and include relevant code from your project
* `@Docs` - Include documentation context
* `@Files` - Reference specific files
* Custom context providers
## Response Handling
Each code section in the AI response includes action buttons:
* **Apply to current file** - Replace selected code
* **Insert at cursor** - Add code at cursor position
* **Copy** - Copy code to clipboard
## Session Management
* Use `Cmd/Ctrl + L` (VS Code) or `Cmd/Ctrl + J` (JetBrains) to start a new session
* Clears all previous context for a fresh start
* Helpful for switching between different tasks
## Advanced Features
### Prompt Inspection
View the exact prompt sent to the AI model in the [prompt logs](/troubleshooting) for debugging and optimization.
### Context Providers
Learn more about how context providers work:
* [Codebase Context](/customization/overview#codebase-context)
* [Documentation Context](/customization/overview#documentation-context)
***
*Chat is designed to feel like a natural conversation while maintaining full transparency about what context is being used.*
# null
Source: https://docs.continue.dev/features/chat/how-to-customize
There are a number of different ways to customize Chat:
* Add a `rules` block to give the model persistent instructions through the system prompt
* Configure `@Codebase`
* Configure `@Docs`
* [Build your own context provider](/guides/build-your-own-context-provider)
* [Create a custom code RAG](/guides/custom-code-rag)
# null
Source: https://docs.continue.dev/features/chat/model-setup
The model you use for for Chat mode will be
* used with Edit mode by default but can be switched
* always used with Agent mode if the model supports tool calling
## Recommended Models
Our strong recommendation is to use [Claude Sonnet 4](https://hub.continue.dev/anthropic/claude-4-sonnet) from Anthropic.
Its strong tool calling and reasoning capabilities make it the best model for Agent mode.
1. Get your API key from [Anthropic](https://console.anthropic.com/)
2. Add [Claude Sonnet 4](https://hub.continue.dev/anthropic/claude-4-sonnet) to your assistant on Continue Hub
3. Add `ANTHROPIC_API_KEY` as a [User Secret](https://docs.continue.dev/hub/secrets/secret-types#user-secrets) on Continue Hub [here](https://hub.continue.dev/settings/secrets)
4. Click `Reload config` in the assistant selector in the Continue IDE extension
#### Other hosted models
These models have varying tool calling and reasoning capabilities.
[Gemini 2.5 Pro](https://hub.continue.dev/google/gemini-2.5-pro) from Google
1. Get your API key from [Google AI Studio](https://aistudio.google.com)
2. Add [Gemini 2.5 Pro](https://hub.continue.dev/google/gemini-2.5-pro) to your assistant on Continue Hub
3. Add `GEMINI_API_KEY` as a [User Secret](https://docs.continue.dev/hub/secrets/secret-types#user-secrets) on Continue Hub [here](https://hub.continue.dev/settings/secrets)
4. Click `Reload config` in the assistant selector in the Continue IDE extension
[o3](https://hub.continue.dev/openai/o3) from OpenAI
1. Get your API key from [OpenAI](https://platform.openai.com)
2. Add [o3](https://hub.continue.dev/openai/o3) to your assistant on Continue Hub
3. Add `OPENAI_API_KEY` as a [User Secret](https://docs.continue.dev/hub/secrets/secret-types#user-secrets) on Continue Hub [here](https://hub.continue.dev/settings/secrets)
4. Click `Reload config` in the assistant selector in the Continue IDE extension
[Grok 4](https://hub.continue.dev/xai/grok-4) from xAI
1. Get your API key from [xAI](https://console.x.ai/)
2. Add [Grok 4](https://hub.continue.dev/xai/grok-4) to your assistant on Continue Hub
3. Add `XAI_API_KEY` as a [User Secret](https://docs.continue.dev/hub/secrets/secret-types#user-secrets) on Continue Hub [here](https://hub.continue.dev/settings/secrets)
4. Click `Reload config` in the assistant selector in the Continue IDE extension
[Devstral Medium](https://hub.continue.dev/mistral/devstral-medium) from Mistral AI
1. Get your API key from [Mistral AI](https://console.mistral.ai/)
2. Add [Devstral Medium](https://hub.continue.dev/mistral/devstral-medium) to your assistant on Continue Hub
3. Add `MISTRAL_API_KEY` as a [User Secret](https://docs.continue.dev/hub/secrets/secret-types#user-secrets) on Continue Hub [here](https://hub.continue.dev/settings/secrets)
4. Click `Reload config` in the assistant selector in the Continue IDE extension
[Kimi K2](hub.continue.dev/togetherai/kimi-k2-instruct) from Moonshot AI
1. Get your API key from [TogetherAI](https://api.together.ai)
2. Add [Kimi K2](hub.continue.dev/togetherai/kimi-k2-instruct) to your assistant on Continue Hub
3. Add `TOGETHER_API_KEY` as a [User Secret](https://docs.continue.dev/hub/secrets/secret-types#user-secrets) on Continue Hub [here](https://hub.continue.dev/settings/secrets)
4. Click `Reload config` in the assistant selector in the Continue IDE extension
#### Local models
These models can be run on your computer if you have enough VRAM.
Their limited tool calling and reasoning capabilities will make it challenging to use Agent mode.
[Qwen2.5-Coder 7B](https://hub.continue.dev/ollama/qwen2.5-coder-7b) from Qwen
1. Add [Qwen2.5-Coder 7B](https://hub.continue.dev/ollama/qwen2.5-coder-7b) to your assistant on Continue Hub
2. Run the model with [Ollama](https://docs.continue.dev/guides/ollama-guide#using-ollama-with-continue-a-developers-guide)
3. Click `Reload config` in the assistant selector in the Continue IDE extension
[Gemma 3 4B](https://hub.continue.dev/ollama/gemma3-4b) from Google
1. Add [Gemma 3 4B](https://hub.continue.dev/ollama/gemma3-4b) to your assistant on Continue Hub
2. Run the model with [Ollama](https://docs.continue.dev/guides/ollama-guide#using-ollama-with-continue-a-developers-guide)
3. Click `Reload config` in the assistant selector in the Continue IDE extension
[Llama 3.1 8B](https://hub.continue.dev/ollama/llama3.1-8b) from Meta
1. Add [Llama 3.1 8B](https://hub.continue.dev/ollama/llama3.1-8b) to your assistant on Continue Hub
2. Run the model with [Ollama](https://docs.continue.dev/guides/ollama-guide#using-ollama-with-continue-a-developers-guide)
3. Click `Reload config` in the assistant selector in the Continue IDE extension
For more detailed setup instructions, see [here](/getting-started/install#setup-your-first-model)
# Quick Start
Source: https://docs.continue.dev/features/chat/quick-start
Chat makes it easy to ask for help from an AI without leaving your IDE. Get explanations, generate code, and iterate on solutions conversationally.
## Basic Usage
### 1. Start a Conversation
Type your question or request in the chat input and press Enter.
**Examples:**
* "Explain this function"
* "How do I handle errors in this code?"
* "Generate a test for this component"
### 2. Include Code Context
Select code in your editor, then use the keyboard shortcut to include it in your chat:
* VS Code
* JetBrains
Press `Cmd/Ctrl + L` to send selected code to chat
Press `Cmd/Ctrl + J` to send selected code to chat
### 3. Use @ for Additional Context
Type `@` to include specific context:
* `@Codebase` - Search your project for relevant code
* `@Docs` - Include documentation
* `@Files` - Reference specific files
* `@Terminal` - Include terminal output
## Working with Responses
When the AI provides code in its response, you'll see action buttons:
* **Apply to current file** - Replace your selected code
* **Insert at cursor** - Add code at your cursor position
* **Copy** - Copy code to clipboard
## Pro Tips
### Start Fresh
Press `Cmd/Ctrl + L` (VS Code) or `Cmd/Ctrl + J` (JetBrains) in an empty chat to start a new session.
### Be Specific
Include details about:
* What you're trying to accomplish
* Any constraints or requirements
* Your preferred coding style or patterns
### Iterate
If the first response isn't perfect:
* Ask follow-up questions
* Request modifications
* Provide additional context
## Common Use Cases
### Code Explanation
Select confusing code and ask "What does this code do?"
### Bug Fixing
Include error messages and ask "How do I fix this error?"
### Code Generation
Describe what you want: "Create a React component that displays a user profile"
### Refactoring
Select code and ask "How can I make this more efficient?"
***
*Chat is designed for quick interactions and iterative problem-solving. Don't hesitate to ask follow-up questions!*
# null
Source: https://docs.continue.dev/features/edit/context-selection
## Input
The input you provide is included in the prompt.
## Code to Edit
The **entire contents** of each file (the current file for Jetbrains inline Edit, the `Code to Edit` item for VS Code Edit mode) are included in the prompt for context. The model will only attempt to edit the highlighted/specified ranges.
## Context Providers
In VS Code Edit mode, you can use `@` to add context using [Context Providers](/customize/custom-providers), similar to [Chat](/features/chat/context-selection). Some context providers may be disabled in Edit mode.
# How Edit Works
Source: https://docs.continue.dev/features/edit/how-it-works
Using the highlighted code, the contents of the current file containing your highlight, and your input instructions, we prompt the model to edit the code according to your instructions. No other additional context is provided to the model.
The model response is then streamed directly back to the highlighted range in your code, where we apply a diff formatting to show the proposed changes.
If you accept the diff, we remove the previously highlighted lines, and if you reject the diff, we remove the proposed changes.
If you would like to view the exact prompt that is sent to the model during an edit, you can [find it in the prompt logs](/troubleshooting#check-the-logs).
# null
Source: https://docs.continue.dev/features/edit/how-to-customize
## Setting active Edit/Apply model
You can configure particular models from your Assistant to be used for Edit and Apply requests.
1. Click the 3 dots above the main input
2. Click the cube icon to expand the "Models" section
3. Use the dropdowns to select models for Edit and Apply
Learn more about the [Edit role](/customize/model-roles/edit) and [Apply role](/customize/model-roles/apply).
# null
Source: https://docs.continue.dev/features/edit/model-setup
The model you set up for Chat mode will be used for Edit mode by default.
The recommended models and how to set them up can be found [here](/features/chat/model-setup).
## Apply Model
We also recommend setting up an Apply model for the best Edit experience.
**Recommended Apply models:**
* [Morph v3](https://hub.continue.dev/morphllm/morph-v2)
* [Relace Instant Apply](https://hub.continue.dev/relace/instant-apply)
# Quick Start
Source: https://docs.continue.dev/features/edit/quick-start
## How to use it
Edit is a convenient way to make quick changes to specific code and files. Select code, describe your code changes, and a diff will be streamed inline to your file which you can accept or reject.
Edit is recommended for small, targeted changes, such as
* Writing comments
* Generating unit tests
* Refactoring functions or methods
## Highlight code and activate
Highlight the block of code you would like to modify and press `cmd/ctrl` + `i` to active Edit mode. You can also enter Edit mode by pressing `cmd/ctrl` + `i` with no code highlighted, which will default to editing the current file.
## Describe code changes
Describe the changes you would like the model to make to your highlighted code. For edits, a good prompt should be relatively short and concise. For longer, more complex tasks, we recommend using [Chat](/features/chat/quick-start).
## Accept or reject changes
Proposed changes appear as inline diffs within your highlighted text.
You can navigate through each proposed change, accepting or rejecting them using `cmd/ctrl` + `opt` + `y` (to accept) or `cmd/ctrl` + `opt` + `n` (to reject).
You can also accept or reject all changes at once using `cmd/ctrl` + `shift` + `enter` (to accept) or `cmd/ctrl` + `shift` + `delete/backspace` (to reject).
If you want to request a new suggestion for the same highlighted code section, you can use `cmd/ctrl` + `i` to re-prompt the model.
## VS Code
In VS Code, Edit is implemented in the extension sidebar with a similar interface to [Chat](/features/chat/how-it-works), and you can also enter Edit mode by using the Mode Selector below the main Chat input to select `Edit`.
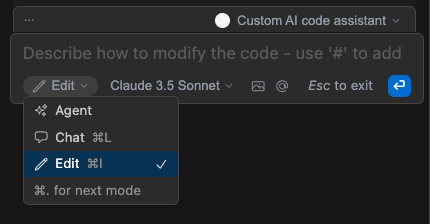
You can also reject and accept diffs using the `Reject All` and `Accept All` buttons that show up in the Chat when diffs are present (see examples below).
### Adding Code to Edit
Along with adding highlighted code, you can also manually add files to edit using the `Add file` combobox or by clicking the dropdown and selecting `Add all open files` to add all files that are currently open in the editor.
## Jetbrains
In Jetbrains, Edit is implemented as an inline popup. See the header GIF example.
# Install
Source: https://docs.continue.dev/getting-started/install
Get Continue installed in your favorite IDE in just a few steps.
Click `Install` on the [Continue extension page in the Visual Studio Marketplace](https://marketplace.visualstudio.com/items?itemName=Continue.continue)
This will open the Continue extension page in VS Code, where you will need to
click `Install` again
The Continue logo will appear on the left sidebar. For a better experience, move Continue to the right sidebar
[Sign in to the hub](https://auth.continue.dev/) to get started with your first assistant
If you have any problems, see the [troubleshooting guide](/troubleshooting) or
ask for help in [our Discord](https://discord.gg/NWtdYexhMs)
Open your JetBrains IDE and open **Settings** using `Ctrl` + `Alt` + `S`
Select **Plugins** on the sidebar and search for "Continue" in the marketplace
Click `Install`, which will cause the Continue logo to show up on the right toolbar
[Sign in to the hub](https://auth.continue.dev/) to get started with your first assistant
If you have any problems, see the [troubleshooting guide](/troubleshooting) or
ask for help in [our Discord](https://discord.com/invite/EfJEfdFnDQ)
## Signing in
Click "Get started" to sign in to the hub and start using assistants.
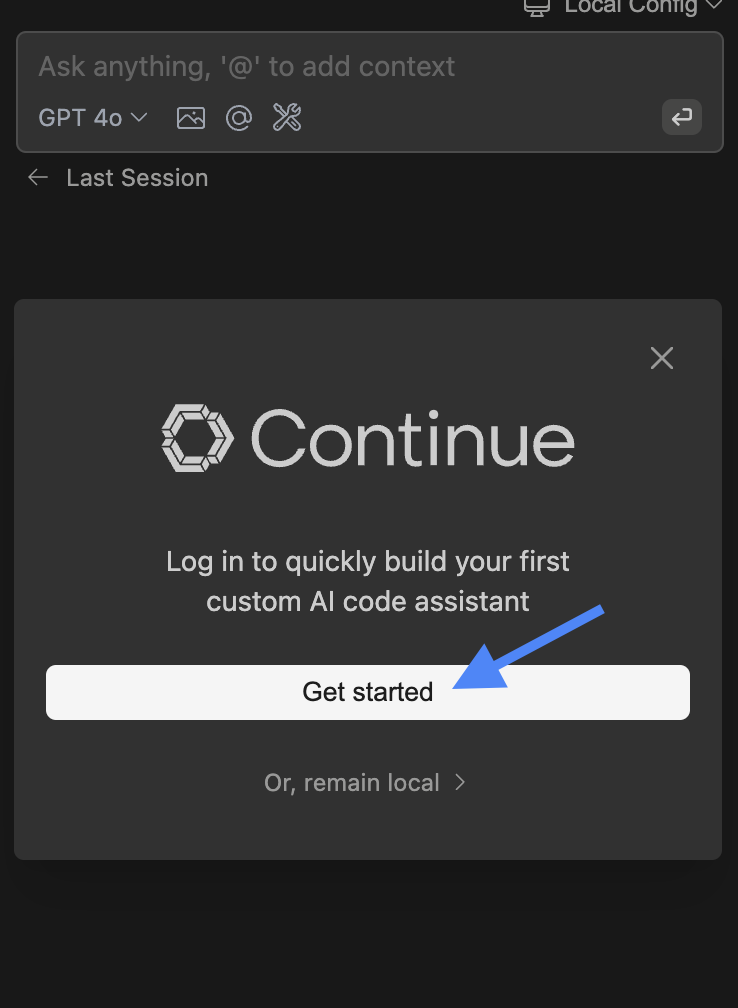
# Overview
Source: https://docs.continue.dev/getting-started/overview
To quickly understand what you can do with Continue, check out each tab below.
[Chat](/features/chat/quick-start) makes it easy to ask for help from an LLM without needing to leave the IDE

Learn more about [Chat](/features/chat/quick-start)
[Autocomplete](/features/autocomplete/quick-start) provides inline code suggestions as you type
Learn more about [Autocomplete](/features/autocomplete/quick-start)
[Edit](/features/edit/quick-start) is a convenient way to modify code without leaving your current file
Learn more about [Edit](/features/edit/quick-start)
[Agent](/features/agent/quick-start) equips the Chat model with the tools needed to handle a wide range of coding tasks
Learn more about [Agent](/features/agent/quick-start)
# Build Your Own Context Provider
Source: https://docs.continue.dev/guides/build-your-own-context-provider
Continue offers several way to provide your custom context to the extension.
## HTTP Context Provider
Continue can retrieve context from a custom HTTP server that you create and serve. Add the `@HTTP` context provider to your configuration like this:
* YAML
* JSON
config.yaml
```
context: provider: http params: url: https://myserver.com/context-provider title: http displayTitle: My Custom Context description: Gets things from my private list options: maxItems: 20
```
config.json
```json
{
"name": "http",
"params": {
"url": "https://myserver.com/context-provider",
"title": "http",
"description": "Custom HTTP Context Provider",
"displayTitle": "My Custom Context",
"options": { "maxItems": 20 }
}
}
```
Then, create a server that responds to requests as are made from [HttpContextProvider.ts](https://github.com/continuedev/continue/blob/main/core/context/providers/HttpContextProvider.ts). See the `hello` endpoint in [context\_provider\_server.py](https://github.com/continuedev/continue/blob/main/core/context/providers/context_provider_server.py) for an example that uses FastAPI.
The `"options"` property can be used to send additional parameters to your endpoint. The full request body has the following shape:
```json
{ query: string; fullInput: string; options: Record; workspacePath?: string; // Only provided if the server is local.}
```
The following methods for creating custom context providers are deprecated. We
recommend using HTTP context providers, [MCP
Servers](/customization/mcp-tools), and [Prompts](/customization/prompts)
where possible.
## Using CustomContextProvider
Custom context providers can be implemented in a `config.ts` placed in your Continue global directory (`~/.continue` for MacOS, `%USERPROFILE%/.continue` for Windows). You can implement the `CustomContextProvider` interface in your `config.ts`
```
interface CustomContextProvider { title: string; displayTitle?: string; description?: string; renderInlineAs?: string; type?: ContextProviderType; getContextItems( query: string, extras: ContextProviderExtras, ): Promise; loadSubmenuItems?: ( args: LoadSubmenuItemsArgs, ) => Promise;}
```
As an example, let's say you have a set of internal documents that have been indexed in a vector database. You've set up a simple REST API that allows internal users to query and get back relevant snippets. This context provider will send the query to this server and return the results from the vector database. The return type of `getContextItems` *must* be an array of objects that have all of the following properties:
* `name`: The name of the context item, which will be displayed as a title
* `description`: A longer description of the context item
* `content`: The actual content of the context item, which will be fed to the LLM as context
\~/.continue/config.ts
```
const RagContextProvider: CustomContextProvider = { title: "rag", displayTitle: "RAG", description: "Retrieve snippets from our vector database of internal documents", getContextItems: async ( query: string, extras: ContextProviderExtras, ): Promise => { const response = await fetch("https://internal_rag_server.com/retrieve", { method: "POST", body: JSON.stringify({ query }), }); const results = await response.json(); return results.map((result) => ({ name: result.title, description: result.title, content: result.contents, })); },};
```
It can then be added in `config.ts` like so:
\~/.continue/config.ts
```
export function modifyConfig(config: Config): Config { if (!config.contextProviders) { config.contextProviders = []; } config.contextProviders.push(RagContextProvider); return config;}
```
This is automatically appended to your configuration.
### Custom Context Providers with Submenu or Query
There are 3 types of context providers: "normal", "query", and "submenu". The "normal" type is the default, and is what we've seen so far.
The **"query"** type is used when you want to display a text box to the user, and then use the contents of that text box to generate the context items. Built-in examples include "search" and "google". This text is what gets passed to the "query" argument in `getContextItems`. To implement a "query" context provider, simply set `"type": "query"` in your custom context provider object.
The **"submenu"** type is used when you want to display a list of searchable items in the dropdown. Built-in examples include "issue" and "folder". To implement a "submenu" context provider, set `"type": "submenu"` and implement the `loadSubmenuItems` and `getContextItems` functions. Here is an example that shows a list of all README files in the current workspace:
\~/.continue/config.ts
```
const ReadMeContextProvider: CustomContextProvider = { title: "readme", displayTitle: "README", description: "Reference README.md files in your workspace", type: "submenu", getContextItems: async ( query: string, extras: ContextProviderExtras, ): Promise => { // 'query' is the filepath of the README selected from the dropdown const content = await extras.ide.readFile(query); return [ { name: getFolder(query), description: getFolderAndBasename(query), content, }, ]; }, loadSubmenuItems: async ( args: LoadSubmenuItemsArgs, ): Promise => { const { ide } = args; // Filter all workspace files for READMEs const workspaceDirs = await ide.getWorkspaceDirs(); const allFiles = await Promise.all( workspaceDirs.map((dir) => ide.subprocess(`find ${dir} -name "README.md"`), ), ); // 'readmes' now contains an array of file paths for each README.md file found in the workspace, // excluding those in 'node_modules' const readmes = allFiles .flatMap((mds) => mds[0].split("\n")) .filter((file) => file.trim() !== "" && !file.includes("/node_modules/")); // Return the items that will be shown in the dropdown return readmes.map((filepath) => { return { id: filepath, title: getFolder(filepath), description: getFolderAndBasename(filepath), }; }); },};export function modifyConfig(config: Config): Config { if (!config.contextProviders) { config.contextProviders = []; } config.contextProviders.push(ReadMeContextProvider); return config;}function getFolder(path: string): string { return path.split(/[\/\\]/g).slice(-2)[0];}function getFolderAndBasename(path: string): string { return path .split(/[\/\\]/g) .slice(-2) .join("/");}
```
The flow of information in the above example is as follows:
1. The user types `@readme` and selects it from the dropdown, now displaying the submenu where they can search for any item returned by `loadSubmenuItems`.
2. The user selects one of the READMEs in the submenu, enters the rest of their input, and presses enter.
3. The `id` of the chosen `ContextSubmenuItem` is passed to `getContextItems` as the `query` argument. In this case it is the filepath of the README.
4. The `getContextItems` function can then use the `query` to retrieve the full contents of the README and format the content before returning the context item which will be included in the prompt.
### Importing outside modules
To include outside Node modules in your config.ts, run `npm install ` from the `~/.continue` directory, and then import them in config.ts.
Continue will use [esbuild](https://esbuild.github.io/) to bundle your `config.ts` and any dependencies into a single Javascript file. The exact configuration used can be found [here](https://github.com/continuedev/continue/blob/5c9874400e223bbc9786a8823614a2e501fbdaf7/extensions/vscode/src/ideProtocol.ts#L45-L52).
### `CustomContextProvider` Reference
* `title`: An identifier for the context provider
* `displayTitle` (optional): The title displayed in the dropdown
* `description` (optional): The longer description displayed in the dropdown when hovered
* `type` (optional): The type of context provider. Options are "normal", "query", and "submenu". Defaults to "normal".
* `renderInlineAs` (optional): The string that will be rendered inline at the top of the prompt. If no value is provided, the `displayTitle` will be used. An empty string can be provided to prevent rendering the default `displayTitle`.
* `getContextItems`: A function that returns the documents to include in the prompt. It should return a list of `ContextItem`s, and is given access to the following arguments:
* `extras.fullInput`: A string representing the user's full input to the text box. This can be used for example to generate an embedding to compare against a set of other embedded documents
* `extras.embeddingsProvider`: The embeddings provider has an `embed` function that will convert text (such as `fullInput`) to an embedding
* `extras.llm`: The current default LLM, which you can use to make completion requests
* `extras.ide`: An instance of the `IDE` class, which lets you gather various sources of information from the IDE, including the contents of the terminal, the list of open files, or any warnings in the currently open file.
* `query`: (not currently used) A string representing the query
* `loadSubmenuItems` (optional): A function that returns a list of `ContextSubmenuItem`s to display in a submenu. It is given access to an `IDE`, the same that is passed to `getContextItems`. .
## Extension API for VSCode
Continue exposes an API for registering context providers from a 3rd party VSCode extension. This is useful if you have a VSCode extension that provides some additional context that you would like to use in Continue. To use this API, add the following to your `package.json`:
package.json
```json
{ "extensionDependencies": ["continue.continue"] }
```
Or install the Continue Core module from npm:
```
npm i @continuedev/core
```
You can add the Continue core module as a dev dependency in your `package.json`:
package.json
```json
{ "devDependencies": { "@continuedev/core": "^0.0.1" } }
```
Then, you can use the `registerCustomContextProvider` function to register your context provider. Your custom context provider must implement the `IContextProvider` interface. Here is an example:
myCustomContextProvider.ts
```
import * as vscode from "vscode";import { IContextProvider, ContextProviderDescription, ContextProviderExtras, ContextItem, LoadSubmenuItemsArgs, ContextSubmenuItem,} from "@continuedev/core";class MyCustomProvider implements IContextProvider { get description(): ContextProviderDescription { return { title: "Custom", displayTitle: "Custom", description: "my custom context provider", type: "normal", }; } async getContextItems( query: string, extras: ContextProviderExtras, ): Promise { return [ { name: "Custom", description: "Custom description", content: "Custom content", }, ]; } async loadSubmenuItems( args: LoadSubmenuItemsArgs, ): Promise { return []; }}// create an instance of your custom providerconst customProvider = new MyCustomProvider();// get Continue extension using vscode APIconst continueExt = vscode.extensions.getExtension("Continue.continue");// get the API from the extensionconst continueApi = continueExt?.exports;// register your custom providercontinueApi?.registerCustomContextProvider(customProvider);
```
This will register `MyCustomProvider` with Continue!
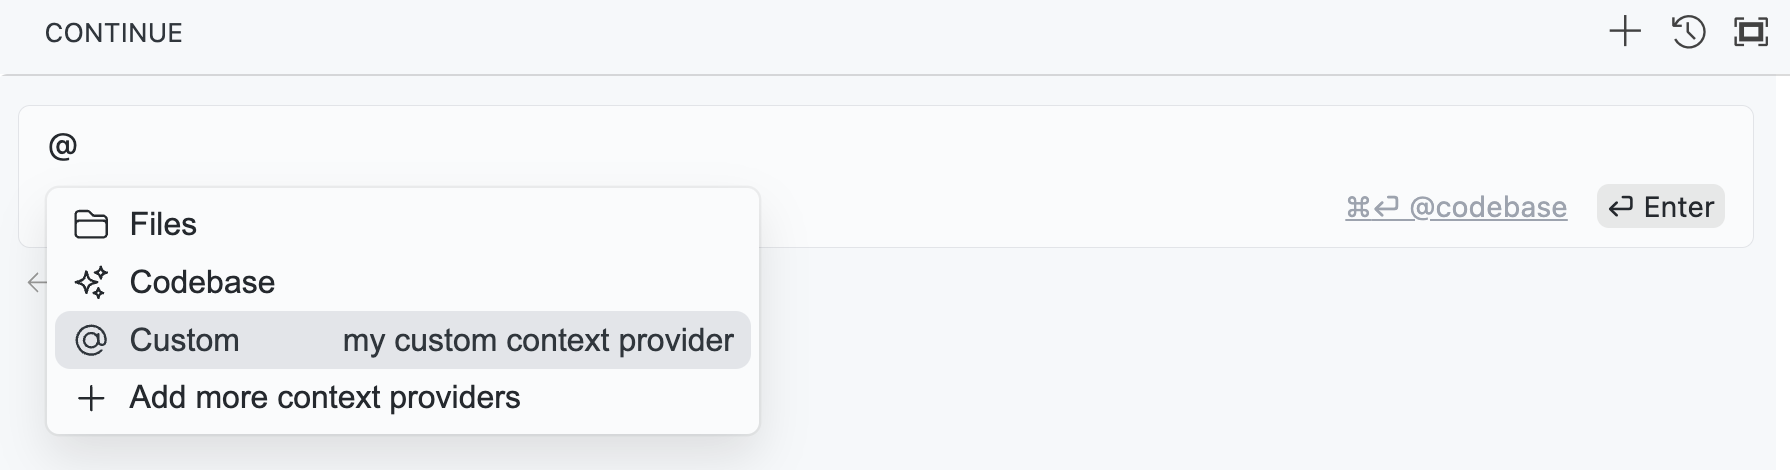
# Custom code RAG
Source: https://docs.continue.dev/guides/custom-code-rag
While Continue comes with out of the box, you might wish to set up your own vector database and build a custom retrieval-augmented generation (RAG) system. This can allow you to access code that is not available locally, to index code a single time across all users, or to include custom logic. In this guide, we'll walk you through the steps it takes to build this.
## Step 1: Choose an embeddings model
If possible, we recommend using [`voyage-code-3`](https://docs.voyageai.com/docs/embeddings), which will give the most accurate answers of any existing embeddings model for code. You can obtain an API key [here](https://dash.voyageai.com/api-keys). Because their API is [OpenAI-compatible](https://docs.voyageai.com/reference/embeddings-api), you can use any OpenAI client by swapping out the URL.
## Step 2: Choose a vector database
There are a number of available vector databases, but because most vector databases will be able to performantly handle large codebases, we would recommend choosing one for ease of setup and experimentation.
[LanceDB](https://lancedb.github.io/lancedb/basic/) is a good choice for this because it can run in-memory with libraries for both Python and Node.js. This means that in the beginning you can focus on writing code rather than setting up infrastructure. If you have already chosen a vector database, then using this instead of LanceDB is also a fine choice.
## Step 3: Choose a "chunking" strategy
Most embeddings models can only handle a limited amount of text at once. To get around this, we "chunk" our code into smaller pieces.
If you use `voyage-code-3`, it has a maximum context length of 16,000 tokens, which is enough to fit most files. This means that in the beginning you can get away with a more naive strategy of truncating files that exceed the limit. In order of easiest to most comprehensive, 3 chunking strategies you can use are:
1. Truncate the file when it goes over the context length: in this case you will always have 1 chunk per file.
2. Split the file into chunks of a fixed length: starting at the top of the file, add lines in your current chunk until it reaches the limit, then start a new chunk.
3. Use a recursive, abstract syntax tree (AST)-based strategy: this is the most exact, but most complex. In most cases you can achieve high quality results by using (1) or (2), but if you'd like to try this you can find a reference example in [our code chunker](https://github.com/continuedev/continue/blob/main/core/indexing/chunk/code.ts) or in [LlamaIndex](https://docs.llamaindex.ai/en/stable/api_reference/node_parsers/code/).
As usual in this guide, we recommend starting with the strategy that gives 80% of the benefit with 20% of the effort.
## Step 4: Put together an indexing script
Indexing, in which we will insert your code into the vector database in a retrievable format, happens in three steps:
1. Chunking
2. Generating embeddings
3. Inserting into the vector database
With LanceDB, we can do steps 2 and 3 simultaneously, as demonstrated [in their docs](https://lancedb.github.io/lancedb/basic/#using-the-embedding-api). If you are using Voyage AI for example, it would be configured like this:
```
from lancedb.pydantic import LanceModel, Vectorfrom lancedb.embeddings import get_registrydb = lancedb.connect("/tmp/db")func = get_registry().get("openai").create( name="voyage-code-3", base_url="https://api.voyageai.com/v1/", api_key=os.environ["VOYAGE_API_KEY"],)class CodeChunks(LanceModel): filename: str text: str = func.SourceField() # 1024 is the default dimension for `voyage-code-3`: https://docs.voyageai.com/docs/embeddings#model-choices vector: Vector(1024) = func.VectorField()table = db.create_table("code_chunks", schema=CodeChunks, mode="overwrite")table.add([ {"text": "print('hello world!')", filename: "hello.py"}, {"text": "print('goodbye world!')", filename: "goodbye.py"}])query = "greetings"actual = table.search(query).limit(1).to_pydantic(CodeChunks)[0]print(actual.text)
```
If you are indexing more than one repository, it is best to store these in
separate "tables" (terminology used by LanceDB) or "collections" (terminology
used by some other vector DBs). The alternative of adding a "repository" field
and then filtering by this is less performant.
Regardless of which database or model you have chosen, your script should iterate over all of the files that you wish to index, chunk them, generate embeddings for each chunk, and then insert all of the chunks into your vector database.
## Step 5: Run your indexing script
In a perfect production version, you would want to build "automatic, incremental indexing", so that you whenever a file changes, that file and nothing else is automatically re-indexed. This has the benefits of perfectly up-to-date embeddings and lower cost.
That said, we highly recommend first building and testing the pipeline before attempting this. Unless your codebase is being entirely rewritten frequently, an incremental refresh of the index is likely to be sufficient and reasonably cheap.
At this point, you've written your indexing script and tested that you can make queries from your vector database. Now, you'll want a plan for when to run the indexing script.
In the beginning, you should probably run it by hand. Once you are confident that your custom RAG is providing value and is ready for the long-term, then you can set up a cron job to run it periodically. Because codebases are largely unchanged in short time frames, you won't want to re-index more than once a day. Once per week or month is probably even sufficient.
## Step 6: Set up your server
In order for the Continue extension to access your custom RAG system, you'll need to set up a server. This server is responsible for recieving a query from the extension, querying the vector database, and returning the results in the format expected by Continue.
Here is a reference implementation using FastAPI that is capable of handling requests from Continue's "http" context provider.
```
"""This is an example of a server that can be used with the "http" context provider."""from fastapi import FastAPIfrom pydantic import BaseModelclass ContextProviderInput(BaseModel): query: str fullInput: strapp = FastAPI()@app.post("/retrieve")async def create_item(item: ContextProviderInput): results = [] # TODO: Query your vector database here. # Construct the "context item" format expected by Continue context_items = [] for result in results: context_items.append({ "name": result.filename, "description": result.filename, "content": result.text, }) return context_items
```
After you've set up your server, you can configure Continue to use it by adding the "http" context provider to your `contextProviders` array in your configuration:
* YAML
* JSON
config.yaml
```
context: - provider: http params: url: https://myserver.com/retrieve name: http description: Custom HTTP Context Provider displayTitle: My Custom Context
```
config.json
```json
{
"contextProviders": [
{
"name": "http",
"params": {
"url": "https://myserver.com/retrieve",
"title": "http",
"description": "Custom HTTP Context Provider",
"displayTitle": "My Custom Context"
}
}
]
}
```
## Step 7 (Bonus): Set up reranking
If you'd like to improve the quality of your results, a great first step is to add reranking. This involves retrieving a larger initial pool of results from the vector database, and then using a reranking model to order them from most to least relevant. This works because the reranking model can perform a slightly more expensive calculation on the small set of top results, and so can give a more accurate ordering than similarity search, which has to search over all entries in the database.
If you wish to return 10 total results for each query for example, then you would:
1. Retrieve \~50 results from the vector database using similarity search
2. Send all of these 50 results to the reranker API along with the query in order to get relevancy scores for each
3. Sort the results by relevancy score and return the top 10
We recommend using the `rerank-2` model from Voyage AI, which has examples of usage [here](https://docs.voyageai.com/docs/reranker).
# How to Self-Host a Model
Source: https://docs.continue.dev/guides/how-to-self-host-a-model
You can deploy a model in your , , , , or using:
* [HuggingFace TGI](https://github.com/continuedev/deploy-os-code-llm#tgi)
* [vLLM](https://github.com/continuedev/deploy-os-code-llm#vllm)
* [SkyPilot](https://github.com/continuedev/deploy-os-code-llm#skypilot)
* [Anyscale Private Endpoints](https://github.com/continuedev/deploy-os-code-llm#anyscale-private-endpoints) (OpenAI compatible API)
* [Lambda](https://github.com/continuedev/deploy-os-code-llm#lambda)
## Self-hosting an open-source model
For many cases, either Continue will have a built-in provider or the API you use will be OpenAI-compatible, in which case you can use the "openai" provider and change the "baseUrl" to point to the server.
However, if neither of these are the case, you will need to wire up a new LLM object.
## Authentication
Basic authentication can be done with any provider using the `apiKey` field:
* YAML
* JSON
config.yaml
```
models: - name: Ollama provider: ollama model: llama2-7b apiKey:
```
config.json
```json
{
"models": [
{
"title": "Ollama",
"provider": "ollama",
"model": "llama2-7b",
"apiKey": ""
}
]
}
```
This translates to the header `"Authorization": "Bearer xxx"`.
If you need to send custom headers for authentication, you may use the `requestOptions.headers` property like in this example with Ollama:
* YAML
* JSON
config.yaml
```
models: - name: Ollama provider: ollama model: llama2-7b requestOptions: headers: X-Auth-Token: xxx
```
config.json
```json
{
"models": [
{
"title": "Ollama",
"provider": "ollama",
"model": "llama2-7b",
"requestOptions": { "headers": { "X-Auth-Token": "xxx" } }
}
]
}
```
Similarly if your model requires a Certificate for authentication, you may use the `requestOptions.clientCertificate` property like in the example below:
* YAML
* JSON
config.yaml
```
models: - name: Ollama provider: ollama model: llama2-7b requestOptions: clientCertificate: cert: C:\tempollama.pem key: C:\tempollama.key passphrase: c0nt!nu3
```
config.json
```json
{
"models": [
{
"title": "Ollama",
"provider": "ollama",
"model": "llama2-7b",
"requestOptions": {
"clientCertificate": {
"cert": "C:\\tempollama.pem",
"key": "C:\\tempollama.key",
"passphrase": "c0nt!nu3"
}
}
}
]
}
```
# Using Llama 3.1 with Continue
Source: https://docs.continue.dev/guides/llama3.1
Continue makes it easy to code with the latest open-source models, including the entire Llama 3.1 family of models. Llama 3.2 models are also supported but not recommended for chat, because they are specifically designed to be small or multi-modal.
If you haven't already installed Continue, you can do that [here for VS Code](https://marketplace.visualstudio.com/items?itemName=Continue.continue) or [here for JetBrains](https://plugins.jetbrains.com/plugin/22707-continue). For more general information on customizing Continue, read [our customization docs](/customization/overview).
Below we share some of the easiest ways to get up and running, depending on your use-case.
## Ollama
Ollama is the fastest way to get up and running with local language models. We recommend trying Llama 3.1 8b, which is impressive for its size and will perform well on most hardware.
1. Download Ollama [here](https://ollama.ai/) (it should walk you through the rest of these steps)
2. Open a terminal and run `ollama run llama3.1:8b`
3. Change your Continue config file like this:
* YAML
* JSON
config.yaml
```
models: - name: Llama 3.1 8b provider: ollama model: llama3.1-8b
```
config.json
```json
{
"models": [
{ "title": "Llama 3.1 8b", "provider": "ollama", "model": "llama3.1-8b" }
]
}
```
## Groq
Check if your chosen model is still supported by referring to the [model
documentation](https://console.groq.com/docs/models). If a model has been
deprecated, you may encounter a 404 error when attempting to use it.
Groq provides the fastest available inference for open-source language models, including the entire Llama 3.1 family.
1. Obtain an API key [here](https://console.groq.com/keys)
2. Update your Continue config file like this:
* YAML
* JSON
config.yaml
```
models: - name: Llama 3.3 70b Versatile provider: groq model: llama-3.3-70b-versatile apiKey:
```
config.json
```json
{
"models": [
{
"title": "Llama 3.3 70b Versatile",
"provider": "groq",
"model": "llama-3.3-70b-versatile",
"apiKey": ""
}
]
}
```
## Together AI
Together AI provides fast and reliable inference of open-source models. You'll be able to run the 405b model with good speed.
1. Create an account [here](https://api.together.xyz/signup)
2. Copy your API key that appears on the welcome screen
3. Update your Continue config file like this:
* YAML
* JSON
config.yaml
```
models: - name: Llama 3.1 405b provider: together model: llama3.1-405b apiKey:
```
config.json
```json
{
"models": [
{
"title": "Llama 3.1 405b",
"provider": "together",
"model": "llama3.1-405b",
"apiKey": ""
}
]
}
```
## Replicate
Replicate makes it easy to host and run open-source AI with an API.
1. Get your Replicate API key [here](https://replicate.ai/)
2. Change your Continue config file like this:
* YAML
* JSON
config.yaml
```
models: - name: Llama 3.1 405b provider: replicate model: llama3.1-405b apiKey:
```
config.json
```json
{
"models": [
{
"title": "Llama 3.1 405b",
"provider": "replicate",
"model": "llama3.1-405b",
"apiKey": ""
}
]
}
```
## SambaNova
SambaNova Cloud provides world record Llama3.1 70B/405B serving.
1. Create an account [here](http://cloud.sambanova.ai?utm_source=continue\&utm_medium=external\&utm_campaign=cloud_signup)
2. Copy your API key
3. Update your Continue config file like this:
* YAML
* JSON
config.yaml
```
models: - name: SambaNova Llama 3.1 405B provider: sambanova model: llama3.1-405b apiKey:
```
config.json
```json
{
"models": [
{
"title": "SambaNova Llama 3.1 405B",
"provider": "sambanova",
"model": "llama3.1-405b",
"apiKey": ""
}
]
}
```
## Cerebras Inference
Cerebras Inference uses specialized silicon to provides fast inference for the Llama3.1 8B/70B.
1. Create an account in the portal [here](https://cloud.cerebras.ai/).
2. Create and copy the API key for use in Continue.
3. Update your Continue config file:
* YAML
* JSON
config.yaml
```
models: - name: Cerebras Llama 3.1 70B provider: cerebras model: llama3.1-70b apiKey:
```
config.json
```json
{
"models": [
{
"title": "Cerebras Llama 3.1 70B",
"provider": "cerebras",
"model": "llama3.1-70b",
"apiKey": ""
}
]
}
```
# Using Ollama with Continue: A Developer's Guide
Source: https://docs.continue.dev/guides/ollama-guide
This comprehensive guide will walk you through setting up Ollama with Continue for powerful local AI development. Ollama allows you to run large language models locally on your machine, providing privacy, control, and offline capabilities for AI-assisted coding.
## Prerequisites
Before getting started, ensure your system meets these requirements:
* Operating System: macOS, Linux, or Windows
* RAM: Minimum 8GB (16GB+ recommended)
* Storage: At least 10GB free space
* Continue extension installed
## Installation Steps
### Step 1: Install Ollama
Choose the installation method for your operating system:
```
# macOSbrew install ollama# Linuxcurl -fsSL https://ollama.ai/install.sh | sh# Windows# Download from ollama.ai
```
### Step 2: Download Models
After installing Ollama, download the models you want to use. Here are some popular options:
```
# Popular models for developmentollama pull llama2ollama pull codellamaollama pull mistral
```
## Configuration
Configure Continue to work with your local Ollama instance:
### Continue Configuration
```json
{
"models": [
{
"title": "Ollama",
"provider": "ollama",
"model": "llama2",
"apiBase": "http://localhost:11434"
}
]
}
```
### Advanced Settings
For optimal performance, consider these advanced configuration options:
* Memory optimization
* GPU acceleration
* Custom model parameters
* Performance tuning
## Best Practices
### Model Selection
Choose models based on your specific needs:
1. **Code Generation**: Use CodeLlama or Mistral
2. **Chat**: Llama2 or Mistral
3. **Specialized Tasks**: Domain-specific models
### Performance Optimization
To get the best performance from Ollama:
* Monitor system resources
* Adjust context window size
* Use appropriate model sizes
* Enable GPU acceleration when available
## Troubleshooting
### Common Issues
Here are solutions to common problems you might encounter:
#### Connection Problems
* Check Ollama service status
* Verify port availability
* Review firewall settings
#### Performance Issues
* Insufficient RAM
* Model too large for system
* GPU compatibility
### Solutions
Try these solutions in order:
1. Restart Ollama service
2. Clear model cache
3. Update to latest version
4. Check system requirements
## Example Workflows
### Code Generation
```
# Example: Generate a FastAPI endpointdef create_user_endpoint(): # Continue will help generate the implementation pass
```
### Code Review
Use Continue with Ollama to:
* Analyze code quality
* Suggest improvements
* Identify potential bugs
* Generate documentation
## Conclusion
Ollama with Continue provides a powerful local development environment for AI-assisted coding. You now have complete control over your AI models, ensuring privacy and enabling offline development workflows.
***
*This guide is based on Ollama v0.1.x and Continue v0.8.x. Please check for updates regularly.*
# Overview
Source: https://docs.continue.dev/guides/overview
## Model & Setup Guides
* [Using Ollama with Continue](/guides/ollama-guide) - Local AI development with Ollama
* [Setting up Codestral](/guides/set-up-codestral) - Configure Mistral's Codestral model
* [How to Self-Host a Model](/guides/how-to-self-host-a-model) - Self-hosting AI models
* [Running Continue Without Internet](/guides/running-continue-without-internet) - Offline development setup
* [Llama 3.1 Setup](/guides/llama3.1) - Getting started with Llama 3.1
## Advanced Tutorials
* [Build Your Own Context Provider](/guides/build-your-own-context-provider) - Create custom context providers
* [Custom Code RAG](/guides/custom-code-rag) - Implement custom retrieval-augmented generation
## Contributing
Have a guide idea or found an issue? We welcome contributions! Check our [GitHub repository](https://github.com/continuedev/continue) to get involved.
# Running Continue without Internet
Source: https://docs.continue.dev/guides/running-continue-without-internet
Continue can be run even on an air-gapped computer if you use a local model. Only a few adjustments are required for this to work.
1. Download the latest .vsix file from the [Open VSX Registry](https://open-vsx.org/extension/Continue/continue) and [install it to VS Code](https://code.visualstudio.com/docs/editor/extension-marketplace#_install-from-a-vsix).
2. Open the [User Settings Page](/customize/settings) and turn off "Allow Anonymous Telemetry". This will stop Continue from attempting requests to PostHog for [anonymous telemetry](/customize/telemetry).
3. Also in `config.json`, set the default model to a local model. You can available options [here](/customization/models#openai).
4. Restart VS Code to ensure that the changes to `config.json` or `config.yaml` take effect.
# How to Set Up Codestral
Source: https://docs.continue.dev/guides/set-up-codestral
**Here is a step-by-step guide on how to set up Codestral with Continue using the Mistral AI API:**
1. Install the Continue VS Code or JetBrains extension following the instructions [here](/getting-started/install)
2. Click on the gear icon in the bottom right corner of the Continue window to open `~/.continue/config.json` (MacOS) / `%userprofile%\.continue\config.json` (Windows)
3. Log in and create an API key on Mistral AI's La Plateforme [here](https://console.mistral.ai/codestral). Make sure you get an API key from the "Codestral" page.
4. To use Codestral as your model for both `autocomplete` and `chat`, insert your Mistral API key below and add it to your configuration file:
* YAML
* JSON
config.yaml
```
models: - name: Codestral provider: mistral model: codestral-latest apiKey: apiBase: https://codestral.mistral.ai/v1 roles: - chat - autocomplete
```
config.json
```json
{
"models": [
{
"title": "Codestral",
"provider": "mistral",
"model": "codestral-latest",
"apiKey": "",
"apiBase": "https://codestral.mistral.ai/v1"
}
],
"tabAutocompleteModel": [
{
"title": "Codestral",
"provider": "mistral",
"model": "codestral-latest",
"apiKey": "",
"apiBase": "https://codestral.mistral.ai/v1"
}
]
}
```
5. If you run into any issues or have any questions, please join our Discord and post in the `#help` channel [here](https://discord.gg/EfJEfdFnDQ)
# Create an assistant
Source: https://docs.continue.dev/hub/assistants/create-an-assistant
## Remix an assistant
You should remix an assistant if you want to use it after some modifications.
By clicking the “remix” button, you’ll be taken to the “Create a remix” page.
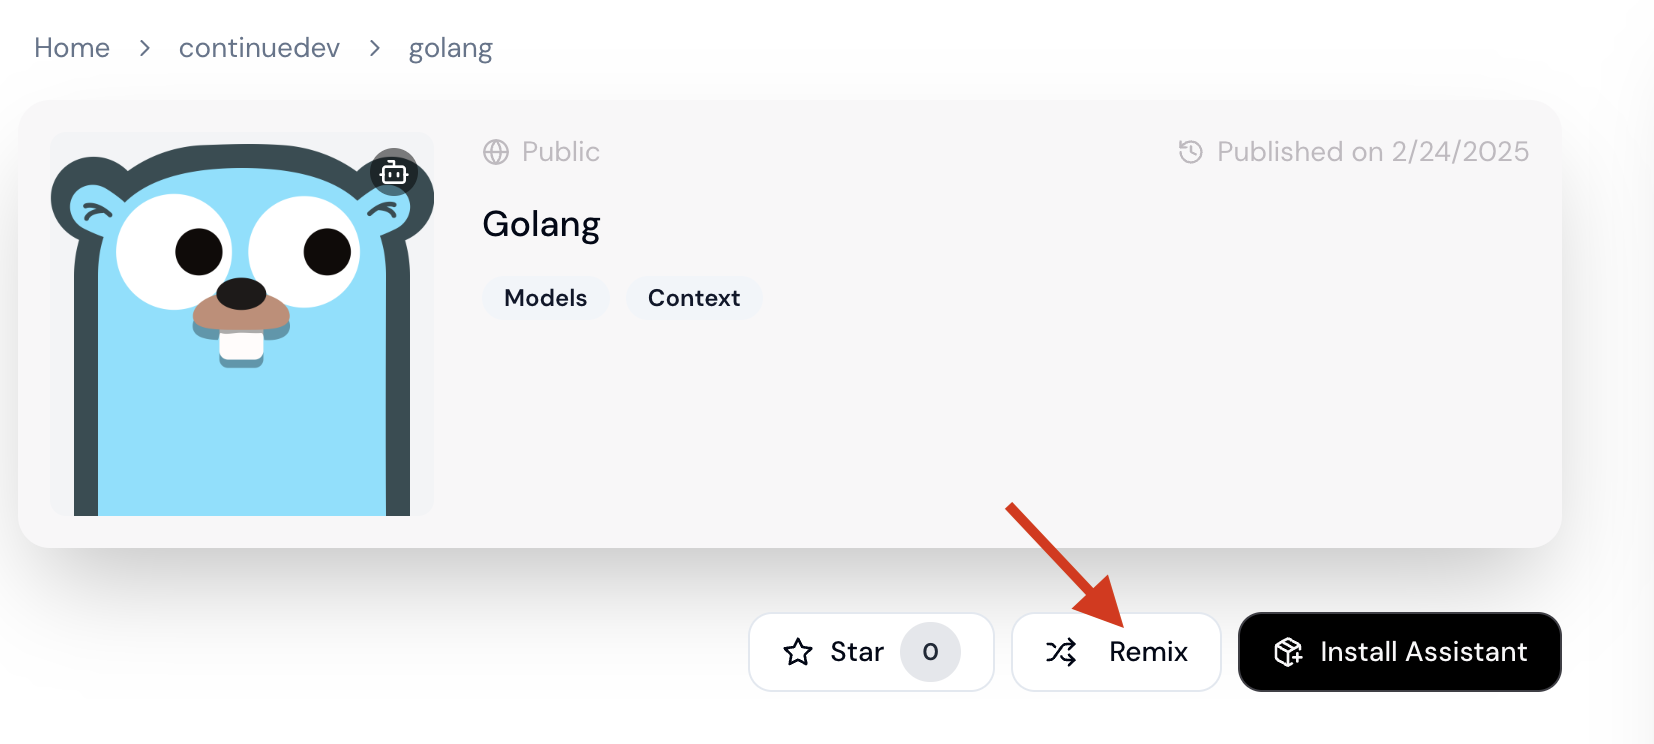
Once here, you’ll be able to
1. add or remove blocks in YAML configuration
2. change the name, description, icon, etc.
Clicking “Create assistant” will make this assistant available for use.
## Create an assistant from scratch
To create an assistant from scratch, select “New assistant” in the top bar.
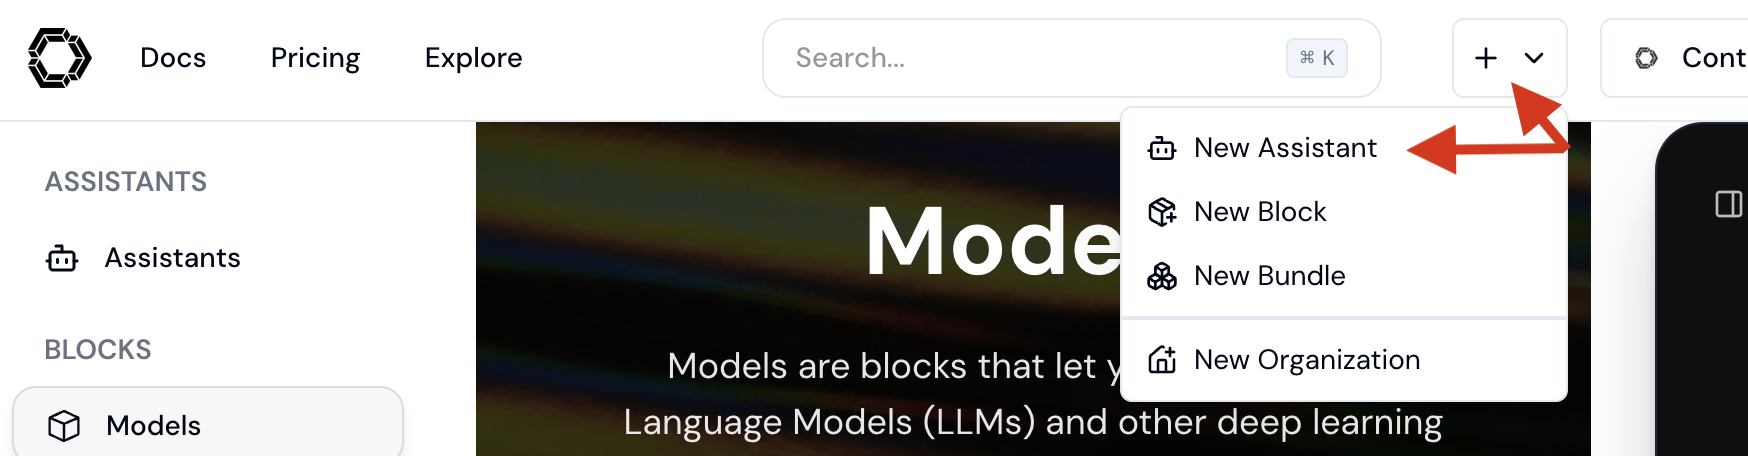
Choose a name, slug, description, and icon for your assistant.
The easiest way to create an assistant is to click "Create assistant" with the default configuration and then add / remove blocks using the sidebar.
Alternatively, you can edit the assistant YAML directly before clicking "Create assistant". Refer to examples of assistants on [hub.continue.dev](https://hub.continue.dev/explore/assistants) and visit the [YAML Reference](/reference#complete-yaml-config-example) docs for more details.
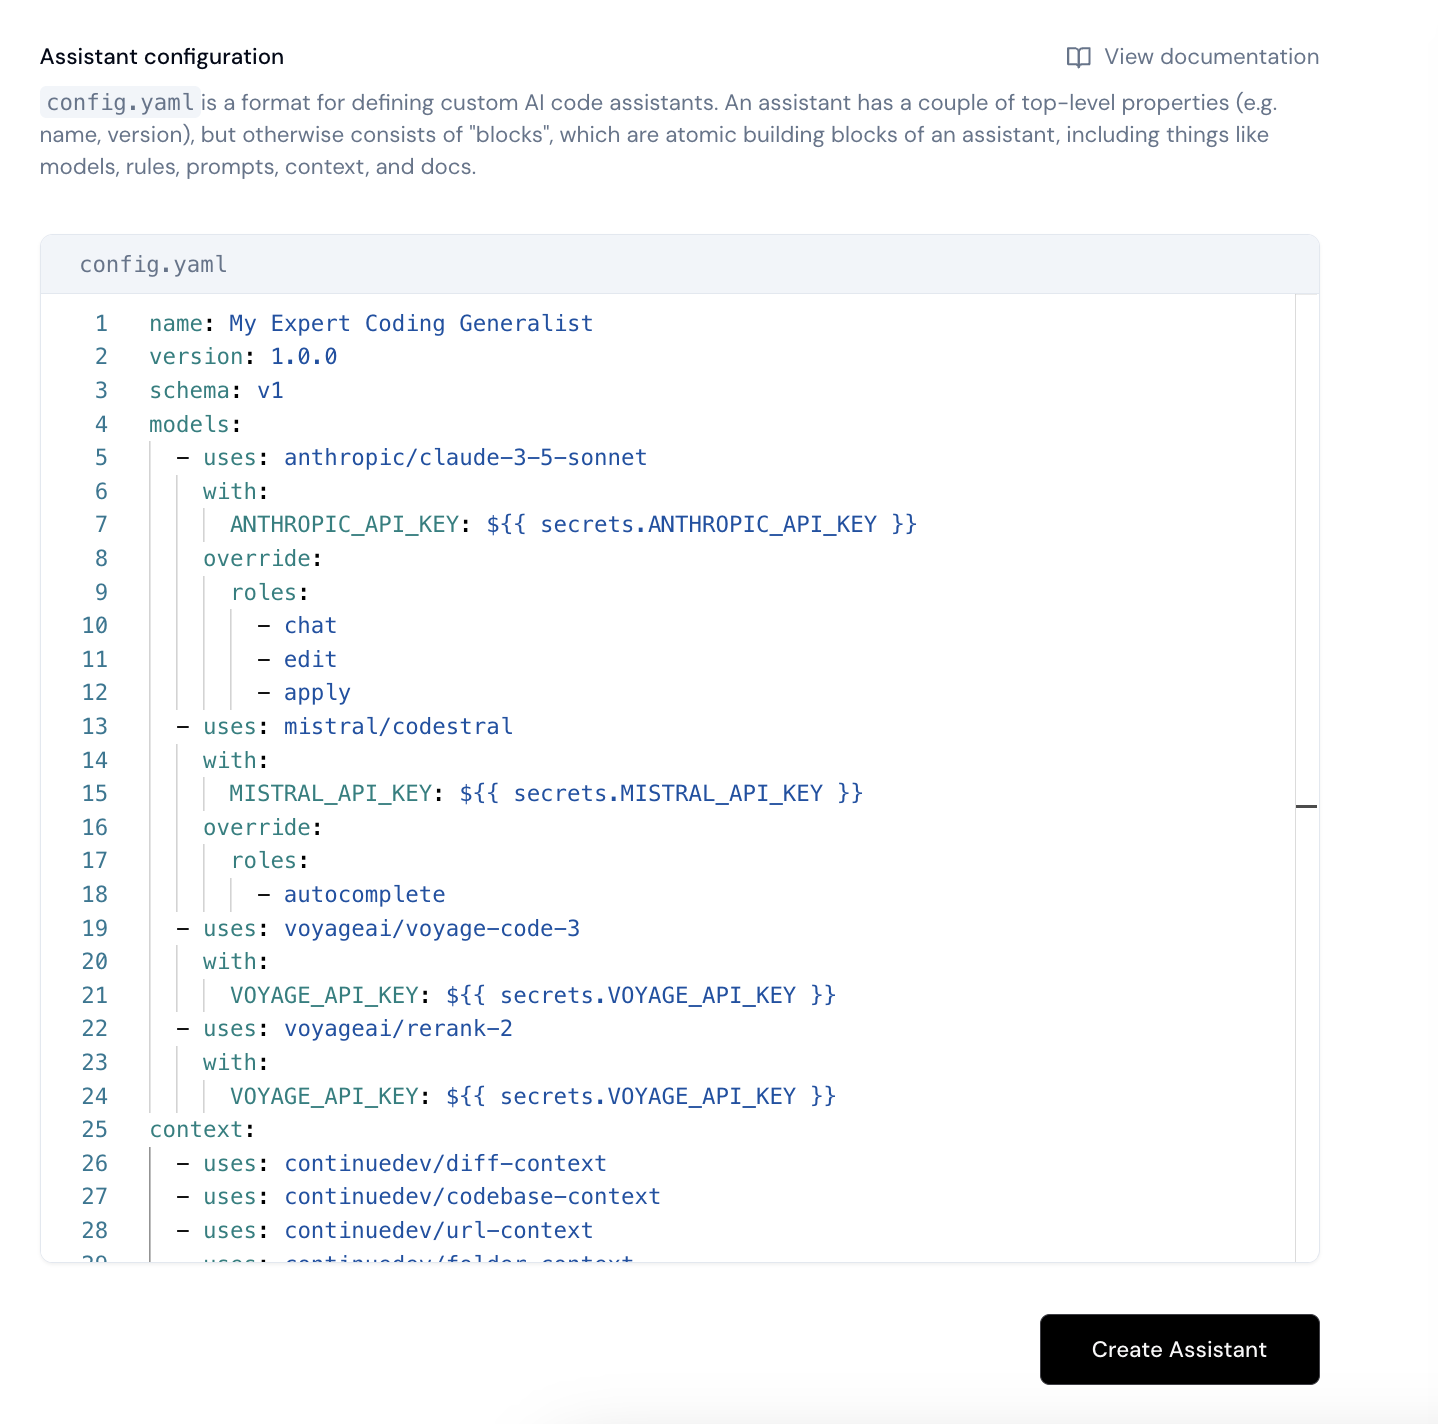
# Edit an Assistant
Source: https://docs.continue.dev/hub/assistants/edit-an-assistant
New versions of an assistant can be created and published using the sidebar.
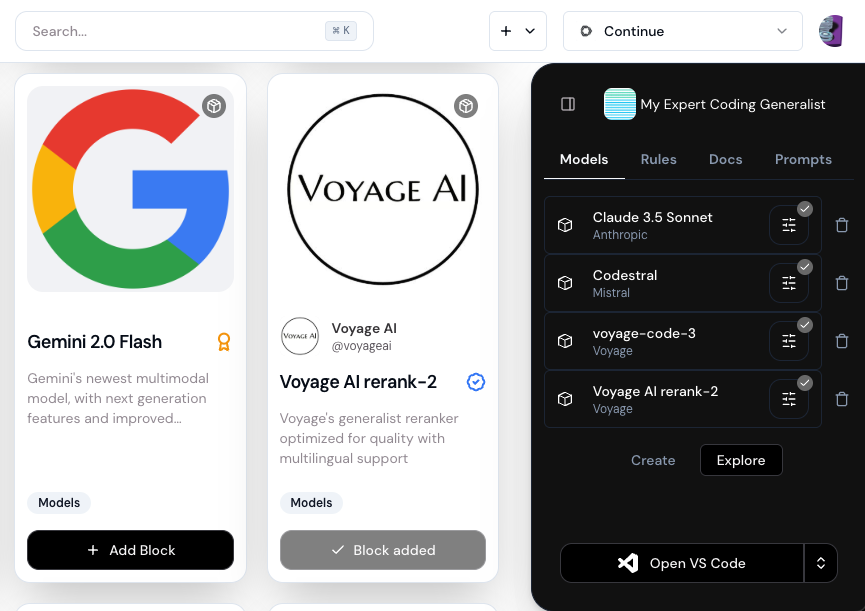
First, select an assistant from the dropdown at the top.
While editing an assistant, you can explore the hub and click "Add Block" from a block page to add it to your assistant.
For blocks that require secret values like API keys, you will see a small notification on the block's tile in the sidebar that will indicate if action is needed.
To delete a block, click the trash icon.
If a block you want to use does not exist yet, you can [create a new block](/hub/blocks/create-a-block).
When you are done editing, click "Publish" to publish a new version of the assistant.
Click "Open VS Code" or "Open JetBrains" to open your IDE for using the assistant.
# Introduction to Assistants
Source: https://docs.continue.dev/hub/assistants/intro
Custom AI code assistants are configurations of building blocks that enable a coding experience tailored to your specific use cases.
`config.yaml` is a format for defining custom AI code assistants. An assistant has some top-level properties (e.g. `name`, `version`), but otherwise consists of composable lists of **blocks** such as `models` and `rules`, which are the atomic building blocks of an assistant.
The `config.yaml` is parsed by the open-source Continue IDE extensions to create custom assistant experiences. When you log in to [hub.continue.dev](https://hub.continue.dev/), your assistants will automatically be synced with the IDE extensions.
# Use an assistant
Source: https://docs.continue.dev/hub/assistants/use-an-assistant
To use an existing assistant, you can explore other assistants .
Once you've found the assistant you want to use
1. Click “Add Assistant” on its page
2. Add any required inputs (e.g. secrets like API keys)
3. Select “Save changes” in assistant sidebar on the right hand side
After this, you can then go to your IDE extension and begin using the assistant by selecting it from the assistant dropdown.
[Extension Assistant Selector](/images/assistant-extension-select-319492a06d6249e5389747687341dfdb.png)
# Block Types
Source: https://docs.continue.dev/hub/blocks/block-types
## Models
Models are blocks that let you specify Large Language Models (LLMs) and other deep learning models to be used for various roles in the open-source IDE extension like Chat, Autocomplete, Edit, Embed, Rerank, etc. You can explore available models on [the hub](https://hub.continue.dev/explore/models).
Continue supports [many model providers](/customization/models#openai), including Anthropic, OpenAI, Gemini, Ollama, Amazon Bedrock, Azure, xAI, DeepSeek, and more. Models can have one or more of the following roles depending on its capabilities, including `chat`, `edit`, `apply`, `autocomplete`, `embed`, and `rerank`. Read more about roles [here](/customize/model-roles). View [`models`](/reference#models) in the YAML Reference for more details.
## Context
Context blocks define a context provider which can be referenced in Chat with `@` to pull in data from external sources such as files and folders, a URL, Jira or Confluence, and GitHub issues, among others. [Explore context provider blocks](https://hub.continue.dev/explore/context) on the hub.
Learn more about context providers [here](/reference#context), and check out [this guide](/guides/build-your-own-context-provider) to creating your own custom context provider. The `config.yaml` spec for context can be found [`here`](/reference#context).
## Docs
Docs are blocks that point to documentation sites, which will be indexed locally and then can be referenced as context using @Docs in Chat. [Explore docs](https://hub.continue.dev/explore/docs) on the hub.
Learn more in the [@Docs deep dive](/customization/overview#documentation-context), and view [`docs`](/reference#docs) in the YAML Reference for more details.
## MCP Servers
Model Context Protocol (MCP) is a standard way of building and sharing tools for language models. MCP Servers can be defined in `mcpServers` blocks. [Explore MCP Servers](https://hub.continue.dev/explore/mcp) on the hub.
Learn more in the [MCP deep dive](/customization/mcp-tools), and view [`mcpServers`](/reference#mcpservers) in the YAML Reference for more details.
## Rules
Rules blocks are instructions that your custom AI code assistant will always keep in mind - the contents of rules are inserted into the system message for all Chat requests. [Explore rules](https://hub.continue.dev/explore/rules) on the hub.
Learn more in the [rules deep dive](/customization/rules), and view [`rules`](/reference#rules) in the YAML Reference for more details.
## Prompts
Prompts blocks are pre-written, reusable prompts that can be referenced at any time during chat. They are especially useful as context for repetitive and/or complex tasks. [Explore prompts](https://hub.continue.dev/explore/prompts) on the hub.
Prompt blocks have the same syntax as [prompt files](/customization/prompts). The `config.yaml` spec for `prompts` can be found [here](/reference#prompts).
## Data
Data blocks allow you send your development data to custom destinations of your choice. Development data can be used for a variety of purposes, including analyzing usage, gathering insights, or fine-tuning models. You can read more about development data [here](/customize/overview#development-data). Explore data block examples [here](https://hub.continue.dev/explore/data).
Data destinations are configured in the [`data`](/reference#data) section of `config.yaml`.
# Bundles
Source: https://docs.continue.dev/hub/blocks/bundles
Bundles are collections of blocks that are commonly used together. You can use them to add multiple building blocks to your custom AI code assistants at once. They are only a concept on , so they are not represented in .
## Use a bundle
Once you know which bundle you want to use, you’ll need to
1. Make sure the correct assistant is in the sidebar
2. Click “Add all blocks". This adds the individual blocks to your assistant.
3. Add any required inputs (e.g. secrets) for each block.
4. Select “Save changes” in assistant sidebar on the right hand side
After this, you can then go to your IDE extension using the "Open VS Code" or "Open Jetbrains" buttons and begin using the new blocks.
## Create a bundle
To create a bundle, click “New bundle” in the header.
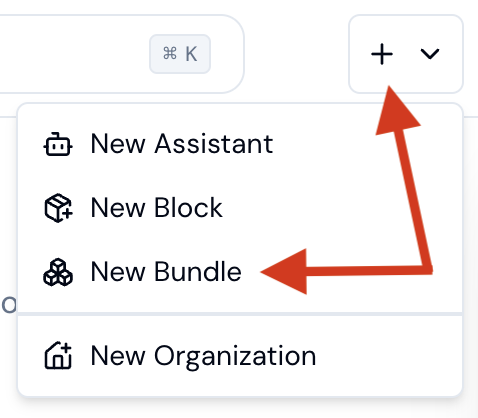
Choose a name, slug, description, and visibility for your bundle.
Then, search blocks using the "Search blocks" input and add them to your bundle.
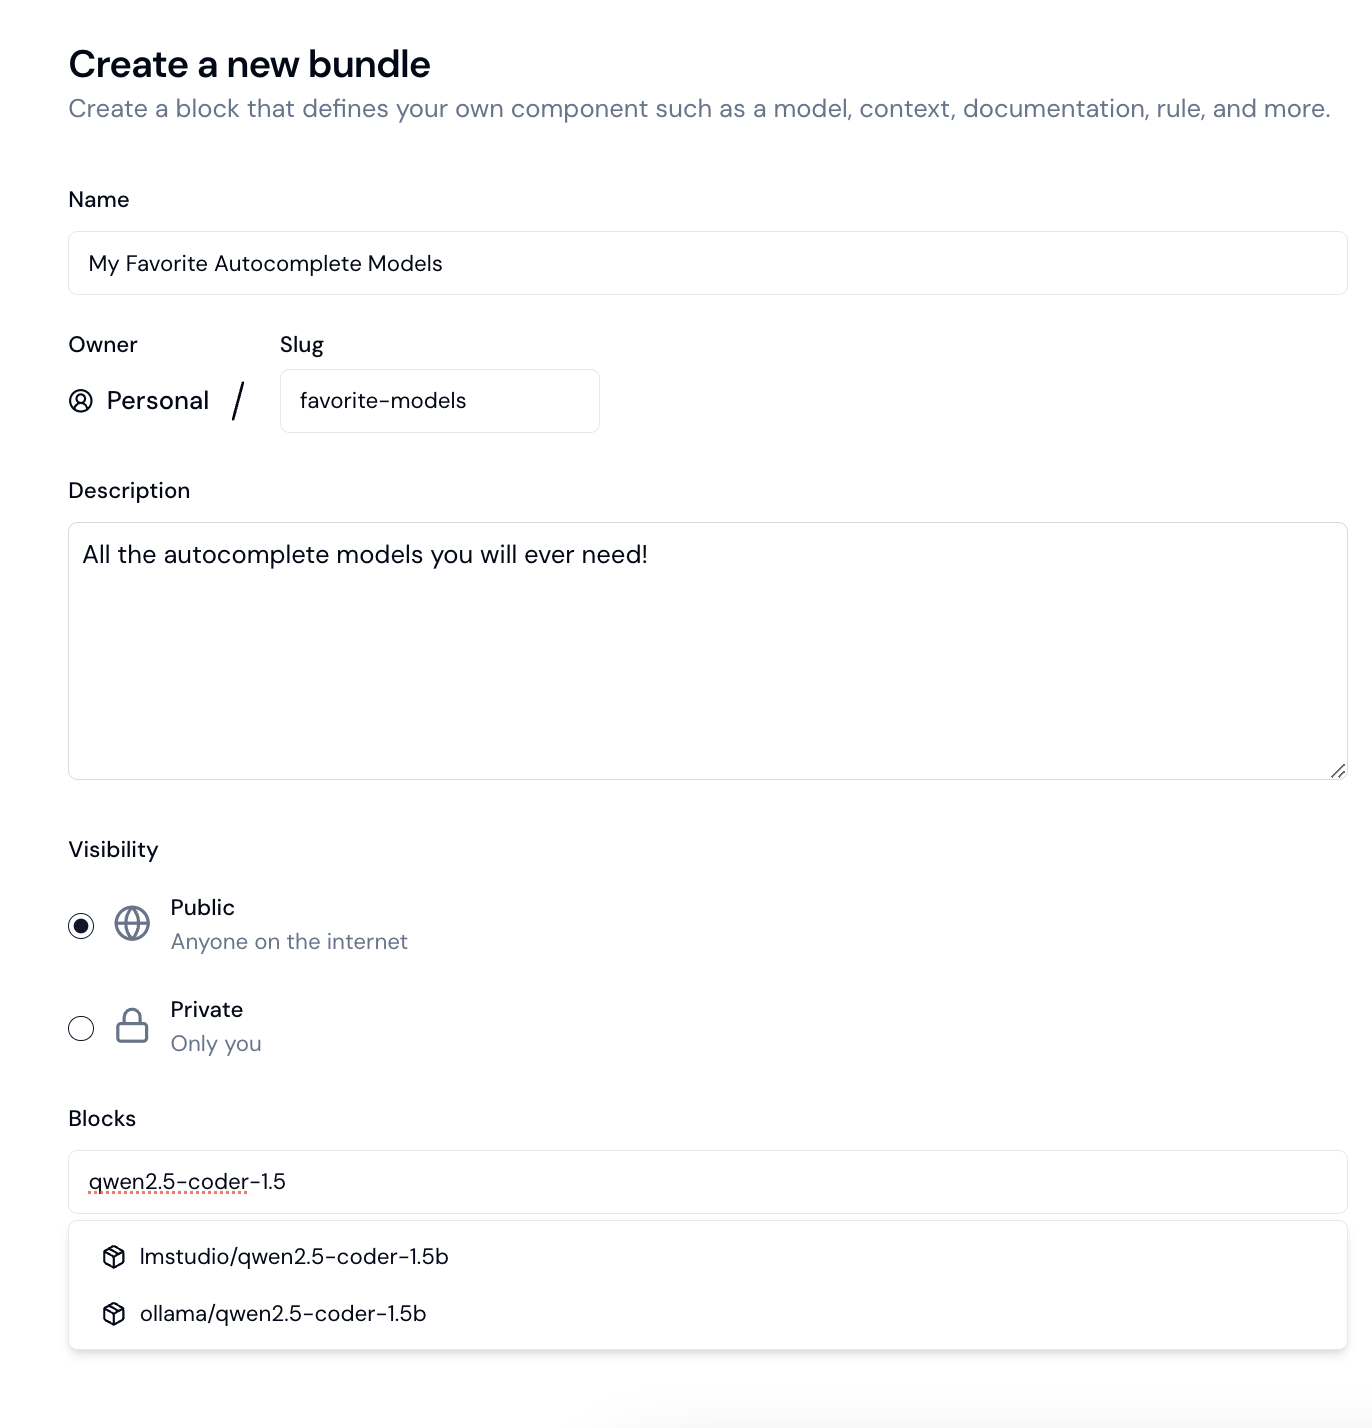
Once you have added all the blocks you want in your bundle, click "Create Bundle" to save it and make it available for use.
## Remix a bundle
It is not currently possible to remix a bundle.
# Create a block
Source: https://docs.continue.dev/hub/blocks/create-a-block
## Remix a block
You should remix a block if you want to use it after some modifications.
By clicking the “remix” button, you’ll be taken to the “Create a remix” page.
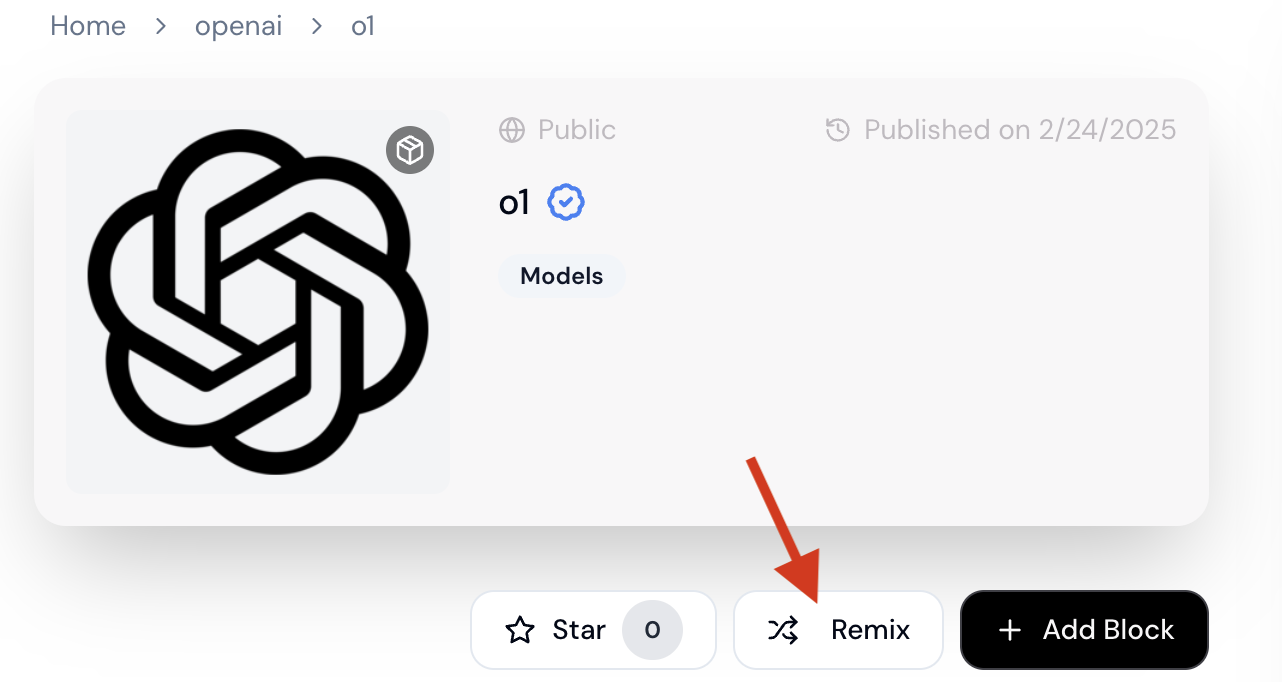
Once here, you’ll be able to 1) edit YAML configuration for the block and 2) change name, description, icon, etc. Clicking “Create block” will make this block available for use in an assistant.
## Create a block from scratch
To create a block from scratch, you will need to click “New block” in the top bar.
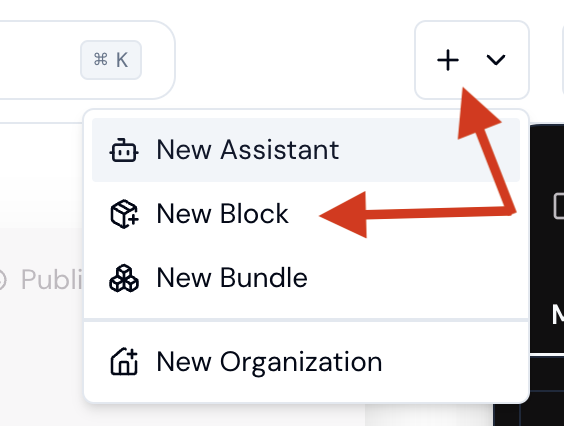
After filling out information on the block, you will want to create a block following the `config.yaml` [reference documentation](/reference). Refer to examples of blocks on [hub.continue.dev](https://hub.continue.dev/explore/models) and visit the [YAML Reference](/reference#complete-yaml-config-example) docs for more details.

### Block inputs
Blocks can receive values, including secrets, as inputs through templating. For values that the user of the block needs to set, you can use template variables (e.g. `${{ inputs.API_KEY}}`). Then, the user can set `API_KEY: ${{ secrets.MY_API_KEY }}` in the `with` clause of their assistant.
# Introduction
Source: https://docs.continue.dev/hub/blocks/intro
Blocks are the components you use to build a custom AI code assistant. These include , , , , , , and .
Blocks follow the [`config.yaml`](/reference) format. When combined with other blocks into a complete `config.yaml`, they form a custom AI code assistant.
# Use a block
Source: https://docs.continue.dev/hub/blocks/use-a-block
Blocks can be used by adding them to assistants:
* [Create an assistant](/hub/assistants/create-an-assistant)
* [Edit an assistant](/hub/assistants/edit-an-assistant)
Some blocks require inputs. If you are missing an input for a block, a notification icon will show up in the sidebar next to the block. Click the notification to select which secret to use for the block input:
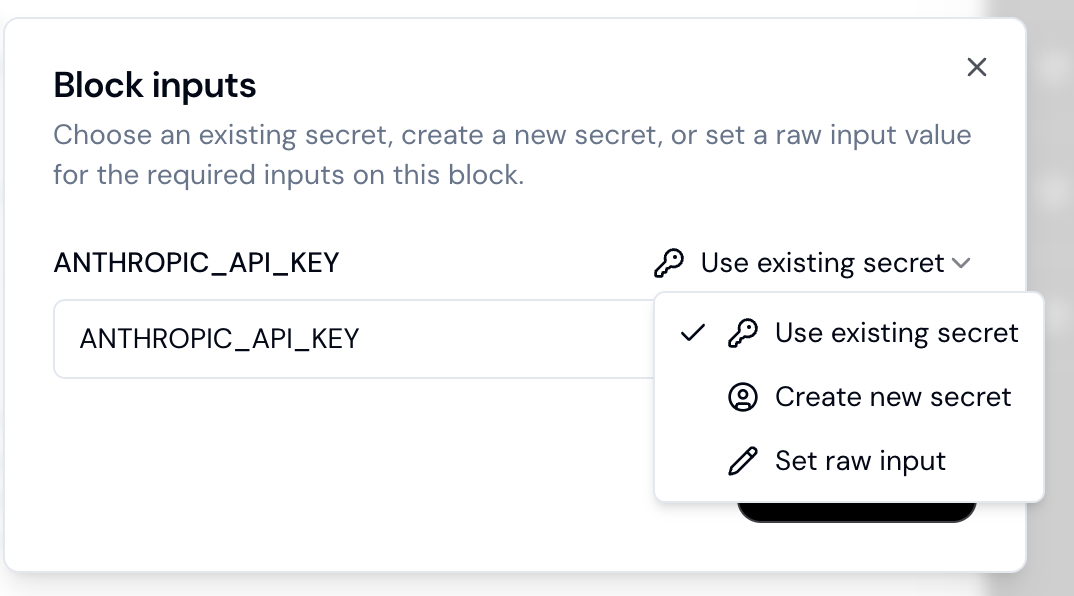
# Creating an Organization
Source: https://docs.continue.dev/hub/governance/creating-an-org
To Create an Organization, click the organization selector in the top right and select
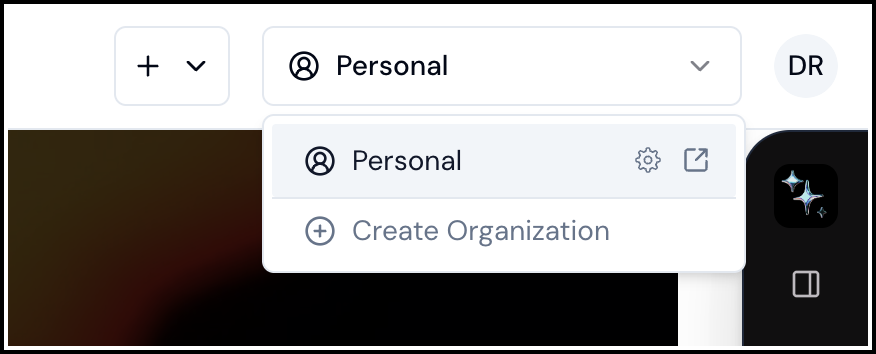
1. Choose a name, which will be used as the display name for your organization throughout the hub
2. Add a slug, which will be used for your org URL and as the prefix to all organization blocks and assistant slugs
3. Select an icon for your organization using the image uploader
4. Finally, add a Biography, which will be displayed on your org Home Page
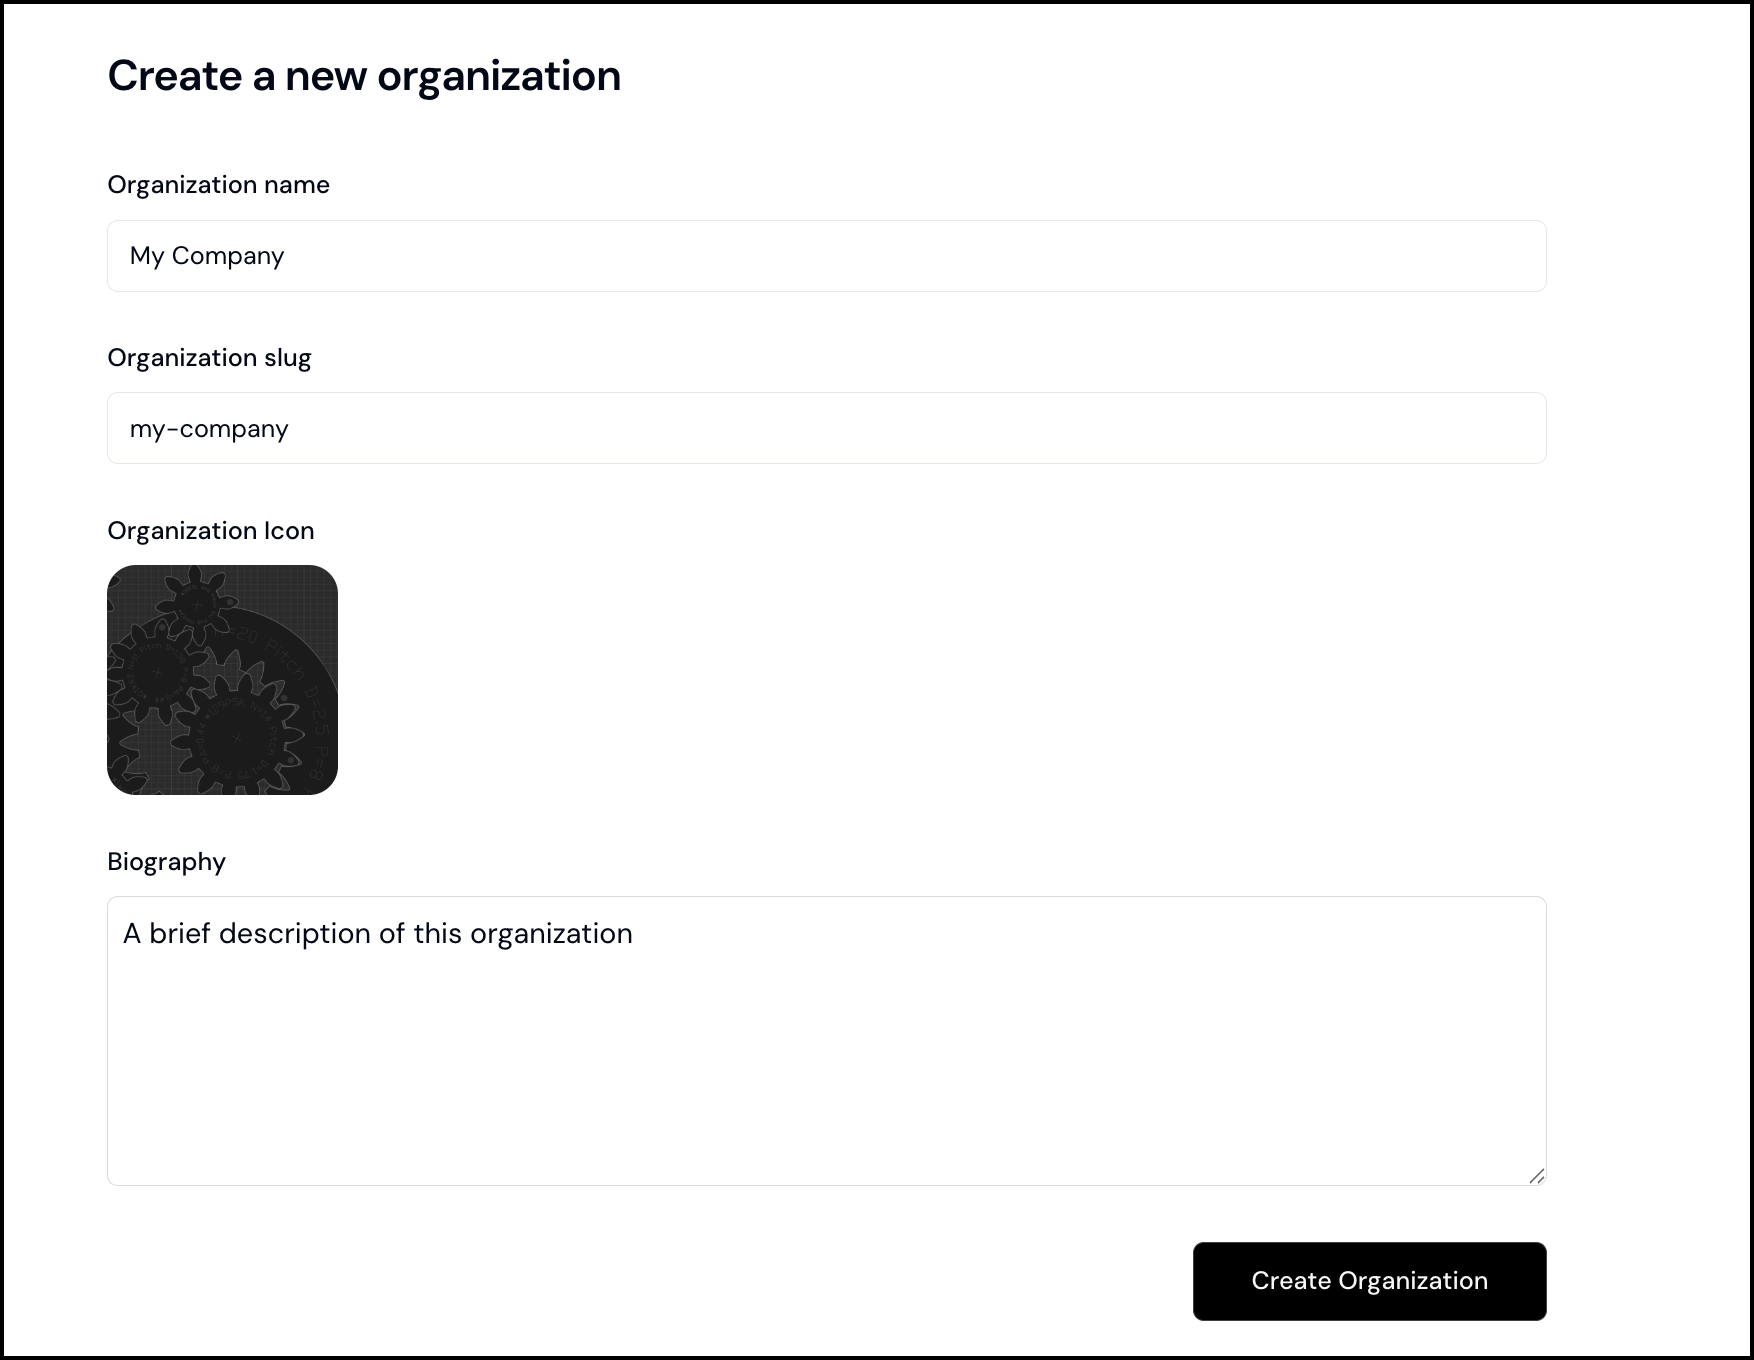
You will then be signed in to your org and taken to the org home page
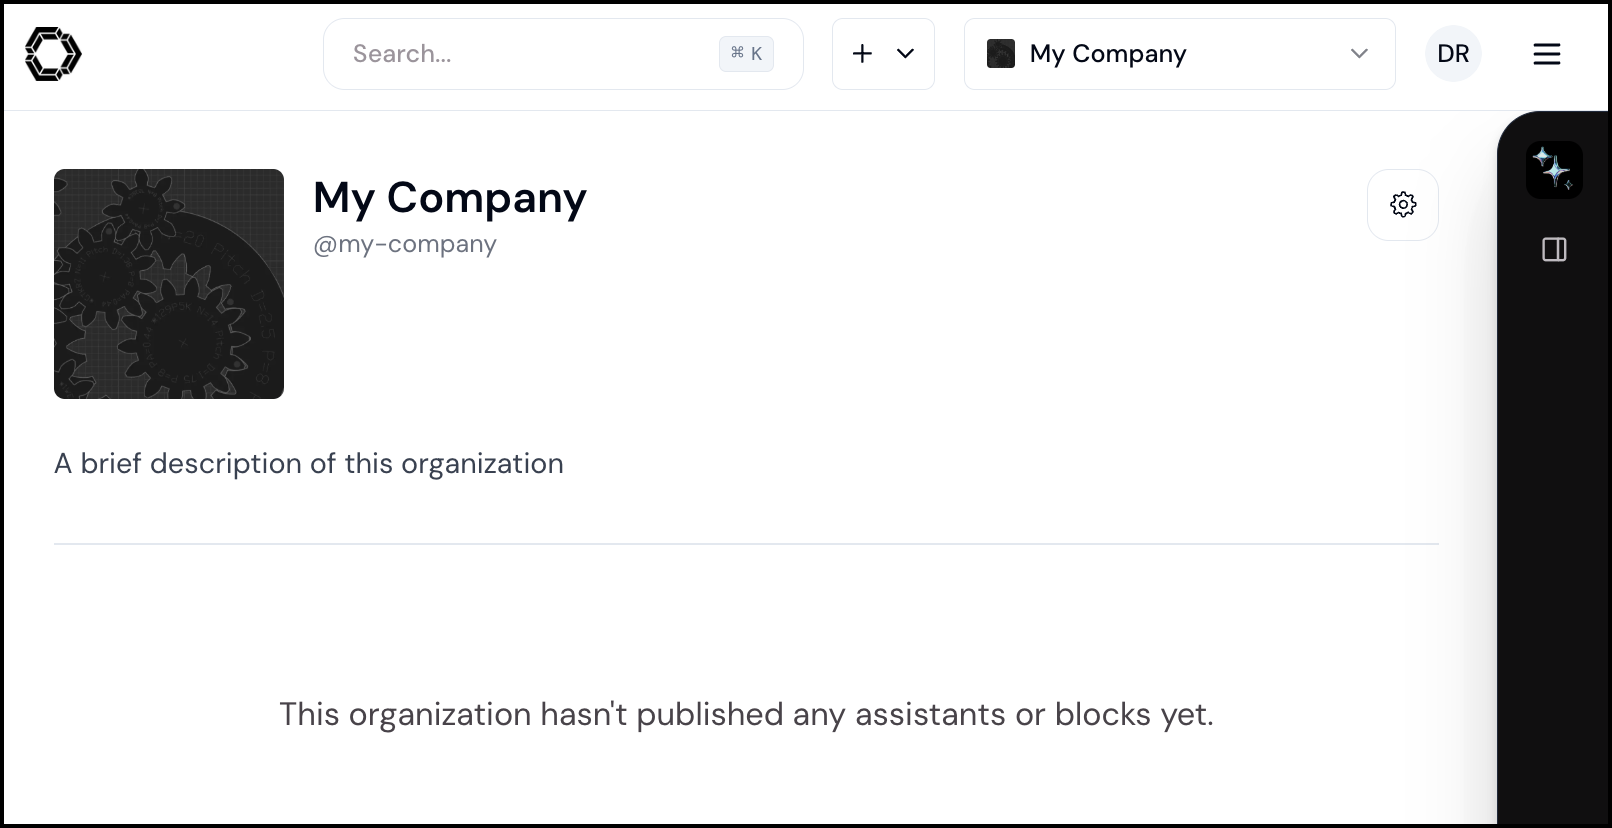
# Organization Permissions
Source: https://docs.continue.dev/hub/governance/org-permissions
Users can have the following roles within an organization:
1. Admins are users who can manage members, secrets, blocks, assistants, etc.
2. Members are users who can use assistants, blocks, secrets, etc.
**User permissions for each role depend on the pricing plan:**
* [Solo](/hub/governance/pricing#solo)
* [Teams](/hub/governance/pricing#teams)
* [Enterprise](/hub/governance/pricing#enterprise)
# Pricing
Source: https://docs.continue.dev/hub/governance/pricing
## Solo
**Solo** is best suited for individuals and small teams with "single-player" problems.
You can read more about what **Solo** includes [here](https://hub.continue.dev/pricing).
## Teams
**Teams** is best suited for growing teams with "multiplayer" problems.
You can read more about what **Teams** includes [here](https://hub.continue.dev/pricing).
## Enterprise
**Enterprise** is best suited for large teams with enterprise-grade requirements.
You can read more about what **Enterprise** includes [here](https://hub.continue.dev/pricing).
## Models Add-On
The **Models Add-On** allows you to use a variety of frontier models for a flat monthly fee. It’s designed to cover the usage of most developers.
You can read more about usage limits and what models are included [here](https://hub.continue.dev/pricing).
### Free Trial
To try out Continue, we offer a free trial of the **Models Add-On** that allows you to use 50 Chat requests and 2,000 autocomplete requests.
# Introduction
Source: https://docs.continue.dev/hub/introduction
[Continue Hub](https://hub.continue.dev) makes it simple to create custom AI code [assistants](/hub/assistants/intro), providing a registry for defining, managing, and sharing assistant [building blocks](/hub/blocks/intro).
Assistants can contain several types of blocks, including [models](/hub/blocks/block-types#models), [rules](/hub/blocks/block-types#rules), [context providers](/hub/blocks/block-types#context), [prompts](/hub/blocks/block-types#prompts), [docs](/hub/blocks/block-types#docs), [data destinations](/hub/blocks/block-types#data), and [MCP servers](/hub/blocks/block-types#mcp-servers).
Continue Hub also makes it easy for engineering leaders to centrally [configure](/hub/secrets/secret-types) and [govern](/hub/governance/org-permissions) blocks and assistants for their organization.
# Secret Resolution
Source: https://docs.continue.dev/hub/secrets/secret-resolution
User or Org secrets should be used depending on how users want them to be shared within their organization and assistants.
For individual users and [Solo](/hub/governance/pricing#solo) organizations, secret resolution is performed in the following order:
1. User [models add-on](/hub/governance/pricing#models-add-on) (if subscribed)
2. [User secrets](/hub/secrets/secret-types#user-secrets) (if set)
3. [Free trial](/hub/governance/pricing#free-trial) (if below limit)
For [Teams](/hub/governance/pricing#teams) and [Enterprise](/hub/governance/pricing#enterprise) organizations, secret resolution is performed in the following order:
1. Org [models add-on](/hub/governance/pricing#models-add-on) (if subscribed)
2. [Org secrets](/hub/secrets/secret-types#org-secrets) (if set)
3. [User secrets](/hub/secrets/secret-types#user-secrets) (if set)
# Secret Types
Source: https://docs.continue.dev/hub/secrets/secret-types
The Continue Hub comes with secrets management built-in. Secrets are values such as API keys or endpoints that can be shared across assistants and within organizations.
## User secrets
User secrets are defined by the user for themselves. This means that user secrets are available only to the user that created them. User secrets are assumed to be safe for the user to know, so they will be sent to the IDE extensions alongside the assistant `config.yaml`.
This allows API requests to be made directly from the IDE extensions. You can use user secrets with [Solo](/hub/governance/pricing#solo), [Teams](/hub/governance/pricing#teams), and [Enterprise](/hub/governance/pricing#enterprise). User secrets can be managed [here](https://hub.continue.dev/settings/secrets) in the hub.
## Org secrets
Org secrets are defined by admins for their organization. Org secrets are available to anyone in the organization to use with assistants in that organization. Org secrets are assumed to not be shareable with the user (e.g. you are a team lead who wants to give team members access to models without passing out API keys).
This is why LLM requests are proxied through api.continue.dev / on-premise proxy and secrets are never sent to the IDE extensions. You can only use org secrets on [Teams](/hub/governance/pricing#teams) and [Enterprise](/hub/governance/pricing#enterprise). If you are an admin, you can manage secrets for your organization from the org settings page.
# Sharing
Source: https://docs.continue.dev/hub/sharing
Connect with the Continue community to discover, share, and collaborate on AI development tools.
## Community
Join thousands of developers using Continue. Share experiences, get help, and contribute to the ecosystem.
[Join our Discord Community →](https://discord.gg/continue)
## Publishing
Share your custom assistants, blocks, and configurations with the Continue community.
[Visit the Hub →](https://hub.continue.dev)
## Browse Assistants
Explore assistants created by the community for specific use cases and workflows.
[Browse Assistants →](https://hub.continue.dev)
## Using Assistants
Learn how to discover, install, and use community-created assistants in your projects.
[Learn About Assistants →](/hub/assistants/intro)
***
The Continue Hub makes it easy to leverage community knowledge and share your innovations with fellow developers.
# Source Control
Source: https://docs.continue.dev/hub/source-control
When managing your custom assistants within an organization, you might want to take advantage of your usual source control workflows. Continue makes this easy with a that automatically syncs your YAML files with hub.continue.dev. We are also planning on adding automations for GitLab, BitBucket, Gitee, and others. If you are interested, please reach out to us on .
## Quickstart
This quickstart uses a template repository, but you can also follow these steps 2-4 from an existing repository.
### 1. Create a new repository from the template
As shown in the image below, start by creating a new repository from [the template](https://github.com/continuedev/continue-hub-template). Click "Use Template" and then "Create a new repository".
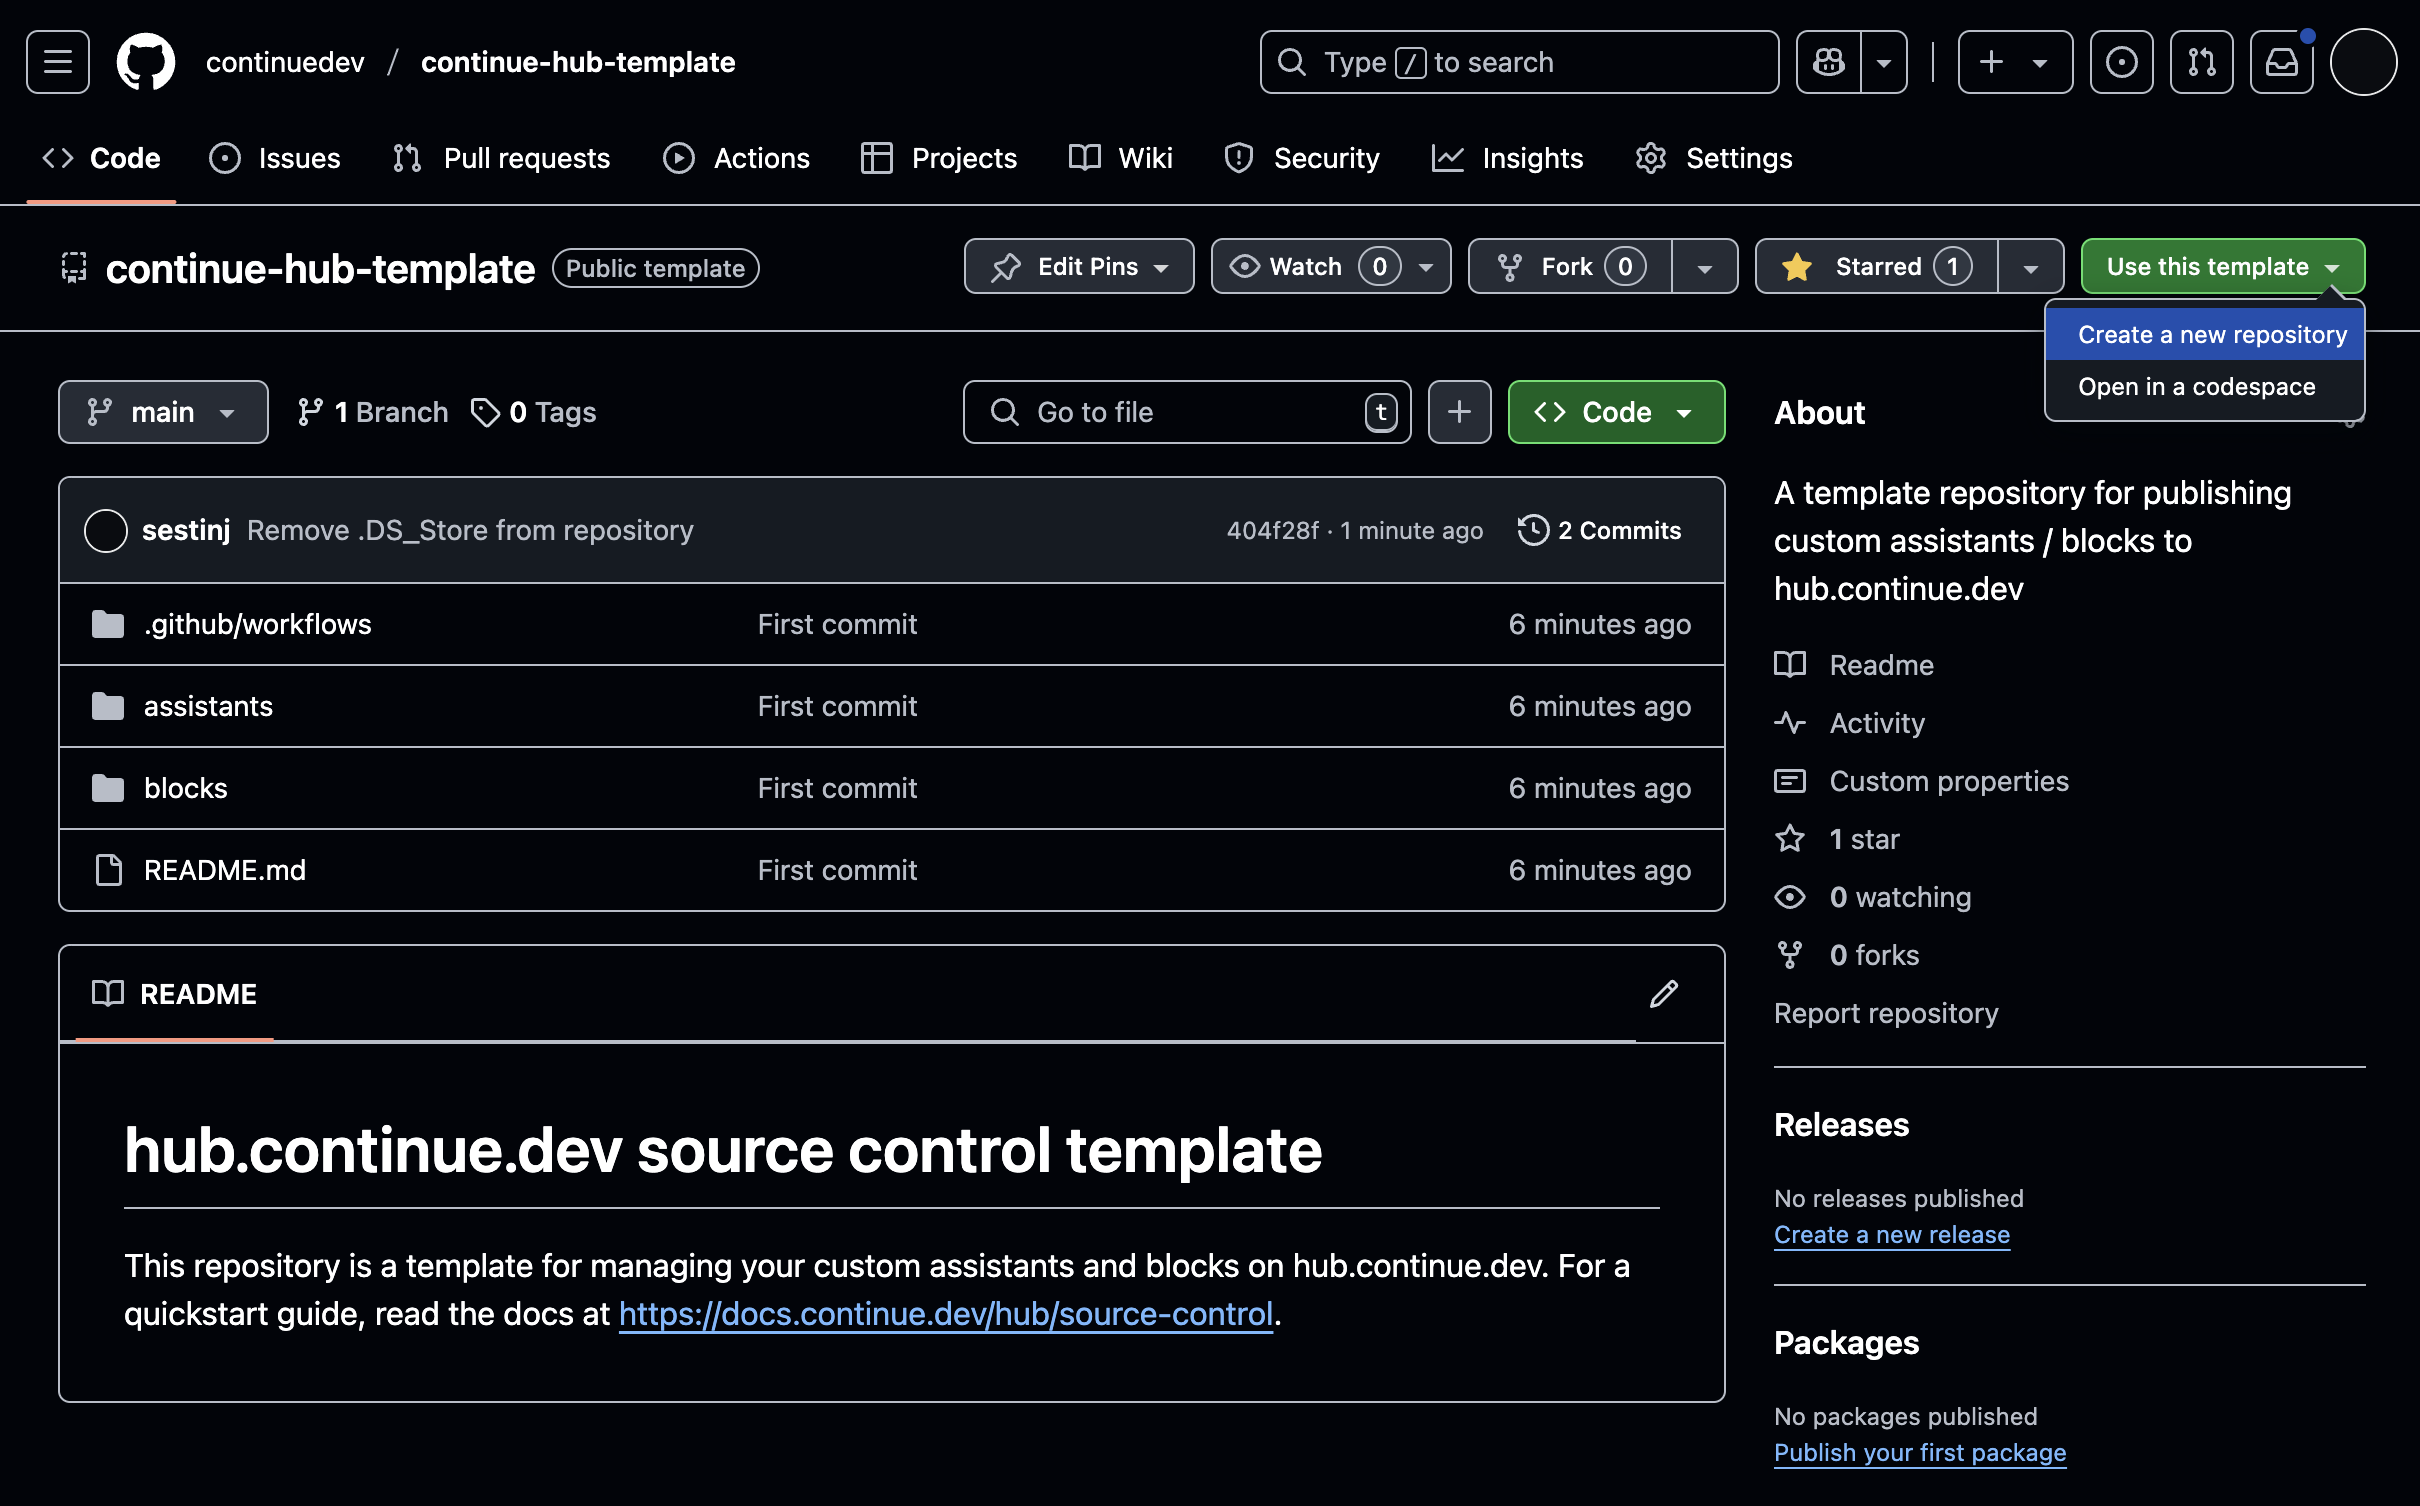
### 2. Obtain a deploy key
Deploy keys allow the GitHub Action to authenticate with hub.continue.dev. [Obtain your deploy key here](https://hub.continue.dev/settings/api-keys) and then [create a secret](https://docs.github.com/en/actions/security-for-github-actions/security-guides/using-secrets-in-github-actions#creating-secrets-for-a-repository) named `CONTINUE_API_KEY` in your GitHub repository.
### 3. Configure the GitHub Action
This step assumes you have already created an organization on
hub.continue.dev. If not, learn more [here](/hub/governance/creating-an-org).
In the repository you created, navigate to `.github/workflows/main.yaml` and update the lines below to match your organization:
```
env: OWNER_SLUG: my-org-slug # <-- TODO
```
This is the only configuration necessary, but you can view the full list of options [here](https://github.com/continuedev/continue-publish-action/blob/main/README.md).
### 4. Commit and push
Add the [YAML for your assistants and blocks](/reference) to the appropriate directories:
* `assistants/public` for public assistants
* `assistants/private` for private (visible only within your organization) assistants
* `blocks/public` for public blocks
* `blocks/private` for private blocks
Then, commit and push your changes. Once the GitHub Action has completed running, you should be able to view the assistants within your organization on hub.continue.dev.
# Introduction
Source: https://docs.continue.dev/index
 **Continue enables developers to create, share, and use custom AI code assistants with our open-source [VS Code](https://marketplace.visualstudio.com/items?itemName=Continue.continue) and [JetBrains](https://plugins.jetbrains.com/plugin/22707-continue-extension) extensions and [hub of models, rules, prompts, docs, and other building blocks](https://hub.continue.dev)**
to understand and iterate on code in the sidebar
to receive inline code suggestions as you type
to modify code without leaving your current file
to make more substantial changes to your codebase
# config.yaml Reference
Source: https://docs.continue.dev/reference
## Introduction
Continue hub assistants are defined using the `config.yaml` specification. Assistants can be loaded from [the Hub](https://hub.continue.dev/explore/assistants) or locally
* [Continue Hub](https://hub.continue.dev/explore/assistants) - YAML is stored on the hub and automatically synced to the extension
* Locally
* in your global `.continue` folder (`~/.continue` on Mac, `%USERPROFILE%\.continue`) within `.continue/assistants`. The name of the file will be used as the display name of the assistant, e.g. `My Assistant.yaml`
* in your workspace in a `/.continue/assistants` folder, with the same naming convention
Config YAML replaces `config.json`, which is deprecated. View the **[Migration
Guide](/customize/yaml-migration)**.
An assistant is made up of:
1. **Top level properties**, which specify the `name`, `version`, and `config.yaml` `schema` for the assistant
2. **Block lists**, which are composable arrays of coding assistant building blocks available to the assistant, such as models, docs, and context providers.
A block is a single standalone building block of a coding assistants, e.g., one model or one documentation source. In `config.yaml` syntax, a block consists of the same top-level properties as assistants (`name`, `version`, and `schema`), but only has **ONE** item under whichever block type it is.
Examples of blocks and assistants can be found on the [Continue hub](https://hub.continue.dev/explore/assistants).
Assistants can either explicitly define blocks - see [Properties](#properties) below - or import and configure existing hub blocks.
### Using Blocks
Hub blocks and assistants are identified with a slug in the format `owner-slug/block-or-assistant-slug`, where an owner can be a user or organization (For example, if you want to use the [OpenAI 4o Model block](https://hub.continue.dev/openai/gpt-4o), your slug would be `openai/gpt-4o`). These blocks are pulled from [https://hub.continue.dev](https://hub.continue.dev).
Blocks can be imported into an assistant by adding a `uses` clause under the block type. This can be alongside other `uses` clauses or explicit blocks of that type.
For example, the following assistant imports an Anthropic model and defines an Ollama DeepSeek one.
Assistant models section
```yaml
models:
- uses: anthropic/claude-3.5-sonnet # an imported model block
- model: deepseek-reasoner # an explicit model block
provider: ollama
```
### Local Blocks
It is also possible to define blocks locally in a `.continue` folder. This folder can be located at either the root of your workspace (these will automatically be applied to all assistants when you are in that workspace) or in your home directory at `~/.continue` (these will automatically be applied globally).
Place your YAML files in the following folders:
Assistants:
* `.continue/assistants` - for assistants
Blocks:
* `.continue/rules` - for rules
* `.continue/models` - for models
* `.continue/prompts` - for prompts
* `.continue/context` - for context providers
* `.continue/docs` - for docs\~\~\~\~
* `.continue/data` - for data
* `.continue/mcpServers` - for MCP Servers
You can find many examples of each of these block types on the [Continue Explore Page](https://hub.continue.dev/explore/models)
Local blocks utilizing mustache notation for secrets (`${{ secrets.SECRET_NAME }}`) can read secret values:
* globally, from a `.env` located in the global `.continue` folder (`~/.continue/.env`)
* per-workspace, from a `.env` file located at the root of the current workspace.
### Inputs
Blocks can be passed user inputs, including hub secrets and raw text values. To create a block that has an input, use mustache templating as follows:
Block config.yaml
```yaml
name: myprofile/custom-model
models:
- name: My Favorite Model
provider: anthropic
apiKey: ${{ inputs.ANTHROPIC_API_KEY }}
defaultCompletionOptions:
temperature: ${{ inputs.TEMP }}
```
Which can then be imported like
Assistant config.yaml
```yaml
name: myprofile/custom-assistant
models:
- uses: myprofile/custom-model
with:
ANTHROPIC_API_KEY: ${{ secrets.MY_ANTHROPIC_API_KEY }}
TEMP: 0.9
```
Note that hub secrets can be passed as inputs, using a similar mustache format: `secrets.SECRET_NAME`.
### Overrides
Block properties can be also be directly overriden using `override`. For example:
Assistant config.yaml
```yaml
name: myprofile/custom-assistant
models:
- uses: myprofile/custom-model
with:
ANTHROPIC_API_KEY: ${{ secrets.MY_ANTHROPIC_API_KEY }}
TEMP: 0.9
override:
roles:
- chat
```
## Properties
Below are details for each property that can be set in `config.yaml`.
**All properties at all levels are optional unless explicitly marked as required.**
The top-level properties in the `config.yaml` configuration file are:
* [`name`](#name) (**required**)
* [`version`](#version) (**required**)
* [`schema`](#schema) (**required**)
* [`models`](#models)
* [`context`](#context)
* [`rules`](#rules)
* [`prompts`](#prompts)
* [`docs`](#docs)
* [`mcpServers`](#mcpservers)
* [`data`](#data)
***
### `name`
The `name` property specifies the name of your project or configuration.
config.yaml
```yaml
name: MyProject
```
***
### `version`
The `version` property specifies the version of your project or configuration.
### `schema`
The `schema` property specifies the schema version used for the `config.yaml`, e.g. `v1`
***
### `models`
The `models` section defines the language models used in your configuration. Models are used for functionalities such as chat, editing, and summarizing.
**Properties:**
* `name` (**required**): A unique name to identify the model within your configuration.
* `provider` (**required**): The provider of the model (e.g., `openai`, `ollama`).
* `model` (**required**): The specific model name (e.g., `gpt-4`, `starcoder`).
* `apiBase`: Can be used to override the default API base that is specified per model
* `roles`: An array specifying the roles this model can fulfill, such as `chat`, `autocomplete`, `embed`, `rerank`, `edit`, `apply`, `summarize`. The default value is `[chat, edit, apply, summarize]`. Note that the `summarize` role is not currently used.
* `capabilities`: Array of strings denoting model capabilities, which will overwrite Continue's autodetection based on provider and model. Supported capabilities include `tool_use` and `image_input`.
* `maxStopWords`: Maximum number of stop words allowed, to avoid API errors with extensive lists.
* `promptTemplates`: Can be used to override the default prompt templates for different model roles. Valid values are `chat`, [`edit`](/customize/model-roles#edit-prompt-templating), [`apply`](/customize/model-roles#apply-prompt-templating) and [`autocomplete`](/customize/model-roles#autocomplete-prompt-templating). The `chat` property must be a valid template name, such as `llama3` or `anthropic`.
* `chatOptions`: If the model includes role `chat`, these settings apply for Chat and Agent mode:
* `baseSystemMessage`: Can be used to override the default system prompt for **Chat** mode.
* `embedOptions`: If the model includes role `embed`, these settings apply for embeddings:
* `maxChunkSize`: Maximum tokens per document chunk. Minimum is 128 tokens.
* `maxBatchSize`: Maximum number of chunks per request. Minimum is 1 chunk.
* `defaultCompletionOptions`: Default completion options for model settings.
* `contextLength`: Maximum context length of the model, typically in tokens.
* `maxTokens`: Maximum number of tokens to generate in a completion.
* `temperature`: Controls the randomness of the completion. Values range from `0.0` (deterministic) to `1.0` (random).
* `topP`: The cumulative probability for nucleus sampling.
* `topK`: Maximum number of tokens considered at each step.
* `stop`: An array of stop tokens that will terminate the completion.
* `reasoning`: Boolean to enable thinking/reasoning for Anthropic Claude 3.7+ models.
* `reasoningBudgetTokens`: Budget tokens for thinking/reasoning in Anthropic Claude 3.7+ models.
* `requestOptions`: HTTP request options specific to the model.
* `timeout`: Timeout for each request to the language model.
* `verifySsl`: Whether to verify SSL certificates for requests.
* `caBundlePath`: Path to a custom CA bundle for HTTP requests.
* `proxy`: Proxy URL for HTTP requests.
* `headers`: Custom headers for HTTP requests.
* `extraBodyProperties`: Additional properties to merge with the HTTP request body.
* `noProxy`: List of hostnames that should bypass the specified proxy.
* `clientCertificate`: Client certificate for HTTP requests.
* `cert`: Path to the client certificate file.
* `key`: Path to the client certificate key file.
* `passphrase`: Optional passphrase for the client certificate key file.
#### Example
config.yaml
```yaml
models:
- name: GPT-4o
provider: openai
model: gpt-4o
roles:
- chat
- edit
- apply
defaultCompletionOptions:
temperature: 0.7
maxTokens: 1500
- name: Codestral
provider: mistral
model: codestral-latest
roles:
- autocomplete
- name: My Model - OpenAI-Compatible
provider: openai
apiBase: http://my-endpoint/v1
model: my-custom-model
capabilities:
- tool_use
- image_input
roles:
- chat
- edit
```
***
### `context`
The `context` section defines context providers, which supply additional information or context to the language models. Each context provider can be configured with specific parameters.
More information about usage/params for each context provider can be found [here](/customize/custom-providers)
**Properties:**
* `provider` (**required**): The identifier or name of the context provider (e.g., `code`, `docs`, `web`)
* `name`: Optional name for the provider
* `params`: Optional parameters to configure the context provider's behavior.
**Example:**
config.yaml
```yaml
context:
- provider: file
- provider: code
- provider: codebase
params:
nFinal: 10
- provider: docs
- provider: diff
- provider: http
name: Context Server 1
params:
url: "https://api.example.com/server1"
- provider: folder
- provider: terminal
```
***
### `rules`
List of rules that the LLM should follow. These are concatenated into the system message for all [Chat](/features/chat/quick-start), [Edit](/features/edit/quick-start), and [Agent](/features/agent/quick-start) requests. See the [rules deep dive](/customization/rules) for details.
Explicit rules can either be simple text or an object with the following properties:
* `name` (**required**): A display name/title for the rule
* `rule` (**required**): The text content of the rule
* `globs` (optional): When files are provided as context that match this glob pattern, the rule will be included. This can be either a single pattern (e.g., `"**/*.{ts,tsx}"`) or an array of patterns (e.g., `["src/**/*.ts", "tests/**/*.ts"]`).
config.yaml
```yaml
rules:
- Always annotate Python functions with their parameter and return types
- name: TypeScript best practices
rule: Always use TypeScript interfaces to define shape of objects. Use type aliases sparingly.
globs: "**/*.{ts,tsx}"
- name: TypeScript test patterns
rule: In TypeScript tests, use Jest's describe/it pattern and follow best practices for mocking.
globs:
- "src/**/*.test.ts"
- "tests/**/*.ts"
- uses: myprofile/my-mood-setter
with:
TONE: concise
```
***
### `prompts`
A list of custom prompts that can be invoked from the chat window. Each prompt has a name, description, and the actual prompt text.
config.yaml
```yaml
prompts:
- name: check
description: Check for mistakes in my code
prompt: |
Please read the highlighted code and check for any mistakes. You should look for the following, and be extremely vigilant:
- Syntax errors
- Logic errors
- Security vulnerabilities
```
***
### `docs`
List of documentation sites to index.
**Properties:**
* `name` (**required**): Name of the documentation site, displayed in dropdowns, etc.
* `startUrl` (**required**): Start page for crawling - usually root or intro page for docs
* `maxDepth`: Maximum link depth for crawling. Default `4`
* `favicon`: URL for site favicon (default is `/favicon.ico` from `startUrl`).
* `useLocalCrawling`: Skip the default crawler and only crawl using a local crawler.
Example
config.yaml
```yaml
docs:
- name: Continue
startUrl: https://docs.continue.dev/intro
favicon: https://docs.continue.dev/favicon.ico
```
***
### `mcpServers`
The [Model Context Protocol](https://modelcontextprotocol.io/introduction) is a standard proposed by Anthropic to unify prompts, context, and tool use. Continue supports any MCP server with the MCP context provider.
**Properties:**
* `name` (**required**): The name of the MCP server.
* `command` (**required**): The command used to start the server.
* `args`: An optional array of arguments for the command.
* `env`: An optional map of environment variables for the server process.
* `cwd`: An optional working directory to run the command in. Can be absolute or relative path.
* `connectionTimeout`: An optional connection timeout number to the server in milliseconds.
**Example:**
config.yaml
```yaml
mcpServers:
- name: My MCP Server
command: uvx
args:
- mcp-server-sqlite
- --db-path
- ./test.db
cwd: /Users/NAME/project
env:
NODE_ENV: production
```
### `data`
Destinations to which [development data](/customize/overview#development-data) will be sent.
**Properties:**
* `name` (**required**): The display name of the data destination
* `destination` (**required**): The destination/endpoint that will receive the data. Can be:
* an HTTP endpoint that will receive a POST request with a JSON blob
* a file URL to a directory in which events will be dumpted to `.jsonl` files
* `schema` (**required**): the schema version of the JSON blobs to be sent. Options include `0.1.0` and `0.2.0`
* `events`: an array of event names to include. Defaults to all events if not specified.
* `level`: a pre-defined filter for event fields. Options include `all` and `noCode`; the latter excludes data like file contents, prompts, and completions. Defaults to `all`
* `apiKey`: api key to be sent with request (Bearer header)
* `requestOptions`: Options for event POST requests. Same format as [model requestOptions](#models).
**Example:**
config.yaml
```yaml
data:
- name: Local Data Bank
destination: file:///Users/dallin/Documents/code/continuedev/continue-extras/external-data
schema: 0.2.0
level: all
- name: My Private Company
destination: https://mycompany.com/ingest
schema: 0.2.0
level: noCode
events:
- autocomplete
- chatInteraction
```
***
## Complete YAML Config Example
Putting it all together, here's a complete example of a `config.yaml` configuration file:
config.yaml
```yaml
name: MyProject
version: 0.0.1
schema: v1
models:
- uses: anthropic/claude-3.5-sonnet
with:
ANTHROPIC_API_KEY: ${{ secrets.ANTHROPIC_API_KEY }}
override:
defaultCompletionOptions:
temperature: 0.8
- name: GPT-4
provider: openai
model: gpt-4
roles:
- chat
- edit
defaultCompletionOptions:
temperature: 0.5
maxTokens: 2000
requestOptions:
headers:
Authorization: Bearer YOUR_OPENAI_API_KEY
- name: Ollama Starcoder
provider: ollama
model: starcoder
roles:
- autocomplete
defaultCompletionOptions:
temperature: 0.3
stop:
- "\n"
rules:
- Give concise responses
- Always assume TypeScript rather than JavaScript
prompts:
- name: test
description: Unit test a function
prompt: |
Please write a complete suite of unit tests for this function. You should use the Jest testing framework.
The tests should cover all possible edge cases and should be as thorough as possible.
You should also include a description of each test case.
- uses: myprofile/my-favorite-prompt
context:
- provider: diff
- provider: file
- provider: codebase
- provider: code
- provider: docs
params:
startUrl: https://docs.example.com/introduction
rootUrl: https://docs.example.com
maxDepth: 3
mcpServers:
- name: DevServer
command: npm
args:
- run
- dev
env:
PORT: "3000"
data:
- name: My Private Company
destination: https://mycompany.com/ingest
schema: 0.2.0
level: noCode
events:
- autocomplete
- chatInteraction
```
## Using YAML anchors to avoid config duplication
You can also use node anchors to avoid duplication of properties. To do so, adding the YAML version header `%YAML 1.1` is needed, here's an example of a `config.yaml` configuration file using anchors:
config.yaml
```yaml
%YAML 1.1
---
name: MyProject
version: 0.0.1
schema: v1
model_defaults: &model_defaults
provider: openai
apiKey: my-api-key
apiBase: https://api.example.com/llm
models:
- name: mistral
<<: *model_defaults
model: mistral-7b-instruct
roles:
- chat
- edit
- name: qwen2.5-coder-7b-instruct
<<: *model_defaults
model: qwen2.5-coder-7b-instruct
roles:
- chat
- edit
- name: qwen2.5-coder-7b
<<: *model_defaults
model: qwen2.5-coder-7b
useLegacyCompletionsEndpoint: false
roles:
- autocomplete
```
# Continue Documentation MCP Server
Source: https://docs.continue.dev/reference/continue-mcp
Set up an MCP server to search Continue documentation
The continue-docs MCP Server allows you to search and retrieve information from the Continue documentation directly within your agent conversations. This is powered by Mintlify's MCP server generation.
## Installation
### Step 1: Install the MCP Server
Run the following command to install the continue-docs MCP server:
```bash
npx mint-mcp add docs.continue.dev
```
When prompted, select "All" from the selection menu:

This command will:
* Download and install the MCP server locally
* Set up the search tool for Continue documentation
* Create the necessary configuration files
Take note of the installation path displayed after running the command above. You'll need to replace in the configuration below with your actual installation path.
It will look like this: `/path/to/user/.mcp/docs.continue.dev/src/index.js`
### Step 2: Configure Continue
1. Create a folder called `.continue/mcpServers` at the top level of your workspace
2. Add a file called `continue-docs-mcp.yaml` to this folder
3. Write the following contents and save:
````yaml title=".continue/mcpServers/continue-docs-mcp.yaml"
```yaml title=".continue/mcpServers/continue-docs-mcp.yaml"
name: Continue Documentation MCP
version: 0.0.1
schema: v1
mcpServers:
- name: Continue Docs Search
command: node
args:
- "/path/to/user/.mcp/docs.continue.dev/src/index.js"
````
### Step 3: Enable Agent Mode
MCP servers only work in agent mode. Make sure to switch to agent mode in Continue before testing.
## Usage Examples
Once configured, you can use the MCP server to search Continue documentation:
### Model Configuration Help
```
Search for model setup instructions in the Continue docs
```
### Context Providers
```
Find documentation about context providers and how to configure them
```
### Autocomplete Setup
```
How do I configure autocomplete in Continue?
```
### Slash Commands
```
Search for information about custom slash commands
```
### Troubleshooting
```
Find troubleshooting information for Continue extension issues
```
## Test Plan
Use this test plan to verify your MCP server is working correctly:
### Prerequisites
* Continue extension is installed and running
* Agent mode is enabled
* MCP server configuration file exists in `.continue/mcpServers/`
### Test Cases
#### 1. Basic Documentation Search
* **Query**: "Search the Continue docs for information about model setup"
* **Expected**: Returns structured information about configuring models
* **Pass/Fail**: ☐
#### 2. Context Provider Documentation
* **Query**: "Find documentation about context providers in Continue"
* **Expected**: Returns information about available context providers
* **Pass/Fail**: ☐
#### 3. Feature-Specific Search
* **Query**: "How do I configure autocomplete in Continue?"
* **Expected**: Returns autocomplete setup instructions
* **Pass/Fail**: ☐
#### 4. MCP Documentation Search
* **Query**: "Search for MCP server setup instructions"
* **Expected**: Returns MCP configuration information
* **Pass/Fail**: ☐
## Troubleshooting
### MCP Server Not Loading
1. **Check configuration**: Ensure your YAML configuration uses the npx command approach
2. **Verify installation**: Run `npx mint-mcp add continue-docs` to confirm the server can be accessed
3. **Check agent mode**: MCP servers only work in agent mode
4. **Restart Continue**: Try restarting the Continue extension
### No Search Results
1. **Verify connection**: The MCP server needs internet access to search the documentation
2. **Check query format**: Try rephrasing your search query
3. **Test with known topics**: Search for well-documented features like "model configuration"
### Permission Issues
If you encounter permission errors, ensure npx has proper permissions:
```bash
npm config get prefix
```
## Advanced Configuration
### Using Environment Variables
You can configure the MCP server with environment variables:
## Related Documentation
* [MCP Overview](/customize/deep-dives/mcp)
* [Agent Mode](/features/agent/quick-start)
* [Configuration](/customize/overview)
# config.json Reference
Source: https://docs.continue.dev/reference/json-reference
We recently introduced a new configuration format, `config.yaml`, to replace
`config.json`. See the `config.yaml` reference and migration guide
[here](/reference).
Below are details for each property that can be set in `config.json`. The config schema code is found in [`extensions/vscode/config_schema.json`](https://github.com/continuedev/continue/blob/main/extensions/vscode/config_schema.json).
**All properties at all levels are optional unless explicitly marked required**
### `models`
Your **chat** models are defined here, which are used for [Chat](/features/chat/how-it-works), [Edit](/features/edit/how-it-works) and [VS Code actions](/customization/overview#vscode-actions).
Each model has specific configuration options tailored to its provider and functionality, which can be seen as suggestions while editing the json.
**Properties:**
* `title` (**required**): The title to assign to your model, shown in dropdowns, etc.
* `provider` (**required**): The provider of the model, which determines the type and interaction method. Options inclued `openai`, `ollama`, `xAI`, etc., see IntelliJ suggestions.
* `model` (**required**): The name of the model, used for prompt template auto-detection. Use `AUTODETECT` special name to get all available models.
* `apiKey`: API key required by providers like OpenAI, Anthropic, Cohere, and xAI.
* `apiBase`: The base URL of the LLM API.
* `contextLength`: Maximum context length of the model, typically in tokens (default: 2048).
* `maxStopWords`: Maximum number of stop words allowed, to avoid API errors with extensive lists.
* `template`: Chat template to format messages. Auto-detected for most models but can be overridden. See intelliJ suggestions.
* `promptTemplates`: A mapping of prompt template names (e.g., `edit`) to template strings. See the [Deep Dives section](/customize/deep-dives/prompts) for customization details.
* `completionOptions`: Model-specific completion options, same format as top-level [`completionOptions`](#completionoptions), which they override.
* `systemMessage`: A system message that will precede responses from the LLM.
* `requestOptions`: Model-specific HTTP request options, same format as top-level [`requestOptions`](#requestoptions), which they override.
* `apiType`: Specifies the type of API (`openai` or `azure`).
* `apiVersion`: Azure API version (e.g., `2023-07-01-preview`).
* `engine`: Engine for Azure OpenAI requests.
* `capabilities`: Override auto-detected capabilities:
* `uploadImage`: Boolean indicating if the model supports image uploads.
* `tools`: Boolean indicating if the model supports tool use.
*(AWS Only)*
* `profile`: AWS security profile for authorization.
* `modelArn`: AWS ARN for imported models (e.g., for `bedrockimport` provider).
* `region`: Region where the model is hosted (e.g., `us-east-1`, `eu-central-1`).
Example:
config.json
```json
{
"models": [
{ "title": "Ollama", "provider": "ollama", "model": "AUTODETECT" },
{
"model": "gpt-4o",
"contextLength": 128000,
"title": "GPT-4o",
"provider": "openai",
"apiKey": "YOUR_API_KEY"
}
]
}
```
### `tabAutocompleteModel`
Specifies the model or models for tab autocompletion, defaulting to an Ollama instance. This property uses the same format as `models`. Can be an array of models or an object for one model.
Example
config.json
```json
{
"tabAutocompleteModel": {
"title": "My Starcoder",
"provider": "ollama",
"model": "starcoder2:3b"
}
}
```
### `tabAutocompleteOptions`
Specifies options for tab autocompletion behavior.
**Properties:**
* `disable`: If `true`, disables tab autocomplete (default: `false`).
* `maxPromptTokens`: Maximum number of tokens for the prompt (default: `1024`).
* `debounceDelay`: Delay (in ms) before triggering autocomplete (default: `350`).
* `maxSuffixPercentage`: Maximum percentage of prompt for suffix (default: `0.2`).
* `prefixPercentage`: Percentage of input for prefix (default: `0.3`).
* `template`: Template string for autocomplete, using Mustache templating. You can use the `{{{ prefix }}}`, `{{{ suffix }}}`, `{{{ filename }}}`, `{{{ reponame }}}`, and `{{{ language }}}` variables.
* `onlyMyCode`: If `true`, only includes code within the repository (default: `true`).
Example
config.json
```json
{
"tabAutocompleteOptions": {
"debounceDelay": 500,
"maxPromptTokens": 1500,
"disableInFiles": ["*.md"]
}
}
```
### `embeddingsProvider`
Embeddings model settings - the model used for @Codebase and @docs.
**Properties:**
* `provider` (**required**): Specifies the embeddings provider, with options including `transformers.js`, `ollama`, `openai`, `cohere`, `gemini`, etc
* `model`: Model name for embeddings.
* `apiKey`: API key for the provider.
* `apiBase`: Base URL for API requests.
* `requestOptions`: Additional HTTP request settings specific to the embeddings provider.
* `maxEmbeddingChunkSize`: Maximum tokens per document chunk. Minimum is 128 tokens.
* `maxEmbeddingBatchSize`: Maximum number of chunks per request. Minimum is 1 chunk.
(AWS ONLY)
* `region`: Specifies the region hosting the model.
* `profile`: AWS security profile.
Example:
config.json
```json
{
"embeddingsProvider": {
"provider": "openai",
"model": "text-embedding-ada-002",
"apiKey": "",
"maxEmbeddingChunkSize": 256,
"maxEmbeddingBatchSize": 5
}
}
```
### `completionOptions`
Parameters that control the behavior of text generation and completion settings. Top-level `completionOptions` apply to all models, *unless overridden at the model level*.
**Properties:**
* `stream`: Whether to stream the LLM response. Currently only respected by the `anthropic` and `ollama` providers; other providers will always stream (default: `true`).
* `temperature`: Controls the randomness of the completion. Higher values result in more diverse outputs.
* `topP`: The cumulative probability for nucleus sampling. Lower values limit responses to tokens within the top probability mass.
* `topK`: The maximum number of tokens considered at each step. Limits the generated text to tokens within this probability.
* `presencePenalty`: Discourages the model from generating tokens that have already appeared in the output.
* `frequencyPenalty`: Penalizes tokens based on their frequency in the text, reducing repetition.
* `mirostat`: Enables Mirostat sampling, which controls the perplexity during text generation. Supported by Ollama, LM Studio, and llama.cpp providers (default: `0`, where `0` = disabled, `1` = Mirostat, and `2` = Mirostat 2.0).
* `stop`: An array of stop tokens that, when encountered, will terminate the completion. Allows specifying multiple end conditions.
* `maxTokens`: The maximum number of tokens to generate in a completion (default: `2048`).
* `numThreads`: The number of threads used during the generation process. Available only for Ollama as `num_thread`.
* `keepAlive`: For Ollama, this parameter sets the number of seconds to keep the model loaded after the last request, unloading it from memory if inactive (default: `1800` seconds, or 30 minutes).
* `numGpu`: For Ollama, this parameter overrides the number of gpu layers that will be used to load the model into VRAM.
* `useMmap`: For Ollama, this parameter allows the model to be mapped into memory. If disabled can enhance response time on low end devices but will slow down the stream.
* `reasoning`: Enables thinking/reasoning for Anthropic Claude 3.7+ models.
* `reasoningBudgetTokens`: Sets budget tokens for thinking/reasoning in Anthropic Claude 3.7+ models.
Example
config.json
```json
{ "completionOptions": { "stream": false, "temperature": 0.5 } }
```
### `requestOptions`
Default HTTP request options that apply to all models and context providers, unless overridden at the model level.
**Properties:**
* `timeout`: Timeout for each request to the LLM (default: 7200 seconds).
* `verifySsl`: Whether to verify SSL certificates for requests.
* `caBundlePath`: Path to a custom CA bundle for HTTP requests - path to `.pem` file (or array of paths)
* `proxy`: Proxy URL to use for HTTP requests.
* `headers`: Custom headers for HTTP requests.
* `extraBodyProperties`: Additional properties to merge with the HTTP request body.
* `noProxy`: List of hostnames that should bypass the specified proxy.
* `clientCertificate`: Client certificate for HTTP requests.
* `cert`: Path to the client certificate file.
* `key`: Path to the client certificate key file.
* `passphrase`: Optional passphrase for the client certificate key file.
Example
config.json
```json
{ "requestOptions": { "headers": { "X-Auth-Token": "xxx" } } }
```
### `reranker`
Configuration for the reranker model used in response ranking.
**Properties:**
* `name` (**required**): Reranker name, e.g., `cohere`, `voyage`, `llm`, `huggingface-tei`, `bedrock`
* `params`:
* `model`: Model name
* `apiKey`: Api key
* `region`: Region (for Bedrock only)
Example
config.json
```json
{
"reranker": {
"name": "voyage",
"params": { "model": "rerank-2", "apiKey": "" }
}
}
```
### `docs`
List of documentation sites to index.
**Properties:**
* `title` (**required**): Title of the documentation site, displayed in dropdowns, etc.
* `startUrl` (**required**): Start page for crawling - usually root or intro page for docs
* `maxDepth`: Maximum link depth for crawling. Default `4`
* `favicon`: URL for site favicon (default is `/favicon.ico` from `startUrl`).
* `useLocalCrawling`: Skip the default crawler and only crawl using a local crawler.
Example
config.json
```
"docs": [ { "title": "Continue", "startUrl": "https://docs.continue.dev/intro", "faviconUrl": "https://docs.continue.dev/favicon.ico", }]
```
### `slashCommands`
Custom commands initiated by typing "/" in the sidebar. Commands include predefined functionality or may be user-defined.
**Properties:**
* `name`: The command name. Options include "issue", "share", "cmd", "http", "commit", and "review".
* `description`: Brief description of the command.
* `step`: (Deprecated) Used for built-in commands; set the name for pre-configured options.
* `params`: Additional parameters to configure command behavior (command-specific - see code for command)
The following commands are built-in and can be added to `config.json` to make them visible:
#### `/share`
Generate a shareable markdown transcript of your current chat history.
config.json
```json
{
"slashCommands": [
{
"name": "share",
"description": "Export the current chat session to markdown",
"params": { "outputDir": "~/.continue/session-transcripts" }
}
]
}
```
Use the `outputDir` parameter to specify where you want to the markdown file to be saved.
#### `/cmd`
Generate a shell command from natural language and (only in VS Code) automatically paste it into the terminal.
config.json
```json
{
"slashCommands": [
{ "name": "cmd", "description": "Generate a shell command" }
]
}
```
#### `/commit`
Shows the LLM your current git diff and asks it to generate a commit message.
config.json
```json
{
"slashCommands": [
{
"name": "commit",
"description": "Generate a commit message for the current changes"
}
]
}
```
#### `/http`
Write a custom slash command at your own HTTP endpoint. Set 'url' in the params object for the endpoint you have setup. The endpoint should return a sequence of string updates, which will be streamed to the Continue sidebar. See our basic [FastAPI example](https://github.com/continuedev/continue/blob/74002369a5e435735b83278fb965e004ae38a97d/core/context/providers/context_provider_server.py#L34-L45) for reference.
config.json
```json
{
"slashCommands": [
{
"name": "http",
"description": "Does something custom",
"params": { "url": "" }
}
]
}
```
#### `/issue`
Describe the issue you'd like to generate, and Continue will turn into a well-formatted title and body, then give you a link to the draft so you can submit. Make sure to set the URL of the repository you want to generate issues for.
config.json
```json
{
"slashCommands": [
{
"name": "issue",
"description": "Generate a link to a drafted GitHub issue",
"params": { "repositoryUrl": "https://github.com/continuedev/continue" }
}
]
}
```
#### `/onboard`
The onboard slash command helps to familiarize yourself with a new project by analyzing the project structure, READMEs, and dependency files. It identifies key folders, explains their purpose, and highlights popular packages used. Additionally, it offers insights into the project's architecture.
config.json
```json
{
"slashCommands": [
{
"name": "onboard",
"description": "Familiarize yourself with the codebase"
}
]
}
```
Example:
config.json
```json
{
"slashCommands": [
{ "name": "commit", "description": "Generate a commit message" },
{ "name": "share", "description": "Export this session as markdown" },
{ "name": "cmd", "description": "Generate a shell command" }
]
}
```
### `customCommands`
User-defined commands for prompt shortcuts in the sidebar, allowing quick access to common actions.
**Properties:**
* `name`: The name of the custom command.
* `prompt`: Text prompt for the command.
* `description`: Brief description explaining the command's function.
Example:
config.json
```json
{
"customCommands": [
{
"name": "test",
"prompt": "Write a comprehensive set of unit tests for the selected code. It should setup, run tests that check for correctness including important edge cases, and teardown. Ensure that the tests are complete and sophisticated. Give the tests just as chat output, don't edit any file.",
"description": "Write unit tests for highlighted code"
}
]
}
```
### `contextProviders`
List of the pre-defined context providers that will show up as options while typing in the chat, and their customization with `params`.
**Properties:**
* `name`: Name of the context provider, e.g. `docs` or `web`
* `params`: A context-provider-specific record of params to configure the context behavior
Example
config.json
```json
{
"contextProviders": [
{ "name": "code", "params": {} },
{ "name": "docs", "params": {} },
{ "name": "diff", "params": {} },
{ "name": "open", "params": {} }
]
}
```
### `userToken`
An optional token that identifies the user, primarily for authenticated services.
### `systemMessage`
Defines a system message that appears before every response from the language model, providing guidance or context.
### `experimental`
Several experimental config parameters are available, as described below:
`experimental`:
* `defaultContext`: Defines the default context for the LLM. Uses the same format as `contextProviders` but includes an additional `query` property to specify custom query parameters.=
* `modelRoles`:
* `inlineEdit`: Model title for inline edits.
* `applyCodeBlock`: Model title for applying code blocks.
* `repoMapFileSelection`: Model title for repo map selections.
* `quickActions`: Array of custom quick actions
* `title` (**required**): Display title for the quick action.
* `prompt` (**required**): Prompt for quick action.
* `sendToChat`: If `true`, sends result to chat; else inserts in document. Default is `false`.
* `contextMenuPrompts`:
* `comment`: Prompt for commenting code.
* `docstring`: Prompt for adding docstrings.
* `fix`: Prompt for fixing code.
* `optimize`: Prompt for optimizing code.
* `modelContextProtocolServers`: See [Model Context Protocol](/customization/mcp-tools)
Example
config.json
```json
{
"experimental": {
"modelRoles": { "inlineEdit": "Edit Model" },
"quickActions": [
{
"title": "Tags",
"prompt": "Return a list of any function and class names from the included code block",
"sendToChat": true
}
],
"contextMenuPrompts": {
"fixGrammar": "Fix grammar in the above but allow for typos."
},
"modelContextProtocolServers": [
{
"transport": {
"type": "stdio",
"command": "uvx",
"args": ["mcp-server-sqlite", "--db-path", "/Users/NAME/test.db"]
}
}
]
}
}
```
### Fully deprecated settings
Some deprecated `config.json` settings are no longer stored in config and have been moved to be editable through the [User Settings Page](/customize/settings). If found in `config.json`, they will be auto-migrated to User Settings and removed from `config.json`.
* `allowAnonymousTelemetry`: This value will be migrated to the safest merged value (`false` if either are `false`).
* `promptPath`: This value will override during migration.
* `disableIndexing`: This value will be migrated to the safest merged value (`true` if either are `true`).
* `disableSessionTitles`/`ui.getChatTitles`: This value will be migrated to the safest merged value (`true` if either are `true`). `getChatTitles` takes precedence if set to false
* `tabAutocompleteOptions`
* `useCache`: This value will override during migration.
* `disableInFiles`: This value will be migrated to the safest merged value (arrays of file matches merged/deduplicated)
* `multilineCompletions`: This value will override during migration.
* `experimental`
* `useChromiumForDocsCrawling`: This value will override during migration.
* `readResponseTTS`: This value will override during migration.
* `ui` - all will override during migration
* `codeBlockToolbarPosition`
* `fontSize`
* `codeWrap`
* `displayRawMarkdown`
* `showChatScrollbar`
See [User Settings Page](/customize/settings) for more information about each option.
# Migrating Config to YAML
Source: https://docs.continue.dev/reference/yaml-migration
Continue's YAML configuration format provides more readable, maintainable, consistent configuration files, as well as new configuration options and removal of some old configuration options. YAML is the preferred format and will be used to integrate with future Continue products. Below is a brief guide for migration from to .
See also
* [Intro to YAML](https://yaml.org/)
* [JSON Continue Config Reference](/reference)
* [YAML Continue Config Reference](/reference)
## Create YAML file
Create a `config.yaml` file in your Continue Global Directory (`~/.continue` on Mac, `%USERPROFILE%\.continue`) alongside your current `config.json` file. If a `config.yaml` file is present, it will be loaded instead of `config.json`.
Give your configuration a `name` and a `version`:
config.yaml
```
name: my-configurationversion: 0.0.1schema: v1
```
### Models
Add all model configurations in `config.json`, including models in `models`, `tabAutocompleteModel`, `embeddingsProvider`, and `reranker`, to the `models` section of your new YAML config file. A new `roles` YAML field specifies which roles a model can be used for, with possible values `chat`, `autocomplete`, `embed`, `rerank`, `edit`, `apply`, `summarize`.
* `models` in config should have `roles: [chat]`
* `tabAutocompleteModel`(s) in config should have `roles: [autocomplete]`
* `embeddingsProvider` in config should have `roles: [embed]`
* `reranker` in config should have `roles: [rerank]`
* `experimental.modelRoles` is replaced by simply adding roles to the model
* `inlineEdit` -> e.g. `roles: [chat, edit]`
* `applyCodeBlock` -> e.g. `roles: [chat, apply]`
Model-level `requestOptions` remain, with minor changes. See [YAML Continue Config Reference](/reference#models)
Model-level `completionOptions` are replaced by `defaultCompletionOptions`, with minor changes. See [YAML Continue Config Reference](/reference#models)
**Before**
config.json
```json
{
"models": [
{
"title": "GPT-4",
"provider": "openai",
"model": "gpt-4",
"apiKey": "",
"completionOptions": { "temperature": 0.5, "maxTokens": 2000 }
},
{ "title": "Ollama", "provider": "ollama", "model": "AUTODETECT" },
{
"title": "My Open AI Compatible Model",
"provider": "openai",
"apiBase": "http://3.3.3.3/v1",
"model": "my-openai-compatible-model",
"requestOptions": { "headers": { "X-Auth-Token": "" } }
}
],
"tabAutocompleteModel": {
"title": "My Starcoder",
"provider": "ollama",
"model": "starcoder2:3b"
},
"embeddingsProvider": {
"provider": "openai",
"model": "text-embedding-ada-002",
"apiKey": "",
"maxEmbeddingChunkSize": 256,
"maxEmbeddingBatchSize": 5
},
"reranker": {
"name": "voyage",
"params": { "model": "rerank-2", "apiKey": "" }
}
}
```
**After**
config.yaml
```
models: - name: GPT-4 provider: openai model: gpt-4 apiKey: defaultCompletionOptions: temperature: 0.5 maxTokens: 2000 roles: - chat - edit - name: My Voyage Reranker provider: voyage apiKey: roles: - rerank - name: My Starcoder provider: ollama model: starcoder2:3b roles: - autocomplete - name: My Ada Embedder provider: openai apiKey: roles: - embed embedOptions: - maxChunkSize: 256 - maxBatchSize: 5 - name: Ollama Autodetect provider: ollama model: AUTODETECT - name: My Open AI Compatible Model - Apply provider: openai model: my-openai-compatible-model apiBase: http://3.3.3.3/v1 requestOptions: headers: X-Auth-Token: roles: - chat - apply
```
Note that the `repoMapFileSelection` experimental model role has been deprecated and is only available in `config.json`.
### Context Providers
The JSON `contextProviders` field is replaced by the YAML `context` array.
* JSON `name` maps to `provider`
* JSON `params` map to `params`
**Before**
config.json
```json
{
"contextProviders": [
{ "name": "docs" },
{ "name": "codebase", "params": { "nRetrieve": 30, "nFinal": 3 } },
{ "name": "diff", "params": {} }
]
}
```
**After**
config.yaml
```
context: - provider: docs - provider: codebase params: nRetrieve: 30 nFinal: 3 - provider: diff
```
### System Message
The `systemMessage` property has been replaced with a `rules` property that takes an array of strings.
**Before**
config.json
```json
{ "systemMessage": "Always give concise responses" }
```
**After**
config.yaml
```
rules: - Always give concise responses
```
### Prompts
Rather than with `customCommands`, you can now use the `prompts` field to define custom prompts.
**Before**
config.json
```json
{
"customCommands": [
{
"name": "check",
"description": "Check for mistakes in my code",
"prompt": "{{{ input }}}\n\nPlease read the highlighted code and check for any mistakes. You should look for the following, and be extremely vigilant:\n- Syntax errors\n- Logic errors\n- Security vulnerabilities\n- Performance issues\n- Anything else that looks wrong\n\nOnce you find an error, please explain it as clearly as possible, but without using extra words. For example, instead of saying 'I think there is a syntax error on line 5', you should say 'Syntax error on line 5'. Give your answer as one bullet point per mistake found."
}
]
}
```
**After**
config.yaml
```
prompts: - name: check description: Check for mistakes in my code prompt: | Please read the highlighted code and check for any mistakes. You should look for the following, and be extremely vigilant: - Syntax errors - Logic errors - Security vulnerabilities - Performance issues - Anything else that looks wrong Once you find an error, please explain it as clearly as possible, but without using extra words. For example, instead of saying 'I think there is a syntax error on line 5', you should say 'Syntax error on line 5'. Give your answer as one bullet point per mistake found.
```
### Documentation
Documentation is largely the same, but the `title` property has been replaced with `name`. The `startUrl`, `rootUrl`, and `faviconUrl` properties remain.
**Before**
config.json
```json
{
"docs": [
{ "startUrl": "https://docs.nestjs.com/", "title": "nest.js" },
{ "startUrl": "https://mysite.com/docs/", "title": "My site" }
]
}
```
**After**
config.yaml
```
docs: - name: nest.js startUrl: https://docs.nestjs.com/ - name: My site startUrl: https://mysite.com/docs/
```
### MCP Servers
**Properties:**
* `name` (**required**): The name of the MCP server.
* `command` (**required**): The command used to start the server.
* `args`: An optional array of arguments for the command.
* `env`: An optional map of environment variables for the server process.
* `cwd`: An optional working directory to run the command in. Can be absolute or relative path.
**Before**
config.json
```json
{
"experimental": {
"modelContextProtocolServers": [
{
"transport": {
"type": "stdio",
"command": "uvx",
"args": ["mcp-server-sqlite", "--db-path", "/Users/NAME/test.db"],
"env": { "KEY": "" }
}
}
]
}
}
```
**After**
config.yaml
```
mcpServers: - name: My MCP Server command: uvx args: - mcp-server-sqlite - --db-path - /Users/NAME/test.db env: KEY:
```
***
## Deprecated configuration options
Some deprecated `config.json` settings are no longer stored in config and have been moved to be editable through the [User Settings Page](/customize/settings) (Gear Icon). If found in `config.json`, they will be auto-migrated to User Settings and removed from `config.json`.
See the [JSON Config Reference](/reference) for more information on fully deprecated options.
The following top-level fields from `config.json` still work when using `config.json` but have been deprecated and don't have a YAML equivalent:
* Slash commands (JSON `slashCommands`)
* top-level `requestOptions`
* top-level `completionOptions`
* `tabAutocompleteOptions`
* `disable`
* `maxPromptTokens`
* `debounceDelay`
* `maxSuffixPercentage`
* `prefixPercentage`
* `template`
* `onlyMyCode`
* `analytics`
The following top-level fields from `config.json` have been deprecated. Most UI-related and user-specific options will move into a settings page in the UI
* `customCommands`
* `experimental`
* `userToken`
## New Configuration options
The YAML configuration format offers new configuration options not available in the JSON format. See the [YAML Config Reference](/reference) for more information.
# Troubleshooting
Source: https://docs.continue.dev/troubleshooting
1. [Check the logs](#check-the-logs)
2. [Try the latest pre-release](#download-the-latest-pre-release)
3. [Download an older version](#download-an-older-version)
4. [Resolve keyboard shortcut issues](#keyboard-shortcuts-not-resolving)
5. [Check FAQs for common issues](#faqs)
## Check the logs
To solve many problems, the first step is reading the logs to find the relevant error message. To do this, follow these steps:
### VS Code
#### Console logs
In order to view debug logs, which contain extra information, click the
dropdown at the top that says "Default levels" and select "Verbose".
1. `cmd` + `shift` + `P` for MacOS or `ctrl`
* `shift` + `P` for Windows
2. Search for and then select "Developer: Toggle Developer Tools"
3. This will open the [Chrome DevTools window](https://developer.chrome.com/docs/devtools/)
4. Select the `Console` tab
5. Read the console logs
#### Prompt Logs (Continue Console)
To view prompt logs/analytics, you can enable the Continue Console.
1. Open VS Code settings (`cmd/ctrl` + `,`)
2. Search for the setting "Continue: Enable Console" and enable it
3. Reload the window
4. Open the Continue Console by using the command palette (`cmd/ctrl` + `shift` + `P`) and searching for "Continue: Focus on Continue Console View"
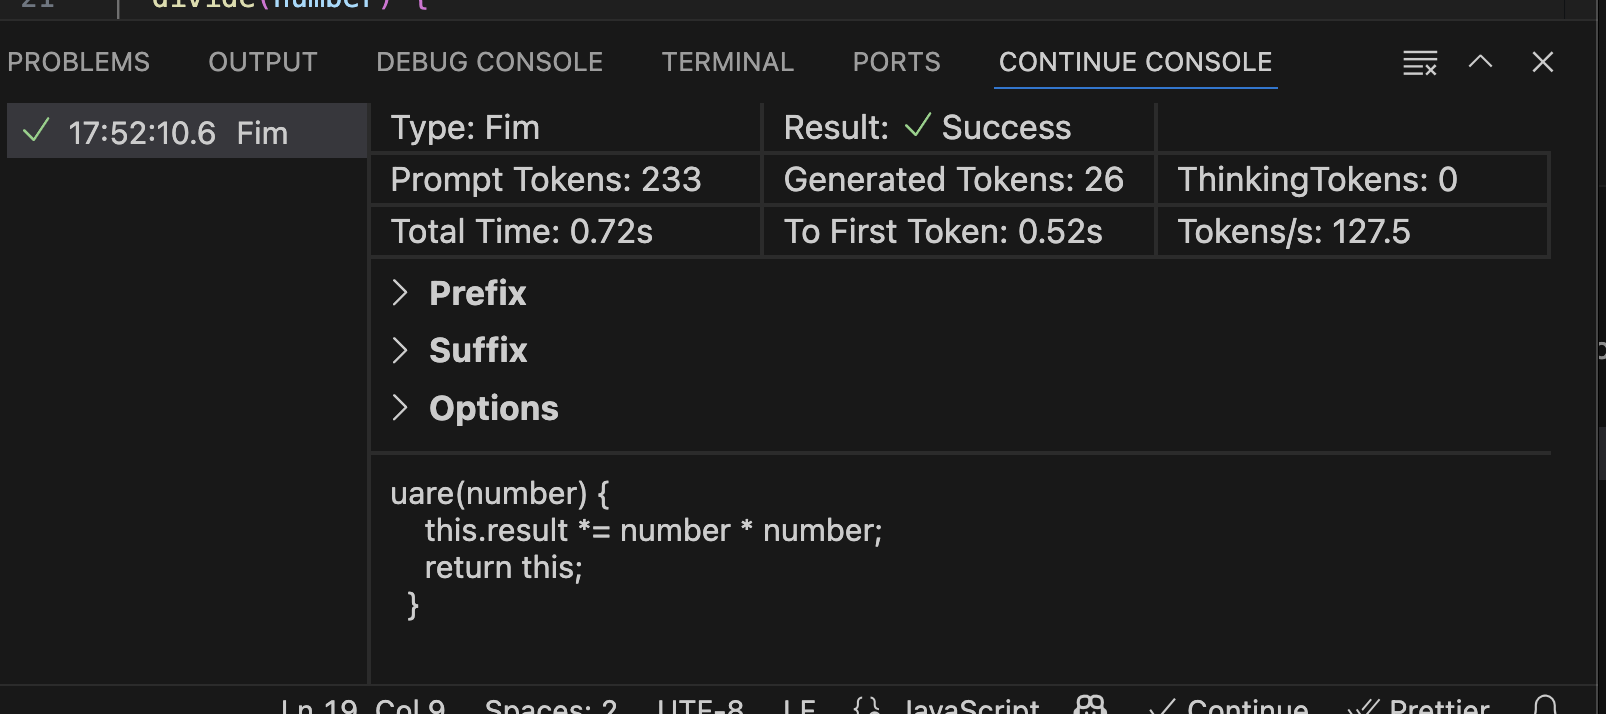
### JetBrains
Open `~/.continue/logs/core.log` to view the logs for the Continue plugin. The most recent logs are found at the bottom of the file.
Some JetBrains-related logs may also be found by clicking "Help" > "Show Log in Explorer/Finder".
## Download the latest pre-release
### VS Code
We are constantly making fixes and improvements to Continue, but the latest changes remain in a "pre-release" version for roughly a week so that we can test their stability. If you are experiencing issues, you can try the pre-release by going to the Continue extension page in VS Code and selecting "Switch to Pre-Release" as shown below.
### JetBrains
On JetBrains, the "pre-release" happens through their Early Access Program (EAP) channel. To download the latest EAP version, enable the EAP channel:
1. Open JetBrains settings (`cmd/ctrl` + `,`) and go to "Plugins"
2. Click the gear icon at the top
3. Select "Manage Plugin Repositories..."
4. Add "[https://plugins.jetbrains.com/plugins/eap/list](https://plugins.jetbrains.com/plugins/eap/list)" to the list
5. You'll now always be able to download the latest EAP version from the marketplace
## Download an Older Version
If you've tried everything, reported an error, know that a previous version was working for you, and are waiting to hear back, you can try downloading an older version of the extension.
For VS Code, All versions are hosted on the Open VSX Registry [here](https://open-vsx.org/extension/Continue/continue). Once you've downloaded the extension, which will be a .vsix file, you can install it manually by following the instructions [here](https://code.visualstudio.com/docs/editor/extension-gallery#_install-from-a-vsix).
You can find older versions of the JetBrains extension on their [marketplace](https://plugins.jetbrains.com/plugin/22707-continue), which will walk you through installing from disk.
## Keyboard shortcuts not resolving
If your keyboard shortcuts are not resolving, you may have other commands that are taking precedence over the Continue shortcuts. You can see if this is the case, and change your shortcut mappings, in the configuration of your IDE.
* [VSCode keyboard shortcuts docs](https://code.visualstudio.com/docs/getstarted/keybindings)
* [IntelliJ keyboard shortcut docs](https://www.jetbrains.com/help/idea/configuring-keyboard-and-mouse-shortcuts.html)
## FAQs
### Networking Issues
#### Configure Certificates
If you're seeing a `fetch failed` error and your network requires custom certificates, you will need to configure them in your config file. In each of the objects in the `"models"` array, add `requestOptions.caBundlePath` like this:
* YAML
* JSON
config.yaml
```
models: - name: My Model ... requestOptions: caBundlePath: /path/to/cert.pem
```
config.json
```json
{ "models": [ { "title": "My Model", ... "requestOptions": { "caBundlePath": "/path/to/cert.pem" } } ],}
```
You may also set `requestOptions.caBundlePath` to an array of paths to multiple certificates.
***Windows VS Code Users***: Installing the [win-ca](https://marketplace.visualstudio.com/items?itemName=ukoloff.win-ca) extension should also correct this issue.
#### VS Code Proxy Settings
If you are using VS Code and require requests to be made through a proxy, you are likely already set up through VS Code's [Proxy Server Support](https://code.visualstudio.com/docs/setup/network#_proxy-server-support). To double-check that this is enabled, use `cmd/ctrl` + `,` to open settings and search for "Proxy Support". Unless it is set to "off", then VS Code is responsible for making the request to the proxy.
#### code-server
Continue can be used in [code-server](https://coder.com/), but if you are running across an error in the logs that includes "This is likely because the editor is not running in a secure context", please see [their documentation on securely exposing code-server](https://coder.com/docs/code-server/latest/guide#expose-code-server).
### I installed Continue, but don't see the sidebar window
By default the Continue window is on the left side of VS Code, but it can be dragged to right side as well, which we recommend in our tutorial. In the situation where you have previously installed Continue and moved it to the right side, it may still be there. You can reveal Continue either by using cmd/ctrl+L or by clicking the button in the top right of VS Code to open the right sidebar.
### I'm getting a 404 error from OpenAI
If you have entered a valid API key and model, but are still getting a 404 error from OpenAI, this may be because you need to add credits to your billing account. You can do so from the [billing console](https://platform.openai.com/settings/organization/billing/overview). If you just want to check that this is in fact the cause of the error, you can try adding \$1 to your account and checking whether the error persists.
### I'm getting a 404 error from OpenRouter
If you have entered a valid API key and model, but are still getting a 404 error from OpenRouter, this may be because models that do not support function calling will return an error to Continue when a request is sent. Example error: `HTTP 404 Not Found from https://openrouter.ai/api/v1/chat/completions`
### Indexing issues
If you are having persistent errors with indexing, our recommendation is to rebuild your index from scratch. Note that for large codebases this may take some time.
This can be accomplished using the following command: `Continue: Rebuild codebase index`.
### Android Studio - "Nothing to show" in Chat
This can be fixed by selecting `Actions > Choose Boot runtime for the IDE` then selecting the latest version, and then restarting Android Studio. [See this thread](https://github.com/continuedev/continue/issues/596#issuecomment-1789327178) for details.
### I received a "Codebase indexing disabled - Your Linux system lacks required CPU features (AVX2, FMA)" notification
We use LanceDB as our vector database for codebase search features. On x64 Linux systems, LanceDB requires specific CPU features (FMA and AVX2) which may not be available on older processors.
Most Continue features will work normally, including autocomplete and chat. However, commands that rely on codebase indexing, such as `@codebase`, `@files`, and `@folder`, will be disabled.
For more details about this requirement, see the [LanceDB issue #2195](https://github.com/lancedb/lance/issues/2195).
### How do I reset the state of the extension?
Continue stores it's data in the `~/.continue` directory (%USERPROFILE%.continue\` on Windows).
If you'd like to perform a clean reset of the extension, including removing all configuration files, indices, etc, you can remove this directory, uninstall, and then reinstall.
## Still having trouble?
You can also join our Discord community [here](https://discord.gg/vapESyrFmJ) for additional support and discussions. Alternatively, you can create a GitHub issue [here](https://github.com/continuedev/continue/issues/new?assignees=\&labels=bug\&projects=\&template=bug-report-%F0%9F%90%9B.md\&title=), providing details of your problem, and we'll be able to help you out more quickly.
**Continue enables developers to create, share, and use custom AI code assistants with our open-source [VS Code](https://marketplace.visualstudio.com/items?itemName=Continue.continue) and [JetBrains](https://plugins.jetbrains.com/plugin/22707-continue-extension) extensions and [hub of models, rules, prompts, docs, and other building blocks](https://hub.continue.dev)**
to understand and iterate on code in the sidebar
to receive inline code suggestions as you type
to modify code without leaving your current file
to make more substantial changes to your codebase
# config.yaml Reference
Source: https://docs.continue.dev/reference
## Introduction
Continue hub assistants are defined using the `config.yaml` specification. Assistants can be loaded from [the Hub](https://hub.continue.dev/explore/assistants) or locally
* [Continue Hub](https://hub.continue.dev/explore/assistants) - YAML is stored on the hub and automatically synced to the extension
* Locally
* in your global `.continue` folder (`~/.continue` on Mac, `%USERPROFILE%\.continue`) within `.continue/assistants`. The name of the file will be used as the display name of the assistant, e.g. `My Assistant.yaml`
* in your workspace in a `/.continue/assistants` folder, with the same naming convention
Config YAML replaces `config.json`, which is deprecated. View the **[Migration
Guide](/customize/yaml-migration)**.
An assistant is made up of:
1. **Top level properties**, which specify the `name`, `version`, and `config.yaml` `schema` for the assistant
2. **Block lists**, which are composable arrays of coding assistant building blocks available to the assistant, such as models, docs, and context providers.
A block is a single standalone building block of a coding assistants, e.g., one model or one documentation source. In `config.yaml` syntax, a block consists of the same top-level properties as assistants (`name`, `version`, and `schema`), but only has **ONE** item under whichever block type it is.
Examples of blocks and assistants can be found on the [Continue hub](https://hub.continue.dev/explore/assistants).
Assistants can either explicitly define blocks - see [Properties](#properties) below - or import and configure existing hub blocks.
### Using Blocks
Hub blocks and assistants are identified with a slug in the format `owner-slug/block-or-assistant-slug`, where an owner can be a user or organization (For example, if you want to use the [OpenAI 4o Model block](https://hub.continue.dev/openai/gpt-4o), your slug would be `openai/gpt-4o`). These blocks are pulled from [https://hub.continue.dev](https://hub.continue.dev).
Blocks can be imported into an assistant by adding a `uses` clause under the block type. This can be alongside other `uses` clauses or explicit blocks of that type.
For example, the following assistant imports an Anthropic model and defines an Ollama DeepSeek one.
Assistant models section
```yaml
models:
- uses: anthropic/claude-3.5-sonnet # an imported model block
- model: deepseek-reasoner # an explicit model block
provider: ollama
```
### Local Blocks
It is also possible to define blocks locally in a `.continue` folder. This folder can be located at either the root of your workspace (these will automatically be applied to all assistants when you are in that workspace) or in your home directory at `~/.continue` (these will automatically be applied globally).
Place your YAML files in the following folders:
Assistants:
* `.continue/assistants` - for assistants
Blocks:
* `.continue/rules` - for rules
* `.continue/models` - for models
* `.continue/prompts` - for prompts
* `.continue/context` - for context providers
* `.continue/docs` - for docs\~\~\~\~
* `.continue/data` - for data
* `.continue/mcpServers` - for MCP Servers
You can find many examples of each of these block types on the [Continue Explore Page](https://hub.continue.dev/explore/models)
Local blocks utilizing mustache notation for secrets (`${{ secrets.SECRET_NAME }}`) can read secret values:
* globally, from a `.env` located in the global `.continue` folder (`~/.continue/.env`)
* per-workspace, from a `.env` file located at the root of the current workspace.
### Inputs
Blocks can be passed user inputs, including hub secrets and raw text values. To create a block that has an input, use mustache templating as follows:
Block config.yaml
```yaml
name: myprofile/custom-model
models:
- name: My Favorite Model
provider: anthropic
apiKey: ${{ inputs.ANTHROPIC_API_KEY }}
defaultCompletionOptions:
temperature: ${{ inputs.TEMP }}
```
Which can then be imported like
Assistant config.yaml
```yaml
name: myprofile/custom-assistant
models:
- uses: myprofile/custom-model
with:
ANTHROPIC_API_KEY: ${{ secrets.MY_ANTHROPIC_API_KEY }}
TEMP: 0.9
```
Note that hub secrets can be passed as inputs, using a similar mustache format: `secrets.SECRET_NAME`.
### Overrides
Block properties can be also be directly overriden using `override`. For example:
Assistant config.yaml
```yaml
name: myprofile/custom-assistant
models:
- uses: myprofile/custom-model
with:
ANTHROPIC_API_KEY: ${{ secrets.MY_ANTHROPIC_API_KEY }}
TEMP: 0.9
override:
roles:
- chat
```
## Properties
Below are details for each property that can be set in `config.yaml`.
**All properties at all levels are optional unless explicitly marked as required.**
The top-level properties in the `config.yaml` configuration file are:
* [`name`](#name) (**required**)
* [`version`](#version) (**required**)
* [`schema`](#schema) (**required**)
* [`models`](#models)
* [`context`](#context)
* [`rules`](#rules)
* [`prompts`](#prompts)
* [`docs`](#docs)
* [`mcpServers`](#mcpservers)
* [`data`](#data)
***
### `name`
The `name` property specifies the name of your project or configuration.
config.yaml
```yaml
name: MyProject
```
***
### `version`
The `version` property specifies the version of your project or configuration.
### `schema`
The `schema` property specifies the schema version used for the `config.yaml`, e.g. `v1`
***
### `models`
The `models` section defines the language models used in your configuration. Models are used for functionalities such as chat, editing, and summarizing.
**Properties:**
* `name` (**required**): A unique name to identify the model within your configuration.
* `provider` (**required**): The provider of the model (e.g., `openai`, `ollama`).
* `model` (**required**): The specific model name (e.g., `gpt-4`, `starcoder`).
* `apiBase`: Can be used to override the default API base that is specified per model
* `roles`: An array specifying the roles this model can fulfill, such as `chat`, `autocomplete`, `embed`, `rerank`, `edit`, `apply`, `summarize`. The default value is `[chat, edit, apply, summarize]`. Note that the `summarize` role is not currently used.
* `capabilities`: Array of strings denoting model capabilities, which will overwrite Continue's autodetection based on provider and model. Supported capabilities include `tool_use` and `image_input`.
* `maxStopWords`: Maximum number of stop words allowed, to avoid API errors with extensive lists.
* `promptTemplates`: Can be used to override the default prompt templates for different model roles. Valid values are `chat`, [`edit`](/customize/model-roles#edit-prompt-templating), [`apply`](/customize/model-roles#apply-prompt-templating) and [`autocomplete`](/customize/model-roles#autocomplete-prompt-templating). The `chat` property must be a valid template name, such as `llama3` or `anthropic`.
* `chatOptions`: If the model includes role `chat`, these settings apply for Chat and Agent mode:
* `baseSystemMessage`: Can be used to override the default system prompt for **Chat** mode.
* `embedOptions`: If the model includes role `embed`, these settings apply for embeddings:
* `maxChunkSize`: Maximum tokens per document chunk. Minimum is 128 tokens.
* `maxBatchSize`: Maximum number of chunks per request. Minimum is 1 chunk.
* `defaultCompletionOptions`: Default completion options for model settings.
* `contextLength`: Maximum context length of the model, typically in tokens.
* `maxTokens`: Maximum number of tokens to generate in a completion.
* `temperature`: Controls the randomness of the completion. Values range from `0.0` (deterministic) to `1.0` (random).
* `topP`: The cumulative probability for nucleus sampling.
* `topK`: Maximum number of tokens considered at each step.
* `stop`: An array of stop tokens that will terminate the completion.
* `reasoning`: Boolean to enable thinking/reasoning for Anthropic Claude 3.7+ models.
* `reasoningBudgetTokens`: Budget tokens for thinking/reasoning in Anthropic Claude 3.7+ models.
* `requestOptions`: HTTP request options specific to the model.
* `timeout`: Timeout for each request to the language model.
* `verifySsl`: Whether to verify SSL certificates for requests.
* `caBundlePath`: Path to a custom CA bundle for HTTP requests.
* `proxy`: Proxy URL for HTTP requests.
* `headers`: Custom headers for HTTP requests.
* `extraBodyProperties`: Additional properties to merge with the HTTP request body.
* `noProxy`: List of hostnames that should bypass the specified proxy.
* `clientCertificate`: Client certificate for HTTP requests.
* `cert`: Path to the client certificate file.
* `key`: Path to the client certificate key file.
* `passphrase`: Optional passphrase for the client certificate key file.
#### Example
config.yaml
```yaml
models:
- name: GPT-4o
provider: openai
model: gpt-4o
roles:
- chat
- edit
- apply
defaultCompletionOptions:
temperature: 0.7
maxTokens: 1500
- name: Codestral
provider: mistral
model: codestral-latest
roles:
- autocomplete
- name: My Model - OpenAI-Compatible
provider: openai
apiBase: http://my-endpoint/v1
model: my-custom-model
capabilities:
- tool_use
- image_input
roles:
- chat
- edit
```
***
### `context`
The `context` section defines context providers, which supply additional information or context to the language models. Each context provider can be configured with specific parameters.
More information about usage/params for each context provider can be found [here](/customize/custom-providers)
**Properties:**
* `provider` (**required**): The identifier or name of the context provider (e.g., `code`, `docs`, `web`)
* `name`: Optional name for the provider
* `params`: Optional parameters to configure the context provider's behavior.
**Example:**
config.yaml
```yaml
context:
- provider: file
- provider: code
- provider: codebase
params:
nFinal: 10
- provider: docs
- provider: diff
- provider: http
name: Context Server 1
params:
url: "https://api.example.com/server1"
- provider: folder
- provider: terminal
```
***
### `rules`
List of rules that the LLM should follow. These are concatenated into the system message for all [Chat](/features/chat/quick-start), [Edit](/features/edit/quick-start), and [Agent](/features/agent/quick-start) requests. See the [rules deep dive](/customization/rules) for details.
Explicit rules can either be simple text or an object with the following properties:
* `name` (**required**): A display name/title for the rule
* `rule` (**required**): The text content of the rule
* `globs` (optional): When files are provided as context that match this glob pattern, the rule will be included. This can be either a single pattern (e.g., `"**/*.{ts,tsx}"`) or an array of patterns (e.g., `["src/**/*.ts", "tests/**/*.ts"]`).
config.yaml
```yaml
rules:
- Always annotate Python functions with their parameter and return types
- name: TypeScript best practices
rule: Always use TypeScript interfaces to define shape of objects. Use type aliases sparingly.
globs: "**/*.{ts,tsx}"
- name: TypeScript test patterns
rule: In TypeScript tests, use Jest's describe/it pattern and follow best practices for mocking.
globs:
- "src/**/*.test.ts"
- "tests/**/*.ts"
- uses: myprofile/my-mood-setter
with:
TONE: concise
```
***
### `prompts`
A list of custom prompts that can be invoked from the chat window. Each prompt has a name, description, and the actual prompt text.
config.yaml
```yaml
prompts:
- name: check
description: Check for mistakes in my code
prompt: |
Please read the highlighted code and check for any mistakes. You should look for the following, and be extremely vigilant:
- Syntax errors
- Logic errors
- Security vulnerabilities
```
***
### `docs`
List of documentation sites to index.
**Properties:**
* `name` (**required**): Name of the documentation site, displayed in dropdowns, etc.
* `startUrl` (**required**): Start page for crawling - usually root or intro page for docs
* `maxDepth`: Maximum link depth for crawling. Default `4`
* `favicon`: URL for site favicon (default is `/favicon.ico` from `startUrl`).
* `useLocalCrawling`: Skip the default crawler and only crawl using a local crawler.
Example
config.yaml
```yaml
docs:
- name: Continue
startUrl: https://docs.continue.dev/intro
favicon: https://docs.continue.dev/favicon.ico
```
***
### `mcpServers`
The [Model Context Protocol](https://modelcontextprotocol.io/introduction) is a standard proposed by Anthropic to unify prompts, context, and tool use. Continue supports any MCP server with the MCP context provider.
**Properties:**
* `name` (**required**): The name of the MCP server.
* `command` (**required**): The command used to start the server.
* `args`: An optional array of arguments for the command.
* `env`: An optional map of environment variables for the server process.
* `cwd`: An optional working directory to run the command in. Can be absolute or relative path.
* `connectionTimeout`: An optional connection timeout number to the server in milliseconds.
**Example:**
config.yaml
```yaml
mcpServers:
- name: My MCP Server
command: uvx
args:
- mcp-server-sqlite
- --db-path
- ./test.db
cwd: /Users/NAME/project
env:
NODE_ENV: production
```
### `data`
Destinations to which [development data](/customize/overview#development-data) will be sent.
**Properties:**
* `name` (**required**): The display name of the data destination
* `destination` (**required**): The destination/endpoint that will receive the data. Can be:
* an HTTP endpoint that will receive a POST request with a JSON blob
* a file URL to a directory in which events will be dumpted to `.jsonl` files
* `schema` (**required**): the schema version of the JSON blobs to be sent. Options include `0.1.0` and `0.2.0`
* `events`: an array of event names to include. Defaults to all events if not specified.
* `level`: a pre-defined filter for event fields. Options include `all` and `noCode`; the latter excludes data like file contents, prompts, and completions. Defaults to `all`
* `apiKey`: api key to be sent with request (Bearer header)
* `requestOptions`: Options for event POST requests. Same format as [model requestOptions](#models).
**Example:**
config.yaml
```yaml
data:
- name: Local Data Bank
destination: file:///Users/dallin/Documents/code/continuedev/continue-extras/external-data
schema: 0.2.0
level: all
- name: My Private Company
destination: https://mycompany.com/ingest
schema: 0.2.0
level: noCode
events:
- autocomplete
- chatInteraction
```
***
## Complete YAML Config Example
Putting it all together, here's a complete example of a `config.yaml` configuration file:
config.yaml
```yaml
name: MyProject
version: 0.0.1
schema: v1
models:
- uses: anthropic/claude-3.5-sonnet
with:
ANTHROPIC_API_KEY: ${{ secrets.ANTHROPIC_API_KEY }}
override:
defaultCompletionOptions:
temperature: 0.8
- name: GPT-4
provider: openai
model: gpt-4
roles:
- chat
- edit
defaultCompletionOptions:
temperature: 0.5
maxTokens: 2000
requestOptions:
headers:
Authorization: Bearer YOUR_OPENAI_API_KEY
- name: Ollama Starcoder
provider: ollama
model: starcoder
roles:
- autocomplete
defaultCompletionOptions:
temperature: 0.3
stop:
- "\n"
rules:
- Give concise responses
- Always assume TypeScript rather than JavaScript
prompts:
- name: test
description: Unit test a function
prompt: |
Please write a complete suite of unit tests for this function. You should use the Jest testing framework.
The tests should cover all possible edge cases and should be as thorough as possible.
You should also include a description of each test case.
- uses: myprofile/my-favorite-prompt
context:
- provider: diff
- provider: file
- provider: codebase
- provider: code
- provider: docs
params:
startUrl: https://docs.example.com/introduction
rootUrl: https://docs.example.com
maxDepth: 3
mcpServers:
- name: DevServer
command: npm
args:
- run
- dev
env:
PORT: "3000"
data:
- name: My Private Company
destination: https://mycompany.com/ingest
schema: 0.2.0
level: noCode
events:
- autocomplete
- chatInteraction
```
## Using YAML anchors to avoid config duplication
You can also use node anchors to avoid duplication of properties. To do so, adding the YAML version header `%YAML 1.1` is needed, here's an example of a `config.yaml` configuration file using anchors:
config.yaml
```yaml
%YAML 1.1
---
name: MyProject
version: 0.0.1
schema: v1
model_defaults: &model_defaults
provider: openai
apiKey: my-api-key
apiBase: https://api.example.com/llm
models:
- name: mistral
<<: *model_defaults
model: mistral-7b-instruct
roles:
- chat
- edit
- name: qwen2.5-coder-7b-instruct
<<: *model_defaults
model: qwen2.5-coder-7b-instruct
roles:
- chat
- edit
- name: qwen2.5-coder-7b
<<: *model_defaults
model: qwen2.5-coder-7b
useLegacyCompletionsEndpoint: false
roles:
- autocomplete
```
# Continue Documentation MCP Server
Source: https://docs.continue.dev/reference/continue-mcp
Set up an MCP server to search Continue documentation
The continue-docs MCP Server allows you to search and retrieve information from the Continue documentation directly within your agent conversations. This is powered by Mintlify's MCP server generation.
## Installation
### Step 1: Install the MCP Server
Run the following command to install the continue-docs MCP server:
```bash
npx mint-mcp add docs.continue.dev
```
When prompted, select "All" from the selection menu:

This command will:
* Download and install the MCP server locally
* Set up the search tool for Continue documentation
* Create the necessary configuration files
Take note of the installation path displayed after running the command above. You'll need to replace in the configuration below with your actual installation path.
It will look like this: `/path/to/user/.mcp/docs.continue.dev/src/index.js`
### Step 2: Configure Continue
1. Create a folder called `.continue/mcpServers` at the top level of your workspace
2. Add a file called `continue-docs-mcp.yaml` to this folder
3. Write the following contents and save:
````yaml title=".continue/mcpServers/continue-docs-mcp.yaml"
```yaml title=".continue/mcpServers/continue-docs-mcp.yaml"
name: Continue Documentation MCP
version: 0.0.1
schema: v1
mcpServers:
- name: Continue Docs Search
command: node
args:
- "/path/to/user/.mcp/docs.continue.dev/src/index.js"
````
### Step 3: Enable Agent Mode
MCP servers only work in agent mode. Make sure to switch to agent mode in Continue before testing.
## Usage Examples
Once configured, you can use the MCP server to search Continue documentation:
### Model Configuration Help
```
Search for model setup instructions in the Continue docs
```
### Context Providers
```
Find documentation about context providers and how to configure them
```
### Autocomplete Setup
```
How do I configure autocomplete in Continue?
```
### Slash Commands
```
Search for information about custom slash commands
```
### Troubleshooting
```
Find troubleshooting information for Continue extension issues
```
## Test Plan
Use this test plan to verify your MCP server is working correctly:
### Prerequisites
* Continue extension is installed and running
* Agent mode is enabled
* MCP server configuration file exists in `.continue/mcpServers/`
### Test Cases
#### 1. Basic Documentation Search
* **Query**: "Search the Continue docs for information about model setup"
* **Expected**: Returns structured information about configuring models
* **Pass/Fail**: ☐
#### 2. Context Provider Documentation
* **Query**: "Find documentation about context providers in Continue"
* **Expected**: Returns information about available context providers
* **Pass/Fail**: ☐
#### 3. Feature-Specific Search
* **Query**: "How do I configure autocomplete in Continue?"
* **Expected**: Returns autocomplete setup instructions
* **Pass/Fail**: ☐
#### 4. MCP Documentation Search
* **Query**: "Search for MCP server setup instructions"
* **Expected**: Returns MCP configuration information
* **Pass/Fail**: ☐
## Troubleshooting
### MCP Server Not Loading
1. **Check configuration**: Ensure your YAML configuration uses the npx command approach
2. **Verify installation**: Run `npx mint-mcp add continue-docs` to confirm the server can be accessed
3. **Check agent mode**: MCP servers only work in agent mode
4. **Restart Continue**: Try restarting the Continue extension
### No Search Results
1. **Verify connection**: The MCP server needs internet access to search the documentation
2. **Check query format**: Try rephrasing your search query
3. **Test with known topics**: Search for well-documented features like "model configuration"
### Permission Issues
If you encounter permission errors, ensure npx has proper permissions:
```bash
npm config get prefix
```
## Advanced Configuration
### Using Environment Variables
You can configure the MCP server with environment variables:
## Related Documentation
* [MCP Overview](/customize/deep-dives/mcp)
* [Agent Mode](/features/agent/quick-start)
* [Configuration](/customize/overview)
# config.json Reference
Source: https://docs.continue.dev/reference/json-reference
We recently introduced a new configuration format, `config.yaml`, to replace
`config.json`. See the `config.yaml` reference and migration guide
[here](/reference).
Below are details for each property that can be set in `config.json`. The config schema code is found in [`extensions/vscode/config_schema.json`](https://github.com/continuedev/continue/blob/main/extensions/vscode/config_schema.json).
**All properties at all levels are optional unless explicitly marked required**
### `models`
Your **chat** models are defined here, which are used for [Chat](/features/chat/how-it-works), [Edit](/features/edit/how-it-works) and [VS Code actions](/customization/overview#vscode-actions).
Each model has specific configuration options tailored to its provider and functionality, which can be seen as suggestions while editing the json.
**Properties:**
* `title` (**required**): The title to assign to your model, shown in dropdowns, etc.
* `provider` (**required**): The provider of the model, which determines the type and interaction method. Options inclued `openai`, `ollama`, `xAI`, etc., see IntelliJ suggestions.
* `model` (**required**): The name of the model, used for prompt template auto-detection. Use `AUTODETECT` special name to get all available models.
* `apiKey`: API key required by providers like OpenAI, Anthropic, Cohere, and xAI.
* `apiBase`: The base URL of the LLM API.
* `contextLength`: Maximum context length of the model, typically in tokens (default: 2048).
* `maxStopWords`: Maximum number of stop words allowed, to avoid API errors with extensive lists.
* `template`: Chat template to format messages. Auto-detected for most models but can be overridden. See intelliJ suggestions.
* `promptTemplates`: A mapping of prompt template names (e.g., `edit`) to template strings. See the [Deep Dives section](/customize/deep-dives/prompts) for customization details.
* `completionOptions`: Model-specific completion options, same format as top-level [`completionOptions`](#completionoptions), which they override.
* `systemMessage`: A system message that will precede responses from the LLM.
* `requestOptions`: Model-specific HTTP request options, same format as top-level [`requestOptions`](#requestoptions), which they override.
* `apiType`: Specifies the type of API (`openai` or `azure`).
* `apiVersion`: Azure API version (e.g., `2023-07-01-preview`).
* `engine`: Engine for Azure OpenAI requests.
* `capabilities`: Override auto-detected capabilities:
* `uploadImage`: Boolean indicating if the model supports image uploads.
* `tools`: Boolean indicating if the model supports tool use.
*(AWS Only)*
* `profile`: AWS security profile for authorization.
* `modelArn`: AWS ARN for imported models (e.g., for `bedrockimport` provider).
* `region`: Region where the model is hosted (e.g., `us-east-1`, `eu-central-1`).
Example:
config.json
```json
{
"models": [
{ "title": "Ollama", "provider": "ollama", "model": "AUTODETECT" },
{
"model": "gpt-4o",
"contextLength": 128000,
"title": "GPT-4o",
"provider": "openai",
"apiKey": "YOUR_API_KEY"
}
]
}
```
### `tabAutocompleteModel`
Specifies the model or models for tab autocompletion, defaulting to an Ollama instance. This property uses the same format as `models`. Can be an array of models or an object for one model.
Example
config.json
```json
{
"tabAutocompleteModel": {
"title": "My Starcoder",
"provider": "ollama",
"model": "starcoder2:3b"
}
}
```
### `tabAutocompleteOptions`
Specifies options for tab autocompletion behavior.
**Properties:**
* `disable`: If `true`, disables tab autocomplete (default: `false`).
* `maxPromptTokens`: Maximum number of tokens for the prompt (default: `1024`).
* `debounceDelay`: Delay (in ms) before triggering autocomplete (default: `350`).
* `maxSuffixPercentage`: Maximum percentage of prompt for suffix (default: `0.2`).
* `prefixPercentage`: Percentage of input for prefix (default: `0.3`).
* `template`: Template string for autocomplete, using Mustache templating. You can use the `{{{ prefix }}}`, `{{{ suffix }}}`, `{{{ filename }}}`, `{{{ reponame }}}`, and `{{{ language }}}` variables.
* `onlyMyCode`: If `true`, only includes code within the repository (default: `true`).
Example
config.json
```json
{
"tabAutocompleteOptions": {
"debounceDelay": 500,
"maxPromptTokens": 1500,
"disableInFiles": ["*.md"]
}
}
```
### `embeddingsProvider`
Embeddings model settings - the model used for @Codebase and @docs.
**Properties:**
* `provider` (**required**): Specifies the embeddings provider, with options including `transformers.js`, `ollama`, `openai`, `cohere`, `gemini`, etc
* `model`: Model name for embeddings.
* `apiKey`: API key for the provider.
* `apiBase`: Base URL for API requests.
* `requestOptions`: Additional HTTP request settings specific to the embeddings provider.
* `maxEmbeddingChunkSize`: Maximum tokens per document chunk. Minimum is 128 tokens.
* `maxEmbeddingBatchSize`: Maximum number of chunks per request. Minimum is 1 chunk.
(AWS ONLY)
* `region`: Specifies the region hosting the model.
* `profile`: AWS security profile.
Example:
config.json
```json
{
"embeddingsProvider": {
"provider": "openai",
"model": "text-embedding-ada-002",
"apiKey": "",
"maxEmbeddingChunkSize": 256,
"maxEmbeddingBatchSize": 5
}
}
```
### `completionOptions`
Parameters that control the behavior of text generation and completion settings. Top-level `completionOptions` apply to all models, *unless overridden at the model level*.
**Properties:**
* `stream`: Whether to stream the LLM response. Currently only respected by the `anthropic` and `ollama` providers; other providers will always stream (default: `true`).
* `temperature`: Controls the randomness of the completion. Higher values result in more diverse outputs.
* `topP`: The cumulative probability for nucleus sampling. Lower values limit responses to tokens within the top probability mass.
* `topK`: The maximum number of tokens considered at each step. Limits the generated text to tokens within this probability.
* `presencePenalty`: Discourages the model from generating tokens that have already appeared in the output.
* `frequencyPenalty`: Penalizes tokens based on their frequency in the text, reducing repetition.
* `mirostat`: Enables Mirostat sampling, which controls the perplexity during text generation. Supported by Ollama, LM Studio, and llama.cpp providers (default: `0`, where `0` = disabled, `1` = Mirostat, and `2` = Mirostat 2.0).
* `stop`: An array of stop tokens that, when encountered, will terminate the completion. Allows specifying multiple end conditions.
* `maxTokens`: The maximum number of tokens to generate in a completion (default: `2048`).
* `numThreads`: The number of threads used during the generation process. Available only for Ollama as `num_thread`.
* `keepAlive`: For Ollama, this parameter sets the number of seconds to keep the model loaded after the last request, unloading it from memory if inactive (default: `1800` seconds, or 30 minutes).
* `numGpu`: For Ollama, this parameter overrides the number of gpu layers that will be used to load the model into VRAM.
* `useMmap`: For Ollama, this parameter allows the model to be mapped into memory. If disabled can enhance response time on low end devices but will slow down the stream.
* `reasoning`: Enables thinking/reasoning for Anthropic Claude 3.7+ models.
* `reasoningBudgetTokens`: Sets budget tokens for thinking/reasoning in Anthropic Claude 3.7+ models.
Example
config.json
```json
{ "completionOptions": { "stream": false, "temperature": 0.5 } }
```
### `requestOptions`
Default HTTP request options that apply to all models and context providers, unless overridden at the model level.
**Properties:**
* `timeout`: Timeout for each request to the LLM (default: 7200 seconds).
* `verifySsl`: Whether to verify SSL certificates for requests.
* `caBundlePath`: Path to a custom CA bundle for HTTP requests - path to `.pem` file (or array of paths)
* `proxy`: Proxy URL to use for HTTP requests.
* `headers`: Custom headers for HTTP requests.
* `extraBodyProperties`: Additional properties to merge with the HTTP request body.
* `noProxy`: List of hostnames that should bypass the specified proxy.
* `clientCertificate`: Client certificate for HTTP requests.
* `cert`: Path to the client certificate file.
* `key`: Path to the client certificate key file.
* `passphrase`: Optional passphrase for the client certificate key file.
Example
config.json
```json
{ "requestOptions": { "headers": { "X-Auth-Token": "xxx" } } }
```
### `reranker`
Configuration for the reranker model used in response ranking.
**Properties:**
* `name` (**required**): Reranker name, e.g., `cohere`, `voyage`, `llm`, `huggingface-tei`, `bedrock`
* `params`:
* `model`: Model name
* `apiKey`: Api key
* `region`: Region (for Bedrock only)
Example
config.json
```json
{
"reranker": {
"name": "voyage",
"params": { "model": "rerank-2", "apiKey": "" }
}
}
```
### `docs`
List of documentation sites to index.
**Properties:**
* `title` (**required**): Title of the documentation site, displayed in dropdowns, etc.
* `startUrl` (**required**): Start page for crawling - usually root or intro page for docs
* `maxDepth`: Maximum link depth for crawling. Default `4`
* `favicon`: URL for site favicon (default is `/favicon.ico` from `startUrl`).
* `useLocalCrawling`: Skip the default crawler and only crawl using a local crawler.
Example
config.json
```
"docs": [ { "title": "Continue", "startUrl": "https://docs.continue.dev/intro", "faviconUrl": "https://docs.continue.dev/favicon.ico", }]
```
### `slashCommands`
Custom commands initiated by typing "/" in the sidebar. Commands include predefined functionality or may be user-defined.
**Properties:**
* `name`: The command name. Options include "issue", "share", "cmd", "http", "commit", and "review".
* `description`: Brief description of the command.
* `step`: (Deprecated) Used for built-in commands; set the name for pre-configured options.
* `params`: Additional parameters to configure command behavior (command-specific - see code for command)
The following commands are built-in and can be added to `config.json` to make them visible:
#### `/share`
Generate a shareable markdown transcript of your current chat history.
config.json
```json
{
"slashCommands": [
{
"name": "share",
"description": "Export the current chat session to markdown",
"params": { "outputDir": "~/.continue/session-transcripts" }
}
]
}
```
Use the `outputDir` parameter to specify where you want to the markdown file to be saved.
#### `/cmd`
Generate a shell command from natural language and (only in VS Code) automatically paste it into the terminal.
config.json
```json
{
"slashCommands": [
{ "name": "cmd", "description": "Generate a shell command" }
]
}
```
#### `/commit`
Shows the LLM your current git diff and asks it to generate a commit message.
config.json
```json
{
"slashCommands": [
{
"name": "commit",
"description": "Generate a commit message for the current changes"
}
]
}
```
#### `/http`
Write a custom slash command at your own HTTP endpoint. Set 'url' in the params object for the endpoint you have setup. The endpoint should return a sequence of string updates, which will be streamed to the Continue sidebar. See our basic [FastAPI example](https://github.com/continuedev/continue/blob/74002369a5e435735b83278fb965e004ae38a97d/core/context/providers/context_provider_server.py#L34-L45) for reference.
config.json
```json
{
"slashCommands": [
{
"name": "http",
"description": "Does something custom",
"params": { "url": "" }
}
]
}
```
#### `/issue`
Describe the issue you'd like to generate, and Continue will turn into a well-formatted title and body, then give you a link to the draft so you can submit. Make sure to set the URL of the repository you want to generate issues for.
config.json
```json
{
"slashCommands": [
{
"name": "issue",
"description": "Generate a link to a drafted GitHub issue",
"params": { "repositoryUrl": "https://github.com/continuedev/continue" }
}
]
}
```
#### `/onboard`
The onboard slash command helps to familiarize yourself with a new project by analyzing the project structure, READMEs, and dependency files. It identifies key folders, explains their purpose, and highlights popular packages used. Additionally, it offers insights into the project's architecture.
config.json
```json
{
"slashCommands": [
{
"name": "onboard",
"description": "Familiarize yourself with the codebase"
}
]
}
```
Example:
config.json
```json
{
"slashCommands": [
{ "name": "commit", "description": "Generate a commit message" },
{ "name": "share", "description": "Export this session as markdown" },
{ "name": "cmd", "description": "Generate a shell command" }
]
}
```
### `customCommands`
User-defined commands for prompt shortcuts in the sidebar, allowing quick access to common actions.
**Properties:**
* `name`: The name of the custom command.
* `prompt`: Text prompt for the command.
* `description`: Brief description explaining the command's function.
Example:
config.json
```json
{
"customCommands": [
{
"name": "test",
"prompt": "Write a comprehensive set of unit tests for the selected code. It should setup, run tests that check for correctness including important edge cases, and teardown. Ensure that the tests are complete and sophisticated. Give the tests just as chat output, don't edit any file.",
"description": "Write unit tests for highlighted code"
}
]
}
```
### `contextProviders`
List of the pre-defined context providers that will show up as options while typing in the chat, and their customization with `params`.
**Properties:**
* `name`: Name of the context provider, e.g. `docs` or `web`
* `params`: A context-provider-specific record of params to configure the context behavior
Example
config.json
```json
{
"contextProviders": [
{ "name": "code", "params": {} },
{ "name": "docs", "params": {} },
{ "name": "diff", "params": {} },
{ "name": "open", "params": {} }
]
}
```
### `userToken`
An optional token that identifies the user, primarily for authenticated services.
### `systemMessage`
Defines a system message that appears before every response from the language model, providing guidance or context.
### `experimental`
Several experimental config parameters are available, as described below:
`experimental`:
* `defaultContext`: Defines the default context for the LLM. Uses the same format as `contextProviders` but includes an additional `query` property to specify custom query parameters.=
* `modelRoles`:
* `inlineEdit`: Model title for inline edits.
* `applyCodeBlock`: Model title for applying code blocks.
* `repoMapFileSelection`: Model title for repo map selections.
* `quickActions`: Array of custom quick actions
* `title` (**required**): Display title for the quick action.
* `prompt` (**required**): Prompt for quick action.
* `sendToChat`: If `true`, sends result to chat; else inserts in document. Default is `false`.
* `contextMenuPrompts`:
* `comment`: Prompt for commenting code.
* `docstring`: Prompt for adding docstrings.
* `fix`: Prompt for fixing code.
* `optimize`: Prompt for optimizing code.
* `modelContextProtocolServers`: See [Model Context Protocol](/customization/mcp-tools)
Example
config.json
```json
{
"experimental": {
"modelRoles": { "inlineEdit": "Edit Model" },
"quickActions": [
{
"title": "Tags",
"prompt": "Return a list of any function and class names from the included code block",
"sendToChat": true
}
],
"contextMenuPrompts": {
"fixGrammar": "Fix grammar in the above but allow for typos."
},
"modelContextProtocolServers": [
{
"transport": {
"type": "stdio",
"command": "uvx",
"args": ["mcp-server-sqlite", "--db-path", "/Users/NAME/test.db"]
}
}
]
}
}
```
### Fully deprecated settings
Some deprecated `config.json` settings are no longer stored in config and have been moved to be editable through the [User Settings Page](/customize/settings). If found in `config.json`, they will be auto-migrated to User Settings and removed from `config.json`.
* `allowAnonymousTelemetry`: This value will be migrated to the safest merged value (`false` if either are `false`).
* `promptPath`: This value will override during migration.
* `disableIndexing`: This value will be migrated to the safest merged value (`true` if either are `true`).
* `disableSessionTitles`/`ui.getChatTitles`: This value will be migrated to the safest merged value (`true` if either are `true`). `getChatTitles` takes precedence if set to false
* `tabAutocompleteOptions`
* `useCache`: This value will override during migration.
* `disableInFiles`: This value will be migrated to the safest merged value (arrays of file matches merged/deduplicated)
* `multilineCompletions`: This value will override during migration.
* `experimental`
* `useChromiumForDocsCrawling`: This value will override during migration.
* `readResponseTTS`: This value will override during migration.
* `ui` - all will override during migration
* `codeBlockToolbarPosition`
* `fontSize`
* `codeWrap`
* `displayRawMarkdown`
* `showChatScrollbar`
See [User Settings Page](/customize/settings) for more information about each option.
# Migrating Config to YAML
Source: https://docs.continue.dev/reference/yaml-migration
Continue's YAML configuration format provides more readable, maintainable, consistent configuration files, as well as new configuration options and removal of some old configuration options. YAML is the preferred format and will be used to integrate with future Continue products. Below is a brief guide for migration from to .
See also
* [Intro to YAML](https://yaml.org/)
* [JSON Continue Config Reference](/reference)
* [YAML Continue Config Reference](/reference)
## Create YAML file
Create a `config.yaml` file in your Continue Global Directory (`~/.continue` on Mac, `%USERPROFILE%\.continue`) alongside your current `config.json` file. If a `config.yaml` file is present, it will be loaded instead of `config.json`.
Give your configuration a `name` and a `version`:
config.yaml
```
name: my-configurationversion: 0.0.1schema: v1
```
### Models
Add all model configurations in `config.json`, including models in `models`, `tabAutocompleteModel`, `embeddingsProvider`, and `reranker`, to the `models` section of your new YAML config file. A new `roles` YAML field specifies which roles a model can be used for, with possible values `chat`, `autocomplete`, `embed`, `rerank`, `edit`, `apply`, `summarize`.
* `models` in config should have `roles: [chat]`
* `tabAutocompleteModel`(s) in config should have `roles: [autocomplete]`
* `embeddingsProvider` in config should have `roles: [embed]`
* `reranker` in config should have `roles: [rerank]`
* `experimental.modelRoles` is replaced by simply adding roles to the model
* `inlineEdit` -> e.g. `roles: [chat, edit]`
* `applyCodeBlock` -> e.g. `roles: [chat, apply]`
Model-level `requestOptions` remain, with minor changes. See [YAML Continue Config Reference](/reference#models)
Model-level `completionOptions` are replaced by `defaultCompletionOptions`, with minor changes. See [YAML Continue Config Reference](/reference#models)
**Before**
config.json
```json
{
"models": [
{
"title": "GPT-4",
"provider": "openai",
"model": "gpt-4",
"apiKey": "",
"completionOptions": { "temperature": 0.5, "maxTokens": 2000 }
},
{ "title": "Ollama", "provider": "ollama", "model": "AUTODETECT" },
{
"title": "My Open AI Compatible Model",
"provider": "openai",
"apiBase": "http://3.3.3.3/v1",
"model": "my-openai-compatible-model",
"requestOptions": { "headers": { "X-Auth-Token": "" } }
}
],
"tabAutocompleteModel": {
"title": "My Starcoder",
"provider": "ollama",
"model": "starcoder2:3b"
},
"embeddingsProvider": {
"provider": "openai",
"model": "text-embedding-ada-002",
"apiKey": "",
"maxEmbeddingChunkSize": 256,
"maxEmbeddingBatchSize": 5
},
"reranker": {
"name": "voyage",
"params": { "model": "rerank-2", "apiKey": "" }
}
}
```
**After**
config.yaml
```
models: - name: GPT-4 provider: openai model: gpt-4 apiKey: defaultCompletionOptions: temperature: 0.5 maxTokens: 2000 roles: - chat - edit - name: My Voyage Reranker provider: voyage apiKey: roles: - rerank - name: My Starcoder provider: ollama model: starcoder2:3b roles: - autocomplete - name: My Ada Embedder provider: openai apiKey: roles: - embed embedOptions: - maxChunkSize: 256 - maxBatchSize: 5 - name: Ollama Autodetect provider: ollama model: AUTODETECT - name: My Open AI Compatible Model - Apply provider: openai model: my-openai-compatible-model apiBase: http://3.3.3.3/v1 requestOptions: headers: X-Auth-Token: roles: - chat - apply
```
Note that the `repoMapFileSelection` experimental model role has been deprecated and is only available in `config.json`.
### Context Providers
The JSON `contextProviders` field is replaced by the YAML `context` array.
* JSON `name` maps to `provider`
* JSON `params` map to `params`
**Before**
config.json
```json
{
"contextProviders": [
{ "name": "docs" },
{ "name": "codebase", "params": { "nRetrieve": 30, "nFinal": 3 } },
{ "name": "diff", "params": {} }
]
}
```
**After**
config.yaml
```
context: - provider: docs - provider: codebase params: nRetrieve: 30 nFinal: 3 - provider: diff
```
### System Message
The `systemMessage` property has been replaced with a `rules` property that takes an array of strings.
**Before**
config.json
```json
{ "systemMessage": "Always give concise responses" }
```
**After**
config.yaml
```
rules: - Always give concise responses
```
### Prompts
Rather than with `customCommands`, you can now use the `prompts` field to define custom prompts.
**Before**
config.json
```json
{
"customCommands": [
{
"name": "check",
"description": "Check for mistakes in my code",
"prompt": "{{{ input }}}\n\nPlease read the highlighted code and check for any mistakes. You should look for the following, and be extremely vigilant:\n- Syntax errors\n- Logic errors\n- Security vulnerabilities\n- Performance issues\n- Anything else that looks wrong\n\nOnce you find an error, please explain it as clearly as possible, but without using extra words. For example, instead of saying 'I think there is a syntax error on line 5', you should say 'Syntax error on line 5'. Give your answer as one bullet point per mistake found."
}
]
}
```
**After**
config.yaml
```
prompts: - name: check description: Check for mistakes in my code prompt: | Please read the highlighted code and check for any mistakes. You should look for the following, and be extremely vigilant: - Syntax errors - Logic errors - Security vulnerabilities - Performance issues - Anything else that looks wrong Once you find an error, please explain it as clearly as possible, but without using extra words. For example, instead of saying 'I think there is a syntax error on line 5', you should say 'Syntax error on line 5'. Give your answer as one bullet point per mistake found.
```
### Documentation
Documentation is largely the same, but the `title` property has been replaced with `name`. The `startUrl`, `rootUrl`, and `faviconUrl` properties remain.
**Before**
config.json
```json
{
"docs": [
{ "startUrl": "https://docs.nestjs.com/", "title": "nest.js" },
{ "startUrl": "https://mysite.com/docs/", "title": "My site" }
]
}
```
**After**
config.yaml
```
docs: - name: nest.js startUrl: https://docs.nestjs.com/ - name: My site startUrl: https://mysite.com/docs/
```
### MCP Servers
**Properties:**
* `name` (**required**): The name of the MCP server.
* `command` (**required**): The command used to start the server.
* `args`: An optional array of arguments for the command.
* `env`: An optional map of environment variables for the server process.
* `cwd`: An optional working directory to run the command in. Can be absolute or relative path.
**Before**
config.json
```json
{
"experimental": {
"modelContextProtocolServers": [
{
"transport": {
"type": "stdio",
"command": "uvx",
"args": ["mcp-server-sqlite", "--db-path", "/Users/NAME/test.db"],
"env": { "KEY": "" }
}
}
]
}
}
```
**After**
config.yaml
```
mcpServers: - name: My MCP Server command: uvx args: - mcp-server-sqlite - --db-path - /Users/NAME/test.db env: KEY:
```
***
## Deprecated configuration options
Some deprecated `config.json` settings are no longer stored in config and have been moved to be editable through the [User Settings Page](/customize/settings) (Gear Icon). If found in `config.json`, they will be auto-migrated to User Settings and removed from `config.json`.
See the [JSON Config Reference](/reference) for more information on fully deprecated options.
The following top-level fields from `config.json` still work when using `config.json` but have been deprecated and don't have a YAML equivalent:
* Slash commands (JSON `slashCommands`)
* top-level `requestOptions`
* top-level `completionOptions`
* `tabAutocompleteOptions`
* `disable`
* `maxPromptTokens`
* `debounceDelay`
* `maxSuffixPercentage`
* `prefixPercentage`
* `template`
* `onlyMyCode`
* `analytics`
The following top-level fields from `config.json` have been deprecated. Most UI-related and user-specific options will move into a settings page in the UI
* `customCommands`
* `experimental`
* `userToken`
## New Configuration options
The YAML configuration format offers new configuration options not available in the JSON format. See the [YAML Config Reference](/reference) for more information.
# Troubleshooting
Source: https://docs.continue.dev/troubleshooting
1. [Check the logs](#check-the-logs)
2. [Try the latest pre-release](#download-the-latest-pre-release)
3. [Download an older version](#download-an-older-version)
4. [Resolve keyboard shortcut issues](#keyboard-shortcuts-not-resolving)
5. [Check FAQs for common issues](#faqs)
## Check the logs
To solve many problems, the first step is reading the logs to find the relevant error message. To do this, follow these steps:
### VS Code
#### Console logs
In order to view debug logs, which contain extra information, click the
dropdown at the top that says "Default levels" and select "Verbose".
1. `cmd` + `shift` + `P` for MacOS or `ctrl`
* `shift` + `P` for Windows
2. Search for and then select "Developer: Toggle Developer Tools"
3. This will open the [Chrome DevTools window](https://developer.chrome.com/docs/devtools/)
4. Select the `Console` tab
5. Read the console logs
#### Prompt Logs (Continue Console)
To view prompt logs/analytics, you can enable the Continue Console.
1. Open VS Code settings (`cmd/ctrl` + `,`)
2. Search for the setting "Continue: Enable Console" and enable it
3. Reload the window
4. Open the Continue Console by using the command palette (`cmd/ctrl` + `shift` + `P`) and searching for "Continue: Focus on Continue Console View"

### JetBrains
Open `~/.continue/logs/core.log` to view the logs for the Continue plugin. The most recent logs are found at the bottom of the file.
Some JetBrains-related logs may also be found by clicking "Help" > "Show Log in Explorer/Finder".
## Download the latest pre-release
### VS Code
We are constantly making fixes and improvements to Continue, but the latest changes remain in a "pre-release" version for roughly a week so that we can test their stability. If you are experiencing issues, you can try the pre-release by going to the Continue extension page in VS Code and selecting "Switch to Pre-Release" as shown below.

### JetBrains
On JetBrains, the "pre-release" happens through their Early Access Program (EAP) channel. To download the latest EAP version, enable the EAP channel:
1. Open JetBrains settings (`cmd/ctrl` + `,`) and go to "Plugins"
2. Click the gear icon at the top
3. Select "Manage Plugin Repositories..."
4. Add "[https://plugins.jetbrains.com/plugins/eap/list](https://plugins.jetbrains.com/plugins/eap/list)" to the list
5. You'll now always be able to download the latest EAP version from the marketplace
## Download an Older Version
If you've tried everything, reported an error, know that a previous version was working for you, and are waiting to hear back, you can try downloading an older version of the extension.
For VS Code, All versions are hosted on the Open VSX Registry [here](https://open-vsx.org/extension/Continue/continue). Once you've downloaded the extension, which will be a .vsix file, you can install it manually by following the instructions [here](https://code.visualstudio.com/docs/editor/extension-gallery#_install-from-a-vsix).
You can find older versions of the JetBrains extension on their [marketplace](https://plugins.jetbrains.com/plugin/22707-continue), which will walk you through installing from disk.
## Keyboard shortcuts not resolving
If your keyboard shortcuts are not resolving, you may have other commands that are taking precedence over the Continue shortcuts. You can see if this is the case, and change your shortcut mappings, in the configuration of your IDE.
* [VSCode keyboard shortcuts docs](https://code.visualstudio.com/docs/getstarted/keybindings)
* [IntelliJ keyboard shortcut docs](https://www.jetbrains.com/help/idea/configuring-keyboard-and-mouse-shortcuts.html)
## FAQs
### Networking Issues
#### Configure Certificates
If you're seeing a `fetch failed` error and your network requires custom certificates, you will need to configure them in your config file. In each of the objects in the `"models"` array, add `requestOptions.caBundlePath` like this:
* YAML
* JSON
config.yaml
```
models: - name: My Model ... requestOptions: caBundlePath: /path/to/cert.pem
```
config.json
```json
{ "models": [ { "title": "My Model", ... "requestOptions": { "caBundlePath": "/path/to/cert.pem" } } ],}
```
You may also set `requestOptions.caBundlePath` to an array of paths to multiple certificates.
***Windows VS Code Users***: Installing the [win-ca](https://marketplace.visualstudio.com/items?itemName=ukoloff.win-ca) extension should also correct this issue.
#### VS Code Proxy Settings
If you are using VS Code and require requests to be made through a proxy, you are likely already set up through VS Code's [Proxy Server Support](https://code.visualstudio.com/docs/setup/network#_proxy-server-support). To double-check that this is enabled, use `cmd/ctrl` + `,` to open settings and search for "Proxy Support". Unless it is set to "off", then VS Code is responsible for making the request to the proxy.
#### code-server
Continue can be used in [code-server](https://coder.com/), but if you are running across an error in the logs that includes "This is likely because the editor is not running in a secure context", please see [their documentation on securely exposing code-server](https://coder.com/docs/code-server/latest/guide#expose-code-server).
### I installed Continue, but don't see the sidebar window
By default the Continue window is on the left side of VS Code, but it can be dragged to right side as well, which we recommend in our tutorial. In the situation where you have previously installed Continue and moved it to the right side, it may still be there. You can reveal Continue either by using cmd/ctrl+L or by clicking the button in the top right of VS Code to open the right sidebar.
### I'm getting a 404 error from OpenAI
If you have entered a valid API key and model, but are still getting a 404 error from OpenAI, this may be because you need to add credits to your billing account. You can do so from the [billing console](https://platform.openai.com/settings/organization/billing/overview). If you just want to check that this is in fact the cause of the error, you can try adding \$1 to your account and checking whether the error persists.
### I'm getting a 404 error from OpenRouter
If you have entered a valid API key and model, but are still getting a 404 error from OpenRouter, this may be because models that do not support function calling will return an error to Continue when a request is sent. Example error: `HTTP 404 Not Found from https://openrouter.ai/api/v1/chat/completions`
### Indexing issues
If you are having persistent errors with indexing, our recommendation is to rebuild your index from scratch. Note that for large codebases this may take some time.
This can be accomplished using the following command: `Continue: Rebuild codebase index`.
### Android Studio - "Nothing to show" in Chat
This can be fixed by selecting `Actions > Choose Boot runtime for the IDE` then selecting the latest version, and then restarting Android Studio. [See this thread](https://github.com/continuedev/continue/issues/596#issuecomment-1789327178) for details.
### I received a "Codebase indexing disabled - Your Linux system lacks required CPU features (AVX2, FMA)" notification
We use LanceDB as our vector database for codebase search features. On x64 Linux systems, LanceDB requires specific CPU features (FMA and AVX2) which may not be available on older processors.
Most Continue features will work normally, including autocomplete and chat. However, commands that rely on codebase indexing, such as `@codebase`, `@files`, and `@folder`, will be disabled.
For more details about this requirement, see the [LanceDB issue #2195](https://github.com/lancedb/lance/issues/2195).
### How do I reset the state of the extension?
Continue stores it's data in the `~/.continue` directory (%USERPROFILE%.continue\` on Windows).
If you'd like to perform a clean reset of the extension, including removing all configuration files, indices, etc, you can remove this directory, uninstall, and then reinstall.
## Still having trouble?
You can also join our Discord community [here](https://discord.gg/vapESyrFmJ) for additional support and discussions. Alternatively, you can create a GitHub issue [here](https://github.com/continuedev/continue/issues/new?assignees=\&labels=bug\&projects=\&template=bug-report-%F0%9F%90%9B.md\&title=), providing details of your problem, and we'll be able to help you out more quickly.